
2,073,600 pixels per frame sounds like a complete specification, but it tells you nothing about where a character should stand or whether captions will survive a crop. That pixel count comes from the widescreen HDTV format defined in ITU's account of the BT.709 standard. The practical lesson is simple: video standard sizes give you a canvas, not a finished composition.
Choose the shape before you generate scenes, record an interview, or build titles. A technically correct export can still hide the second speaker, cut off a product, or put the punchline underneath platform controls.
Table of Contents
- Standard Video Sizes at a Glance
- Frame Rates to Match Each Delivery Format
- Quick Export Presets by Platform
- Export Settings for Long-Form 16:9 Video
- Vertical 9:16 Sizes for Shorts, Reels and TikTok
- Choosing a Ratio When One Story Runs Everywhere
- Caption and Safe-Area Rules for Every Frame
- Pick Your Ratio Before You Make Your Video
<a id="standard-video-sizes-at-a-glance"></a>
Standard Video Sizes at a Glance
A video standard size combines a pixel count with an aspect ratio. Pixel dimensions describe how much image information the file contains; aspect ratio describes the shape of the frame. You can change the resolution without changing that shape.
For horizontal production, start with the HD master. The European Broadcasting Union's HDTV format overview identifies 1920 x 1080 and 1280 x 720 as principal HD formats, containing 2,073,600 and 921,600 pixels per frame, respectively. The lower option preserves the widescreen composition but carries less fine detail.
Standard video sizes by format
| Format | Pixel size | Aspect ratio | Typical use |
|---|---|---|---|
| 16:9 HD master | 1920 x 1080 | 16:9 | YouTube long-form, TV, desktop playback |
| 16:9 lower HD | 1280 x 720 | 16:9 | Lower-resolution HD, minimum recommended for YouTube ads |
| 9:16 vertical | 1080 x 1920 | 9:16 | YouTube Shorts, Instagram Reels, TikTok, Stories |
| 9:16 lower vertical | 720 x 1280 | 9:16 | Lower-resolution vertical placements |
| 1:1 square | 1080 x 1080 | 1:1 | Square feed placements and square ads |
| 1:1 lower square | 480 x 480 | 1:1 | Lower-resolution square ad placements |
| 4:5 portrait | 1080 x 1350 | 4:5 | Instagram feed portrait posts |
The horizontal, vertical, and square advertising dimensions in this table follow Google Ads' video specifications, including 1920 x 1080, 1080 x 1920, 1080 x 1080, and their listed lower-resolution alternatives. The feed portrait option is a separate composition choice, not another name for full-screen vertical video.
<a id="read-width-before-height"></a>
Read width before height
The first number is width; the second is height. Reverse them and you change the orientation, even though the total pixel count stays the same.
Use the highest useful size your destination accepts and your source supports. Check the destination's minimum before exporting lower, but don't enlarge a soft source just to make the dimensions look better.
Practical rule: Save a clean, full-resolution master. Make smaller delivery files from that master, not from an already compressed upload.
<a id="frame-rates-to-match-each-delivery-format"></a>
Frame Rates to Match Each Delivery Format
Frame rate is independent of frame size. A wide canvas doesn't require cinematic motion, and a vertical canvas doesn't require high-motion capture. Match the project to the source or established timeline whenever possible.
The ITU studio-interface recommendation supports the HD production framework behind common delivery workflows; practical source and timeline rates include 23.976, 24, 25, 29.97, 30, 50, 59.94, and 60 frames per second. The table describes common production uses, not a promise that every platform accepts every combination.
Common frame rates and where they are used
| Frame rate | Common source | Typical use |
|---|---|---|
| 23.976 | Film-sourced footage | Cinematic long-form and story video |
| 24 | Film and animation | Story, horror and documentary pacing |
| 25 | PAL-region capture | PAL-region broadcast and European channels |
| 29.97 | NTSC-region capture | NTSC-region broadcast and legacy workflows |
| 30 | Web and screen capture | Most Shorts, Reels, TikTok and talking-head video |
| 50 | PAL high-motion capture | Fast motion in PAL-region production |
| 59.94 | NTSC high-motion capture | Sports, gaming and action in NTSC-region production |
| 60 | Web high-motion capture | Gaming, fast motion and screen recordings |
<a id="preserve-motion-instead-of-manufacturing-it"></a>
Preserve motion instead of manufacturing it
Converting between frame rates means the editor must repeat, discard, blend, or synthesize frames. That can introduce uneven motion, ghosting, or interpolation errors around hands, faces, and moving objects. A higher number in the export menu doesn't recover motion that wasn't captured.
Say you're making a slow horror narration with restrained camera moves. A film-style or ordinary web timeline is a sensible choice. For gameplay recorded at a high frame rate, keeping that native rate preserves the motion detail viewers need to follow fast action.
Higher frame rates also have a delivery cost. Preserving comparable image quality generally requires more data, which can mean larger files and slower uploads. At a fixed bitrate, the encoder instead has less data available for each frame.
- Inspect the source: Check the clip properties rather than guessing from how smooth playback looks.
- Choose one timeline rate: Mixed-rate footage needs deliberate handling, especially during pans and action.
- Save the decision: Record the project rate in the channel template and confirm that each destination accepts it.
Don't change frame rate just because you changed aspect ratio. Reframing changes the composition; it doesn't change the timing of the story.
<a id="quick-export-presets-by-platform"></a>
Quick Export Presets by Platform
Use these presets as starting values, not permanent platform rules. Check current upload guidance before rendering a large batch, especially when organic posts and advertising placements share the same platform name.
The frame dimensions establish the canvas. The frame-rate column tells you how to preserve motion or meet a placement's minimum. Neither setting specifies the container or codec, which control how the file is packaged and compressed.
Export presets by platform
| Platform | Ratio and pixel size | Frame rate |
|---|---|---|
| YouTube long-form | 16:9, 1920 x 1080 | Source rate, commonly 24 to 60 |
| YouTube Shorts | 9:16, 1080 x 1920 | 30 for a new web timeline, or accepted source rate |
| TikTok | 9:16, 1080 x 1920 | 30 for a new web timeline, or accepted source rate |
| Instagram Reels | 9:16, 1080 x 1920, minimum 720 px | At least 30 |
| Instagram feed portrait | 4:5, 1080 x 1350 | 30 for a new web timeline, or accepted source rate |
| Square feed placements | 1:1, 1080 x 1080 | 30 for a new web timeline, or accepted source rate |
| Google Ads vertical, lower resolution | 9:16, 720 x 1280 | Confirm the campaign placement's accepted source rate |
<a id="save-presets-that-include-more-than-dimensions"></a>
Save presets that include more than dimensions
MP4 with H.264 video is a practical starting export combination for ordinary web delivery. Save it alongside the canvas, progressive scanning, square pixels, and your chosen timeline rate in Premiere Pro, DaVinci Resolve, or your preferred editor. Treat that as a production recommendation, not a universal acceptance guarantee.
An unconfirmed value should trigger a check in the platform's help center, not an invented requirement. For the lower-resolution ad row, inspect the actual campaign placement before batching exports. Advertising validation can differ from the rules for an ordinary upload.
A shared vertical export can serve Shorts, Reels, and TikTok, provided the composition and captions survive each interface. Keep clean delivery copies rather than downloading a published version and uploading that compressed copy elsewhere.
- For presentation-based videos: Prepare readable slides and a correctly shaped recording before following this guide to uploading PowerPoint to YouTube.
- For simultaneous live distribution: File presets aren't the whole setup. DBotMaker's guide helps you compare encoder and cloud relay setups when deciding how to send a stream to several destinations.
Name presets by destination and purpose, such as master or vertical social delivery. A preset makes the file consistent; composition makes the story readable.
<a id="export-settings-for-long-form-169-video"></a>
Export Settings for Long-Form 16:9 Video
Set the project format before placing scenes. Changing the canvas after editing can move titles, alter scaling, and expose framing problems that weren't visible in the original sequence.
The professional principle is to preserve the intended master. Netflix's branded delivery specifications require resolution and aspect ratio to match the program's master, rather than substituting a differently shaped version.
<a id="build-and-check-the-landscape-master"></a>
Build and check the landscape master
-
Set the timeline to 1920 x 1080 with square pixels. Confirm the sequence is widescreen before adding media. Don't stretch older, narrower footage to fill it; scale proportionally, crop deliberately, or retain side space.
-
Match the timeline to the source footage. Check the clip metadata before creating the sequence. An arbitrary conversion can make movement uneven even when every still frame looks sharp.
-
Keep the sequence progressive. Interlaced material needs proper handling before web delivery. Exporting interlaced output unnecessarily can leave comb-like edges on fast movement.
-
Protect important visual information. Keep faces, titles, and key objects away from the extreme edges. Leave room to reposition a close-up later instead of locking every essential detail against a border.
-
Export an MP4 using H.264 at the full timeline size and rate. Inspect the export summary, not just the preset name. A reused preset may retain an old resolution or automatically scale the sequence.
-
Review the actual exported file. Watch it full-screen on a laptop and a television-sized display. Look for stretched faces, soft text, clipped captions, and unexpected bars.
Use this visual check before committing the final render.
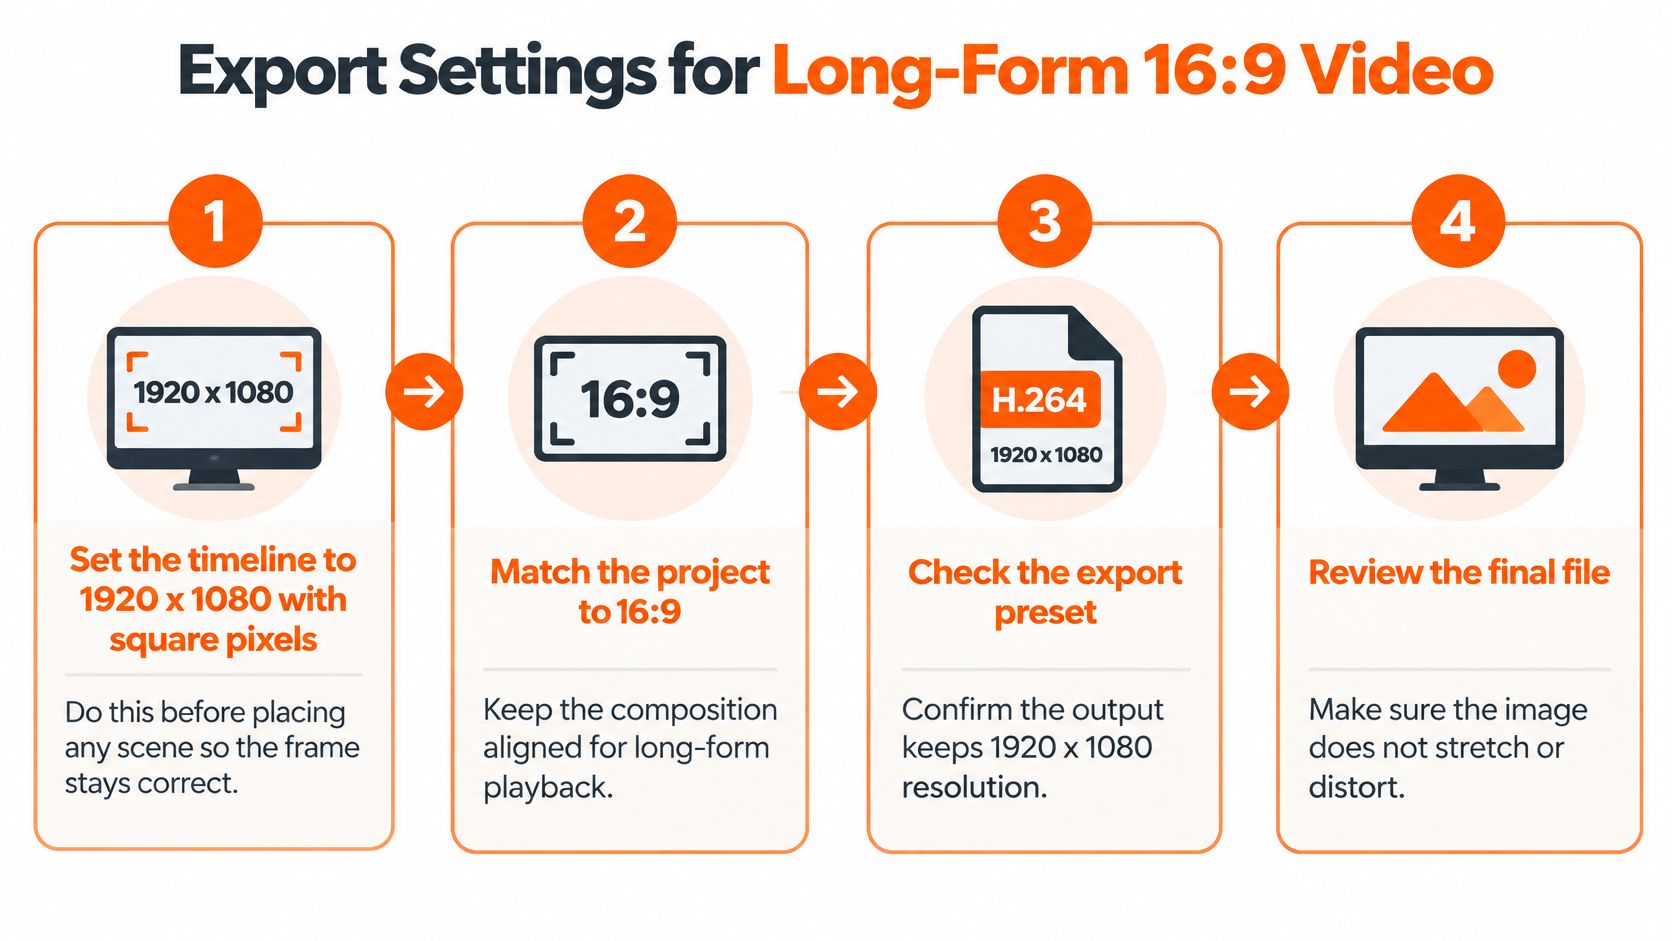
According to YouTube's resolution and aspect-ratio guidance, 16:9 is the default computer-player shape, and 1920 x 1080 is its corresponding full-HD size. YouTube adapts its player to vertical and square uploads, so don't bake black bars into the file; for widescreen videos with ads, its recommendation starts at 1280 x 720.
Keep the editable project alongside this master. You'll need the original scenes and text layers, not just the flattened export, to make alternate compositions properly.
<a id="vertical-916-sizes-for-shorts-reels-and-tiktok"></a>
Vertical 9:16 Sizes for Shorts, Reels and TikTok
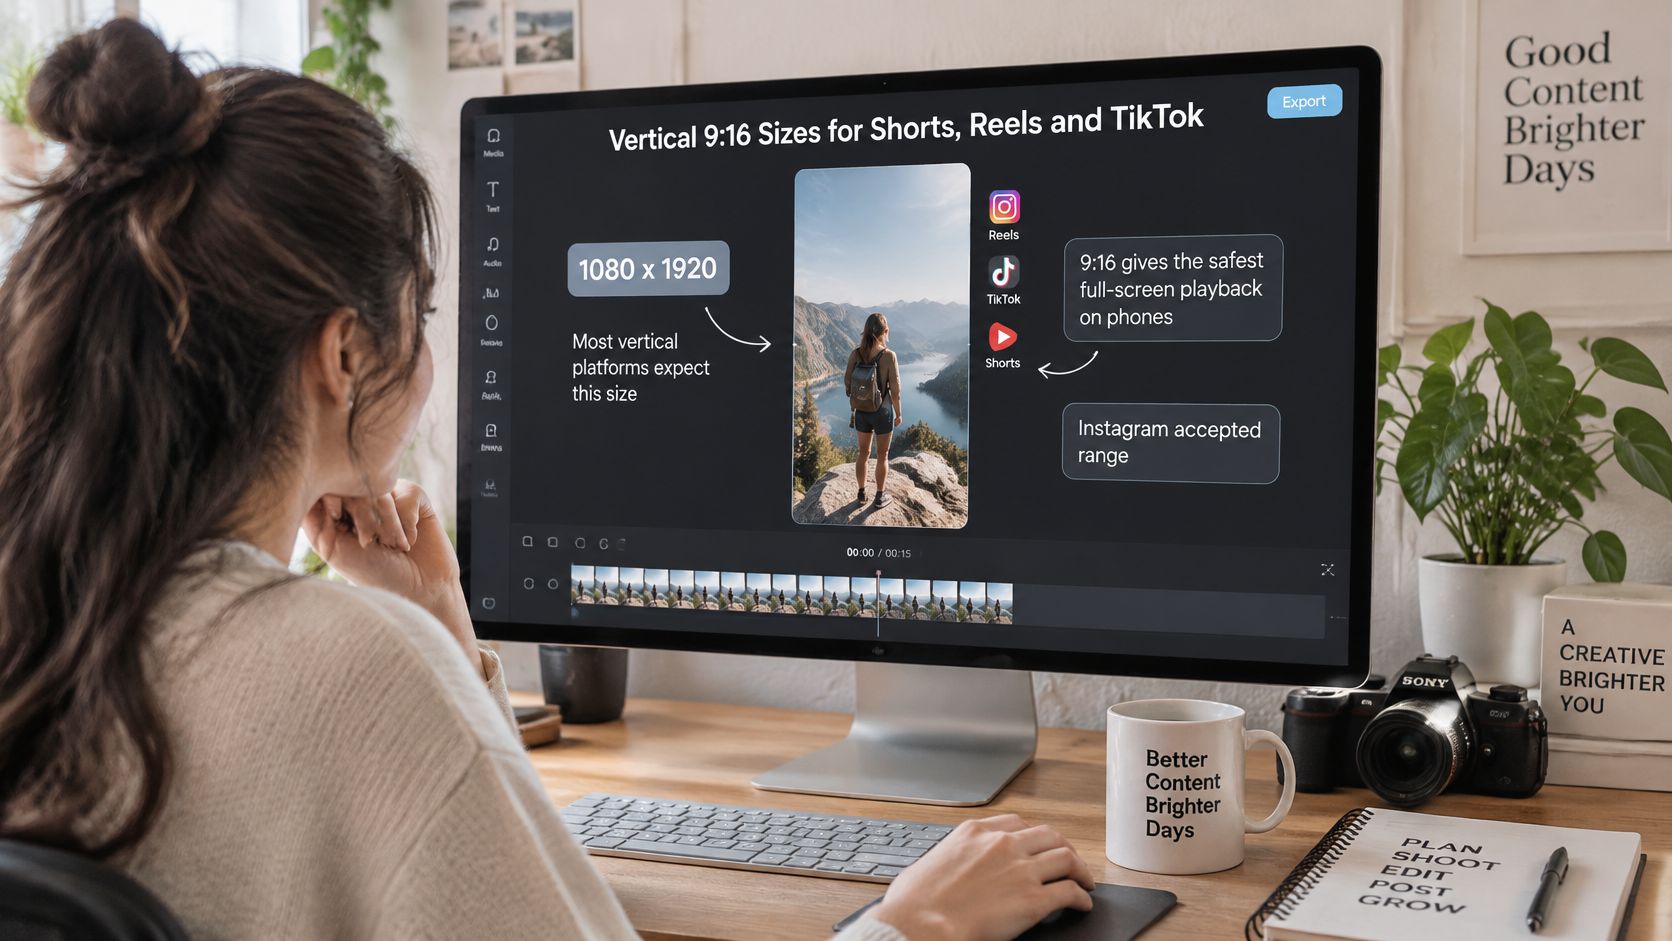
1080 x 1920 is the practical starting canvas for full-screen vertical delivery. It gives you a tall composition for a face, a product demonstration, or stacked action, rather than a wide scene squeezed into a narrow window.
For Reels, Buffer's summary of Instagram's accepted aspect ratios lists 1.91:1 through 9:16, with a minimum resolution of 720 pixels and a minimum frame rate of 30 frames per second. Accepted doesn't mean equally suitable: use the tall format when full-screen vertical playback is the goal.
Check the canvas before editing the scene.
<a id="re-block-the-scene-instead-of-trusting-a-center-crop"></a>
Re-block the scene instead of trusting a center crop
Consider a wide interview with speakers at opposite sides of the frame. A centered vertical crop can show the empty space between them while cutting off both faces. Track the active speaker, alternate close-ups, or build a deliberate stacked composition instead.
For generated story scenes, describe the vertical framing before generation. Put the subject's meaningful action in the central column and avoid requiring viewers to notice something at the opposite edge of a wide room.
- Faces: Leave headroom and space for gestures, not just a tightly cropped forehead and chin.
- Text: Keep titles away from the far sides, where buttons and alternate previews can interfere.
- Products: Keep labels and demonstration details clear of the bottom interface area.
The lower vertical preset is useful only where the destination accepts it. Don't reduce resolution automatically because the viewer is on a phone; small product labels and baked-in captions can become visibly softer.
For an additional video reference, use the player below.
<iframe width="100%" style="aspect-ratio: 16 / 9;" src="https://www.youtube.com/embed/29Bw1fbZkHU" frameborder="0" allow="autoplay; encrypted-media" allowfullscreen></iframe>When distributing a series, keep the approved render separate from publishing notes and scheduling records. FoPost's TikTok content management resource is relevant to organizing that posting workflow after the video is ready.
Finish with a phone check at actual viewing size. If you have to pause or enlarge the image to read a title, revise the title rather than assuming viewers will make the effort.
<a id="choosing-a-ratio-when-one-story-runs-everywhere"></a>
Choosing a Ratio When One Story Runs Everywhere
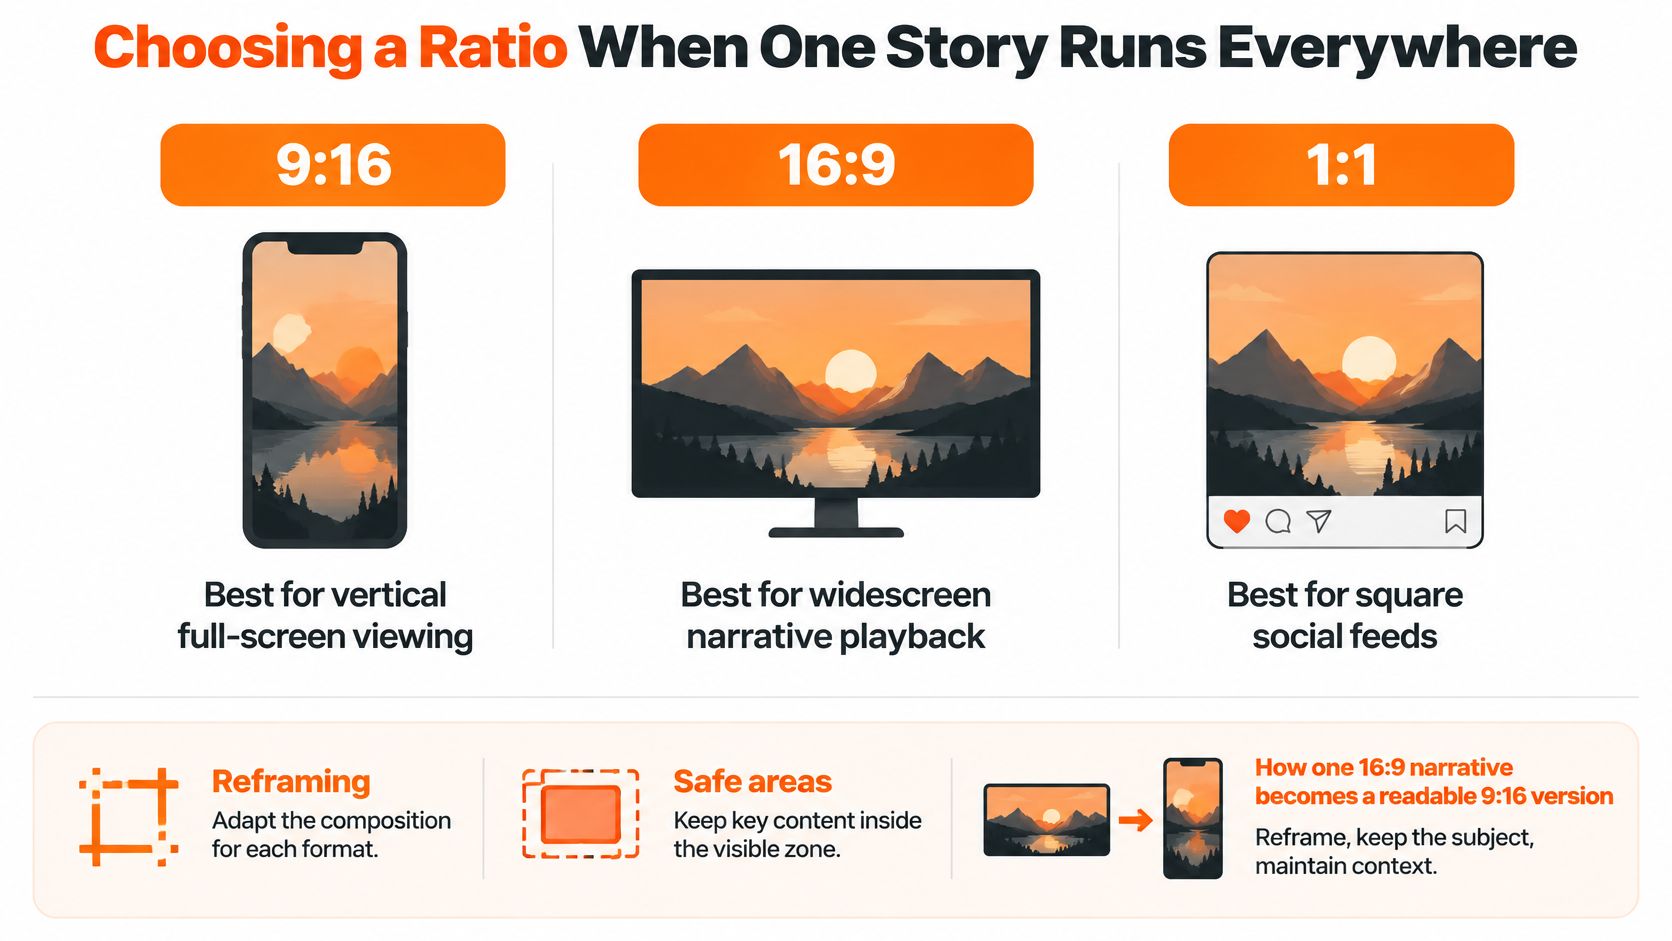
Most video standard sizes charts stop at dimensions. They don't tell you what happens when a reaction, clue, or second character disappears during reframing. Placement determines which composition you need, not just which export preset you select.
Image Studio's social video aspect-ratio guide distinguishes 9:16 at 1080 x 1920 for vertical placements, 16:9 at 1920 x 1080 for long-form YouTube, and 4:5 at 1080 x 1350 for portrait feed use. The feed option occupies more vertical room than square without being the same composition as a full-screen vertical video.
Choosing 9:16, 16:9 or 1:1 by placement
| Factor | 9:16 vertical | 16:9 horizontal | 1:1 square |
|---|---|---|---|
| Primary placement | Shorts, Reels, TikTok, Stories | YouTube long-form, TV, desktop | Feed posts on Instagram, LinkedIn and X |
| Full-screen phone playback | Best fit in portrait orientation | Bars in portrait; better fit when rotated | Fills part of a portrait screen |
| Desktop and TV playback | Side space in a widescreen player | Best fit for widescreen playback | Side space in a widescreen player |
| Reframing from a 16:9 master | Needs punch-in and re-blocking | Native master | Needs cropping on both sides |
| Room for captions and titles | Stacked space above platform controls | Lower third of the frame | Tight margins, watch overlays |
<a id="keep-the-primary-story-intact"></a>
Keep the primary story intact
A universal vertical export isn't always the most efficient choice. If the main destination is long-form YouTube or television-style viewing, preserve the wider narrative first. Viewers may need to see a character and the object they're reacting to simultaneously.
Say you're producing a five-minute horror story and selecting three forty-five-second excerpts for discovery feeds. Keep the full story wide, then give each excerpt its own vertical close-ups, caption positions, and opening context. Those are hypothetical editorial choices, not platform duration requirements.
Use this comparison when planning alternate versions.
An embedded story also needs to work within the surrounding page. When planning video for blogs, check the actual content column and player rather than assuming the social version will read well there.
If removing a character from the frame changes the meaning of the scene, that placement needs a separate composition.
<a id="caption-and-safe-area-rules-for-every-frame"></a>
Caption and Safe-Area Rules for Every Frame
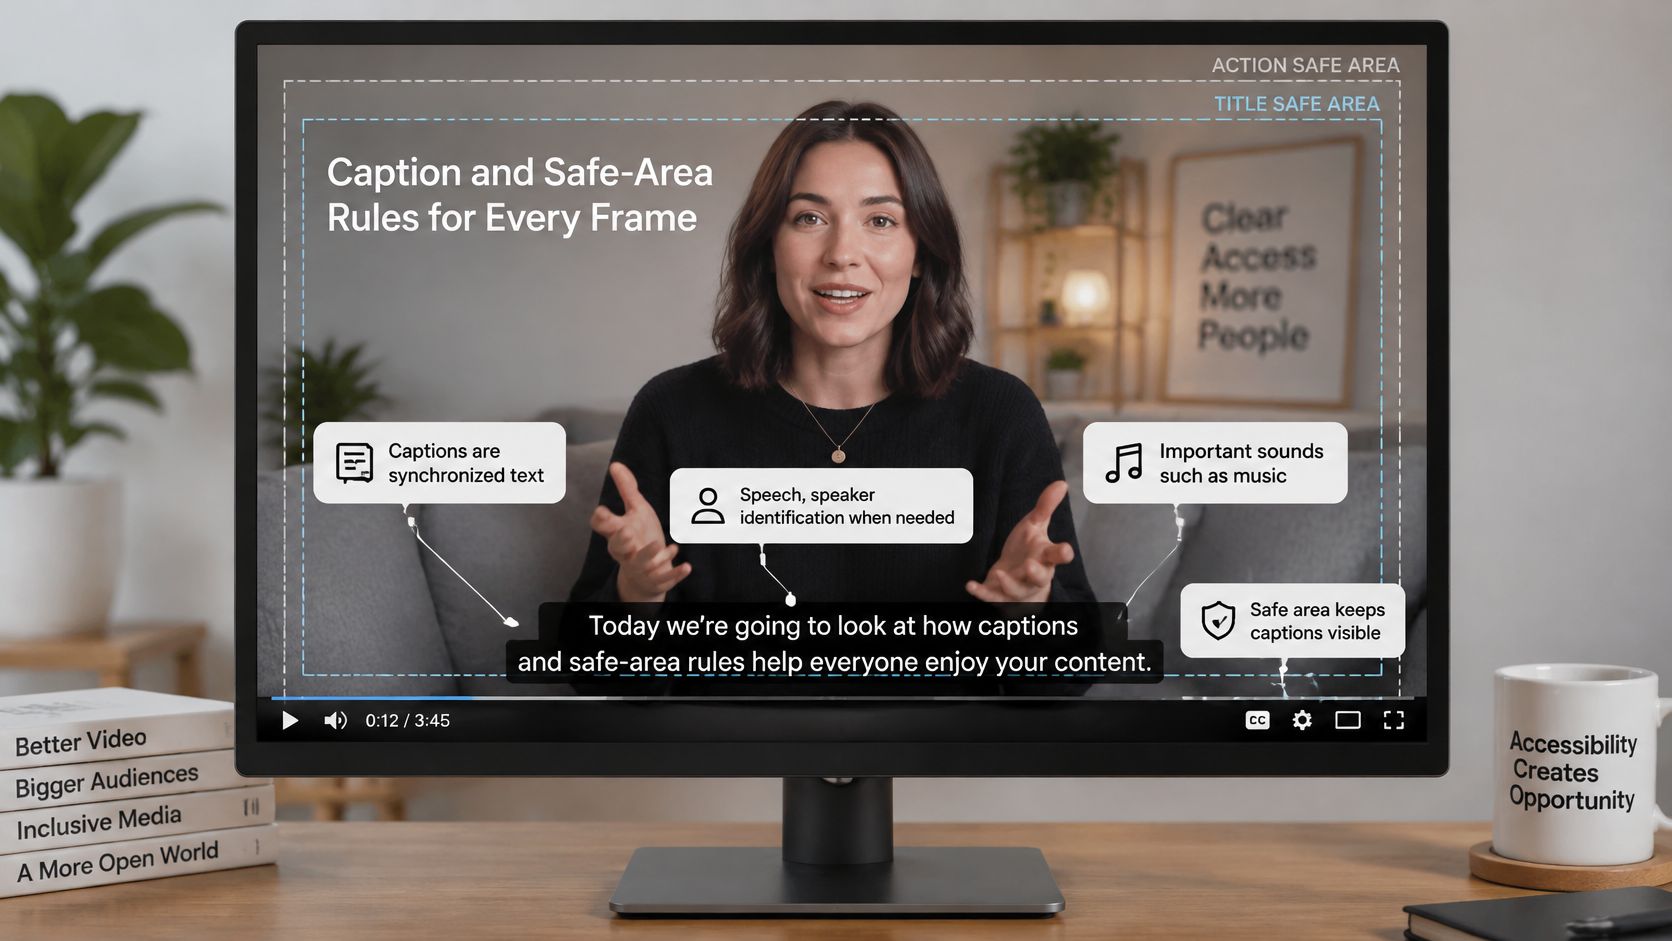
Captions communicate the audio, not just the dialogue. The W3C Web Accessibility Initiative's caption guidance includes synchronized speech, speaker identification when needed, and important sounds such as music or laughter. Captions help deaf and hard-of-hearing viewers, people watching without usable sound, and viewers who are less fluent in the spoken language.
Automatic captions are a useful draft, but W3C warns that accuracy, timing, and completeness often need editing. Check names, unusual vocabulary, and sounds that explain an off-screen event.
<a id="position-captions-for-the-actual-player"></a>
Position captions for the actual player
- Horizontal: Start in the lower third, clear of the bottom edge and any important visual action.
- Vertical: Use a middle-to-lower band above descriptions and platform controls. Move the block when it would cover a face or product.
- Square: Keep the text compact and preview the destination's overlays before approving the layout.
As a working guideline, not a platform rule, leave titles and captions at least 5 to 10 percent of the frame width or height from each edge. That margin is a starting point, not protection against every interface. Check each ratio's own export before translating it.
Use safe-area overlays while editing, then inspect the clean render.
<a id="check-language-and-speaker-changes"></a>
Check language and speaker changes
Translation can expand a short caption into a crowded block. Aim for no more than two lines as an editorial starting point, then adjust phrasing, breaks, and timing for readability. Don't shrink every language version until it fits the original text box.
For multi-character scenes, use names when the speaker isn't obvious. A consistent character color can reinforce identification, but don't rely on color alone. Keep those choices consistent when adding subtitles to a video.
Before export, confirm that captions are readable at phone size, avoid the outer edges, and use a consistent style across formats. Review each language against the spoken timing and check that interface overlays don't hide the final line.
<a id="pick-your-ratio-before-you-make-your-video"></a>
Pick Your Ratio Before You Make Your Video
The decision that saves the most rework happens before scene creation. Choose the primary destination, then make the frame serve that destination rather than forcing a finished story into whatever space remains.
<a id="make-the-production-decisions-in-order"></a>
Make the production decisions in order
-
Choose the main placement. Long-form YouTube points to the horizontal HD master; Shorts, Reels, and TikTok point to vertical. Feed delivery may call for square or portrait framing, so distinguish the feed post from the full-screen player.
-
Lock the frame rate. Match the source or established timeline, then check destination acceptance. Keep that decision consistent across scenes instead of changing it during export.
-
Approve the caption area. Test a dialogue-heavy scene and a title before making the whole video. Leave enough room for translated text and the platform's interface.
For a generated story, the ratio belongs in the initial creative decision. ClipNova makes finished long AI videos with consistent characters, producing the script, original scenes, voiceover, captions, and background music in one pass. Choose 9:16, 16:9, or 1:1 before generation; one-click resizing is also available, but every alternate render still needs a composition check.
<a id="know-what-the-finished-workflow-includes"></a>
Know what the finished workflow includes
Videos run up to 5 minutes at up to 1080p. Saved characters retain the same face and outfit across scenes; Series supports a cast of up to 8 characters across episodes with story memory, and characters can speak with lip sync. Narration is available in 18 languages, with plans from $19/mo including commercial rights.
Clip generators such as Runway, Kling, Veo, and Hailuo focus on shots; ClipNova produces the whole story. It makes original character scenes rather than the stock-footage approach of InVideo and Pictory, supports longer stories than shorts-focused Revid, StoryShort, and Zebracat, and tells stories rather than centering on presenters like HeyGen and Synthesia.
You still control publication. Download the finished MP4 and upload it to each platform yourself; ClipNova doesn't post for you.
ClipNova AI turns an idea into a finished story with consistent characters, voiceover, captions, and music, with the aspect ratio chosen before generation. Pick the destination first, review each resized composition, and make your first video.
Ready to ship your own?
Start creating viral videos with AI in under twenty minutes, no credit card required.