
You can remove a watermark from a video safely only when you own the footage or have clear permission to modify it. YouTube reported more than 2 billion copyright claims during 2025, so a video that looks clean isn't automatically cleared for publication.
A creator downloads a stock clip, edits it into a polished reel, and then hears the sentence every producer dreads: “Can you just remove the logo in the corner before delivery?” The editing request sounds small. The rights question underneath it isn't.
The clean way to approach remove watermark from video is to decide who owns the mark, who owns the footage, and what the license permits before opening an editor. That decision determines whether you should re-export, crop, blur, replace the asset, or use inpainting. It also prevents a common production mistake: treating a visible logo as the only evidence of ownership.
Table of Contents
- Why the Ownership Question Comes First
- Clean Paths for Footage You Own or License
- The Inpainting Workflow for Tricky Marks
- What Watermark Removal Does Not Remove
- Fixing the Usual Quality Problems
- Best Practices Worth Pinning to Your Wall
<a id="why-the-ownership-question-comes-first"></a>
Why the Ownership Question Comes First
A watermark can be a branding overlay, a draft mark, a licensing notice, or part of a broader copyright-management system. Removing the visible pixels doesn't grant you permission to publish the underlying footage, and it doesn't change the contract attached to the asset.
The U.S. Copyright Office's explanation of the DMCA describes copyright-management information as identifying details connected with a work, its author or owner, performers, directors, and applicable usage terms. Section 1202 prohibits intentionally removing or altering that information when the person doing it has reasonable grounds to know the action will facilitate, enable, induce, or conceal copyright infringement. The statute includes limited exceptions for certain broadcast, cable, law-enforcement, and government activities.
That doesn't mean every watermark cleanup is unlawful. A creator can remove their own draft logo. An agency can clean licensed footage when the license allows it. A production team can restore an original asset from an approved source. The important distinction is authorization, not whether the editing tool uses cropping, blur, or artificial intelligence.
<a id="use-the-right-response-for-your-rights-position"></a>
Use the right response for your rights position
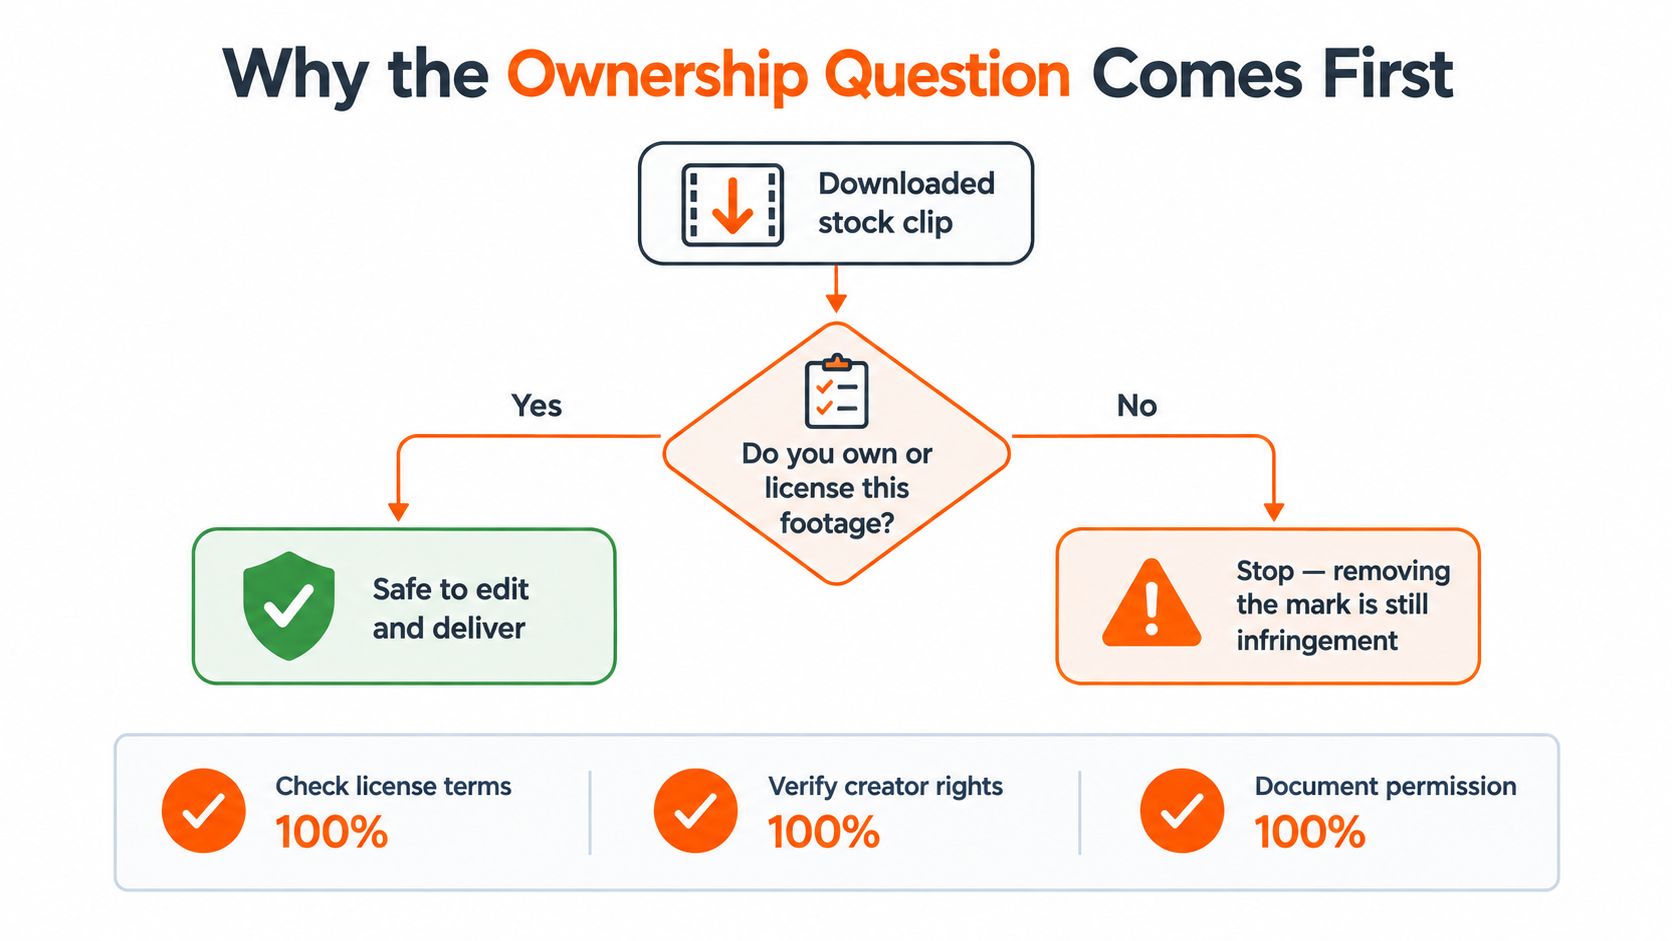
Your situation usually falls into one of three states:
- You own the asset: Return to the original project or master file and export a clean version. This is almost always better than repairing a compressed copy.
- You hold a license: Read the license terms, confirm that editing and commercial delivery are allowed, then request a clean re-export or use an authorized cleanup method.
- You have neither: Stop editing. License the original, buy an approved clean version, or replace the footage with material you can document.
If a client asks you to remove a third party's mark, don't treat the request as proof that the client has permission. Ask for the license, the source file, or written authorization. For a practical overview of the underlying legal risk, LA Law Group, APLC's explanation of intellectual property infringement provides useful context.
The same ownership-first logic applies when you turn a video into a different publishing format. Before creating a video into link workflow, keep the source, license, and delivery permission together in the project record.
Production rule: If you can't explain why you're allowed to remove the mark, don't remove it.
Every technical option below assumes that gate has been passed. That keeps the result clean without pretending that visual cleanup fixes a rights problem.
<a id="clean-paths-for-footage-you-own-or-license"></a>
Clean Paths for Footage You Own or License
The cleanest solution is usually the least glamorous one: go back to the source and export again. If the watermark came from a free preview, stock marketplace, AI generator, or editing platform, purchase or activate the appropriate output option and download the clean file. A fresh export preserves the original composition and avoids the detail loss that comes from repairing a low-quality preview.
If you still have the project file, remove the logo layer before exporting. Check the export dimensions, frame rate, audio, and color settings against the approved master. One clean render is better than repeatedly passing the same file through different editors.
<a id="crop-when-the-composition-can-survive-it"></a>
Crop when the composition can survive it
Cropping works well when the mark sits near an edge and the subject has enough room around it. Reframe for the final destination, then inspect faces, captions, product edges, and important motion. A crop can be invisible in a vertical social edit but destructive in a wide commercial master.
Don't crop automatically just because the mark is in a corner. If the crop cuts off the speaker's hand or pushes the product against the frame edge, replacing the shot may look more professional.
<a id="blur-or-cover-when-disclosure-matters-less-than-texture"></a>
Blur or cover when disclosure matters less than texture
A soft blur is appropriate when the affected area is small and the client accepts that it will remain visibly altered. It can be preferable to a failed reconstruction over moving hair, water, foliage, or a face.
Opacity and solid coverage create different results. A translucent patch may leave the original logo readable, while an opaque shape can look like a new graphic element. Match the treatment to the rest of the edit, and obtain approval when the mark is near a subject or branded object.
<a id="replace-the-shot-when-repair-will-attract-attention"></a>
Replace the shot when repair will attract attention
Swapping the asset is often faster than rescuing a difficult frame. Use a licensed alternative, original b-roll, or a newly created background plate. If a watermark crosses detailed movement, a replacement shot usually produces a more credible result than an inpainting pass that repeats texture or bends edges.
| Method | Quality Impact | Effort | Best For |
|---|---|---|---|
| Re-export from the source | Lowest risk of quality loss | Low | Footage with an available clean master |
| Crop and reframe | Can change composition | Low | Edge marks with sufficient framing space |
| Blur or cover | Leaves a softened or designed region | Low to moderate | Small marks where visual alteration is acceptable |
| Replace the asset | Produces a new shot rather than a repair | Moderate | Marks over faces, motion, text, or complex texture |
These paths keep the work inside the license because they begin with an authorized source or an approved replacement. They also preserve a clear audit trail, which matters when a client later asks where the footage came from.
<a id="the-inpainting-workflow-for-tricky-marks"></a>
The Inpainting Workflow for Tricky Marks
Inpainting makes sense when you have permission to modify the footage, but only a watermarked render is available and cropping or blur would ruin the shot. It isn't a magic eraser. The editor has to reconstruct missing image information while keeping the repair stable as the camera and subject move.

Start with the highest-bitrate source you can legally obtain. Draw a binary mask around the entire mark, including a small safety margin, but don't make the mask unnecessarily large. A tight mask gives the reconstruction more surrounding information and reduces the amount of image that must be invented.
<a id="track-the-mask-dont-pin-it-to-the-frame"></a>
Track the mask, don't pin it to the frame
The mark may move because of camera motion, scaling, rotation, or an object passing in front of it. Track the mask through the shot and correct it manually whenever the tracker slips. Point tracking suits a small, stable mark. Planar tracking is more useful when a larger mark follows a surface that changes perspective.
A static rectangle is the shortcut that causes most obvious failures. It leaves the repair behind when the camera moves, then exposes the original mark or drags a smear across the background.
<a id="feed-the-reconstruction-useful-surrounding-detail"></a>
Feed the reconstruction useful surrounding detail
The inpainter needs context from nearby pixels and, ideally, neighboring frames. Clean information from adjacent frames can help reconstruct grass, water, skin, walls, and other textures that a single frame can't describe reliably. Review difficult areas at native resolution, especially where the mark crosses text, hair, faces, fine texture, or a moving object.
A recent video-inpainting benchmark describes diffusion reconstruction conditioned on surrounding context, frame-by-frame processing, and a five-frame temporal smoothing kernel. It also discusses flow-guided alternatives that propagate motion information through recurrent transformer systems. Those approaches reinforce the point experienced editors already know: a plausible still frame can still flicker when played at full speed. The benchmark is available in this technical discussion of video reconstruction methods.
Run the first pass at the source resolution. Then inspect the edges for halos, repeated texture, softened detail, and motion discontinuities. A light second pass can clean a halo, but repeated heavy processing usually makes the repair more visible.
The quality test isn't a paused frame. Play the entire shot at delivery speed.
Apply temporal smoothing after the reconstruction, using a controlled window rather than indiscriminately softening the whole image. Preserve the source frame rate and color handling. Export a visually lossless intermediate, such as ProRes, or use a high-bitrate H.265 delivery file when the workflow requires a smaller package.
For broader context on how AI-assisted tools fit into editorial workflows, Image Studio's guide to AI video editing for cinema is a useful complementary resource.
Keep the original watermarked file. Save the clean derivative separately, along with the license or written permission and a note describing the removal method. The derivative is a deliverable. The original is your evidence of what you received and what you were authorized to process.
The workflow can be demonstrated alongside a practical editing pass:
<iframe width="100%" style="aspect-ratio: 16 / 9;" src="https://www.youtube.com/embed/d9B0UtrEQkI" frameborder="0" allow="autoplay; encrypted-media" allowfullscreen></iframe><a id="what-watermark-removal-does-not-remove"></a>
What Watermark Removal Does Not Remove
A visible watermark is only one layer of information in a video. Removing it changes the appearance of selected pixels. It doesn't erase the source audio, the underlying footage, the licensing history, or platform-side reference data.
YouTube reported that Content ID generated more than 2 billion copyright claims during 2025, and that Content ID partners accounted for over 99% of all copyright actions on the platform. YouTube also reported that fewer than 1% of those claims were disputed, while more than 65% of disputes were resolved in favor of uploaders because the claimant released the claim or failed to respond in time. These figures come from YouTube's copyright transparency summary.
The practical lesson is two-sided. Automated enforcement works at a scale that makes a clean-looking frame a poor test of ownership, but rights systems can also make mistakes. Keep your license, source details, and permission records so you can respond if a legitimate upload is flagged.
<a id="the-layers-a-visual-cleanup-cant-touch"></a>
The layers a visual cleanup can't touch
A removal pass doesn't automatically change the audio fingerprint baked into the mix. It may also leave source metadata, camera information, compression characteristics, or other signals that help identify how the file was created and transformed. Platform systems can compare edited uploads against reference material without relying on the visible logo.
That means a creator can upload a video with an empty corner and still receive a claim. The visual cleanup may have improved presentation, but it hasn't transferred copyright or cleared usage terms.
For a plain-language look at the technology behind automated cleanup, Simple Unmark's explanation of AI watermark removers for creators can help distinguish pixel repair from rights clearance. Creators working with AI-assisted production can also review ClipNova's video AI workflow guide, then verify the commercial terms for every asset used in the final edit.
Provenance belongs upstream. Record who supplied the footage, what license covers it, whether attribution is required, and which derivative you delivered. A blank frame is not proof that those records exist.
<a id="fixing-the-usual-quality-problems"></a>
Fixing the Usual Quality Problems
Most failed removals aren't caused by the tool alone. They come from a loose mask, an unsuitable source file, or an export that changes the footage several times before delivery. Fix the defects in the order a viewer notices them.
<a id="halo-and-color-bleed"></a>
Halo and color bleed
A bright or dark rim around the repaired area usually means the mask includes too little context, the edge is too hard, or the reconstruction has sampled colors from the mark itself. Feather the mask slightly, then inspect the boundary against the adjacent clean pixels. Don't feather so heavily that the surrounding texture becomes soft.
Keyframe the matte to follow the logo's movement. A mask locked to static frame edges will drift as the camera moves, creating a visible patch even when the central reconstruction looks acceptable.
<a id="flicker-and-crawling-texture"></a>
Flicker and crawling texture
Flicker appears when neighboring frames receive different guesses for the same surface. Keep the repair at the source frame rate and color space, avoid unnecessary intermediate encodes, and use temporal smoothing after the inpainting pass. Review the shot at full speed, then pause on the frames where the texture changes most aggressively.
If the repaired patch seems to breathe, shimmer, or change brightness, reduce the reconstruction area and provide better neighboring-frame context. A smaller, better-informed repair usually beats a broad automated fill.
<a id="softness-and-resolution-loss"></a>
Softness and resolution loss
Start with the highest-quality master available. Don't enlarge a heavily compressed preview and expect the repair to restore detail that the source no longer contains. If enlargement is necessary for the workflow, perform it before masking and compare the final output with the original at the same viewing size.
A tool such as an AI image upscaler for video-frame preparation may help with a controlled restoration workflow, but upscaling can't restore rights or genuine source detail. Treat it as a technical aid, not a substitute for a clean master.
Finish with a color match using a nearby clean reference patch. Compare the repaired and original versions side by side at 100%, then watch the entire sequence before sign-off. If the viewer notices the repair before the scene, replace the shot.
<a id="best-practices-worth-pinning-to-your-wall"></a>
Best Practices Worth Pinning to Your Wall
A reliable watermark-removal workflow is mostly disciplined file handling. The editor should be able to answer the rights question, reproduce the technical process, and show exactly what changed before the file reaches a client or platform.
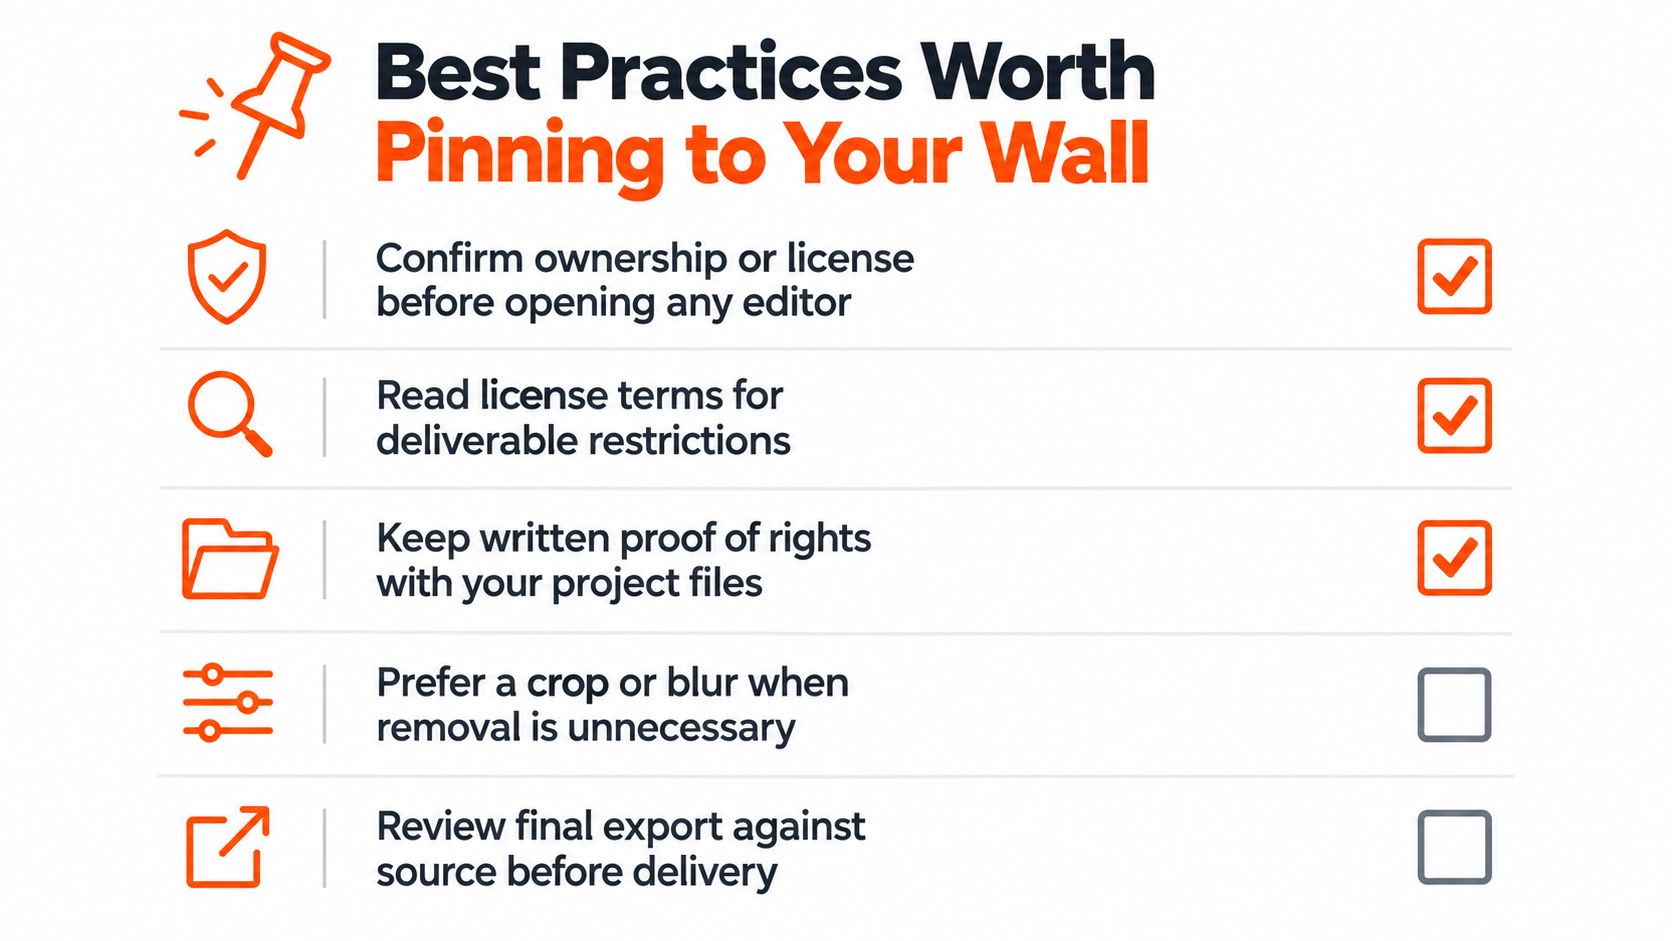
Use this checklist on every project:
- Confirm permission first: Verify that you own the footage or that the license permits modification, delivery, and the intended commercial use.
- Read the restrictions: Check whether attribution must remain, whether clean derivatives are allowed, and whether the source platform requires a paid export.
- Keep the master intact: Work from the highest-quality source and preserve the original watermarked file in a separate location.
- Log the decision: Record the source, license, permission contact, removal method, editor, and final delivery version in the project notes.
- Choose the least invasive path: Prefer a clean re-export. Use cropping, blur, replacement, or inpainting only when each method suits the shot and the authorization.
- Protect the repair: Keep the source frame rate and color handling consistent, use a high-quality intermediate, and avoid needless re-encoding.
- Inspect at full speed: Review edges, faces, text, hair, fine texture, and moving objects at native resolution and during playback.
- Check the audio separately: A clean visual frame doesn't clear music, dialogue, sound effects, or other rights attached to the soundtrack.
- Keep provenance available: C2PA describes Content Credentials as cryptographically bound records of an asset's history, with support for embedded manifests and soft bindings such as invisible watermarks. Preserve the original credentials where possible, and create an authorized clean derivative rather than destroying the source record. The Content Credentials specification overview explains why provenance deserves separate attention from visible branding.
Don't run a final export through several unrelated tools just to chase a slightly cleaner corner. Each unnecessary conversion can make texture, edges, and motion harder to judge. Deliver the version you can document, reproduce, and defend.
ClipNova creates short-form videos and images from prompts, links, or topics, with automated scripting, voiceover, visuals, captions, music, multiple aspect-ratio exports, and watermark-free paid-plan delivery. If you want to avoid preview watermarks by generating authorized assets in the first place, visit ClipNova and choose a workflow that matches your production needs.
Ready to ship your own?
Start creating viral videos with AI in under twenty minutes, no credit card required.