

The practical IG Reel resolution is 1080 × 1920 pixels at 9:16 and a constant 30 fps. 720 pixels is only the minimum Instagram will accept, not the setting you should export.
That distinction explains most soft, cropped, or jumpy Reels. A file can pass upload checks and still look worse than you expected, because acceptance and quality are two different ceilings. Length works the same way. A Reel can post successfully, yet be too long for discovery or too long to boost.
Think of the workflow in three decisions. First, build a sharp 1080 × 1920 master. Second, keep faces and text inside the part of the frame that stays visible. Third, choose a length that matches the job, whether that's followers, new viewers, or paid promotion. Once you separate those decisions, the settings become simple and repeatable.
Table of Contents
- Reel Resolution Specs to Copy
- Aspect Ratios and Crop Risk
- Safe Zones for Faces and Text
- Export Settings for a Clean Master
- Length Limits for Reach and Ads
- How Specs Change by Placement
- Fixes for Soft Cropped or Jumpy Reels
- Export the Next Reel at 1080 by 1920
<a id="reel-resolution-specs-to-copy"></a>
Reel Resolution Specs to Copy
Type 1080 into the width box and 1920 into the height box. Set the frame to 9:16 and lock the frame rate at a constant 30 fps. That's the export to use for a full-screen Reel.
Instagram's Help Center guidance on Reels specifications sets the foundational standard at 1080 × 1920 pixels at a 9:16 aspect ratio, while its minimum published requirements are 720 pixels of resolution and 30 FPS. Those two numbers do different jobs. The first is your production target. The second is the floor.
<a id="the-settings-to-copy"></a>
The settings to copy
| Setting | Use this | Acceptance floor | Why it matters |
|---|---|---|---|
| Resolution | 1080 × 1920 px | At least 720 px | More detail survives compression |
| Aspect ratio | 9:16 (0.5625) | From 1.91:1 to 9:16 | Fills a portrait phone screen |
| Frame rate | 30 fps, constant | 30 fps minimum | Variable rate can stutter |
| Pixels per frame | 2,073,600 | 720p class is much lower | 1280 × 720 is 921,600 pixels |
| Container | MP4 | MP4 or MOV | Widest upload and scheduler support |
| Video codec | H.264, progressive, 4:2:0 | H.264 or HEVC | H.264 is the safer pick |
| Audio | AAC stereo, up to 48 kHz | AAC mono or stereo | Missing audio hurts presentation |
| Ad file size | Stay under 4 GB | 4 GB maximum for Reels ads | Check long exports before upload |
A 9:16 frame has a width-to-height ratio of 0.5625, and it's exactly twice as tall as it is wide. That shape suits a portrait phone screen. It doesn't suit a television, a laptop, or a traditional horizontal YouTube canvas without reframing.
<a id="why-720-pixels-isnt-the-target"></a>
Why 720 pixels isn't the target
At 1080 × 1920, each frame holds 2,073,600 pixels. A 1280 × 720 frame holds 921,600 pixels. You're not looking at a small quality gap. The larger frame carries more than twice as many pixels before Instagram processes the file.
Instagram may process or compress uploaded video, so a clean master gives the platform more visual information to keep during transcoding. If you start at the floor, compression has less detail to work with, and edges, faces, and small text soften faster. A file that meets the minimum can therefore be accepted and still look less sharp on a current phone.
Practical rule: Treat 720 pixels as the lowest file that can pass, and 1080 × 1920 as the file you actually publish.
Meta's advertising guidance also points creators toward 9:16 vertical creative for Reels placements, and automated enhancements may alter quality, including increasing resolution. Don't rely on that to rescue a soft upload. Enhancement can change a file, but it can't invent facial detail or lettering that your export already discarded. Instagram also indicates that viewers may see fewer Reels that are muted, blurry, or low resolution, so clarity affects presentation as well as appearance.
<a id="why-the-frame-is-vertical"></a>
Why the frame is vertical
Reels began as a vertical, mobile-first format. Meta's announcement introducing Instagram Reels dates the launch to August 5, 2020, when Reels centered on 15-second, multi-clip videos with audio, effects, and editing tools. The format has changed since then, but the full-screen portrait canvas remains the natural home for a Reel.
Instagram permits a broader aspect-ratio range, from 1.91:1 to 9:16 portrait. That range tells you what can publish. It doesn't tell you what fills the screen. If your goal is a Reel that uses the phone from edge to edge, the answer is still 1080 × 1920.
For containers and codecs, choose MP4 with progressive H.264 and stereo AAC when you want the widest compatibility. MOV and HEVC are also accepted formats in the source specifications, but compatibility matters when files move between editors, schedulers, and phones. A predictable file beats a technically valid file that behaves differently in each tool.
Keep this baseline fixed as you work through the rest of your decisions. Your master stays 1080 × 1920 at a constant 30 fps. From there, you're only choosing whether another ratio is appropriate, where text can sit safely, and how long each cut should run.
<a id="aspect-ratios-and-crop-risk"></a>
Aspect Ratios and Crop Risk
Every canvas starts with a shape, and the shape determines what the viewer sees. For a Reel, 9:16 is the native category. Other ratios can publish, but they either leave unused space or force you to discard part of the picture.
Judge each option by one question. How much of the original frame survives when someone watches full screen on a phone.
| Category | Typical pixels | Best placement | Reel crop risk |
|---|---|---|---|
| 9:16 portrait | 1080 × 1920 | Reel, Story, full-screen ad | Lowest |
| 4:5 portrait | 1080 × 1350 | Feed post | Top and bottom crop or bars |
| 1:1 square | 1080 × 1080 | Feed or profile | Large side loss or bars |
| 1.91:1 landscape | 1080 × 566 | Widest accepted feed landscape | Most of the frame is lost |
| 16:9 widescreen | 1920 × 1080 | Horizontal master, not a Reel | Needs a separate 9:16 cut |
<a id="what-each-shape-costs-you"></a>
What each shape costs you
9:16 at 1080 × 1920 costs you nothing in the Reel player. The picture reaches the top and bottom of the screen, and you control the composition from the start. It's the only shape on the list that treats the phone as the intended screen.
4:5 at 1080 × 1350 works well in the feed, where a tall portrait takes up useful space without demanding the whole screen. In a Reel, it's shorter than the player. You either accept bars or expand and crop, which puts the top and bottom at risk.
1:1 at 1080 × 1080 creates a larger mismatch. A square leaves substantial unused bands in a vertical player. If you scale it to fill the height, the sides disappear. That can remove a second person, a product at the edge, or half of a title.
1.91:1 horizontal sits at the wide end of the accepted range. At a width of 1080 pixels, the height is about 566 pixels. It can be a valid feed format, but most of a vertical screen remains unused unless you crop aggressively.
16:9 at 1920 × 1080 is a horizontal master, not a Reel canvas. Keep it for wide-format players. If the same story needs a Reel, reframe it as its own vertical edit instead of asking one timeline to serve both shapes equally.
<a id="a-product-demo-shows-the-problem"></a>
A product demo shows the problem
Say you've made a product demo in 16:9. The product sits on the left, a presenter's hand enters from the right, and the logo sits in the lower third. Drop that timeline into 9:16 without reframing and you have two bad options.
The first option fits the full width and adds bars above and below. Your product becomes smaller on the phone. The second option fills the vertical frame and cuts the sides. The hand may vanish, the product may sit off center, and the logo can lose its edge or disappear. Neither result is a framing decision. Both are accidents caused by the canvas.
Build the vertical version deliberately. Move the product toward the center, place the logo where it survives, and recompose each scene for height. Then derive square versions from the source material if you need them. Deriving every shape from one finished timeline usually means each version inherits another shape's compromises.
Accepted doesn't mean suitable. A square or feed portrait file may be right for its own placement. It's the wrong category when the goal is a Reel that fills the phone.
<a id="safe-zones-for-faces-and-text"></a>
Safe Zones for Faces and Text
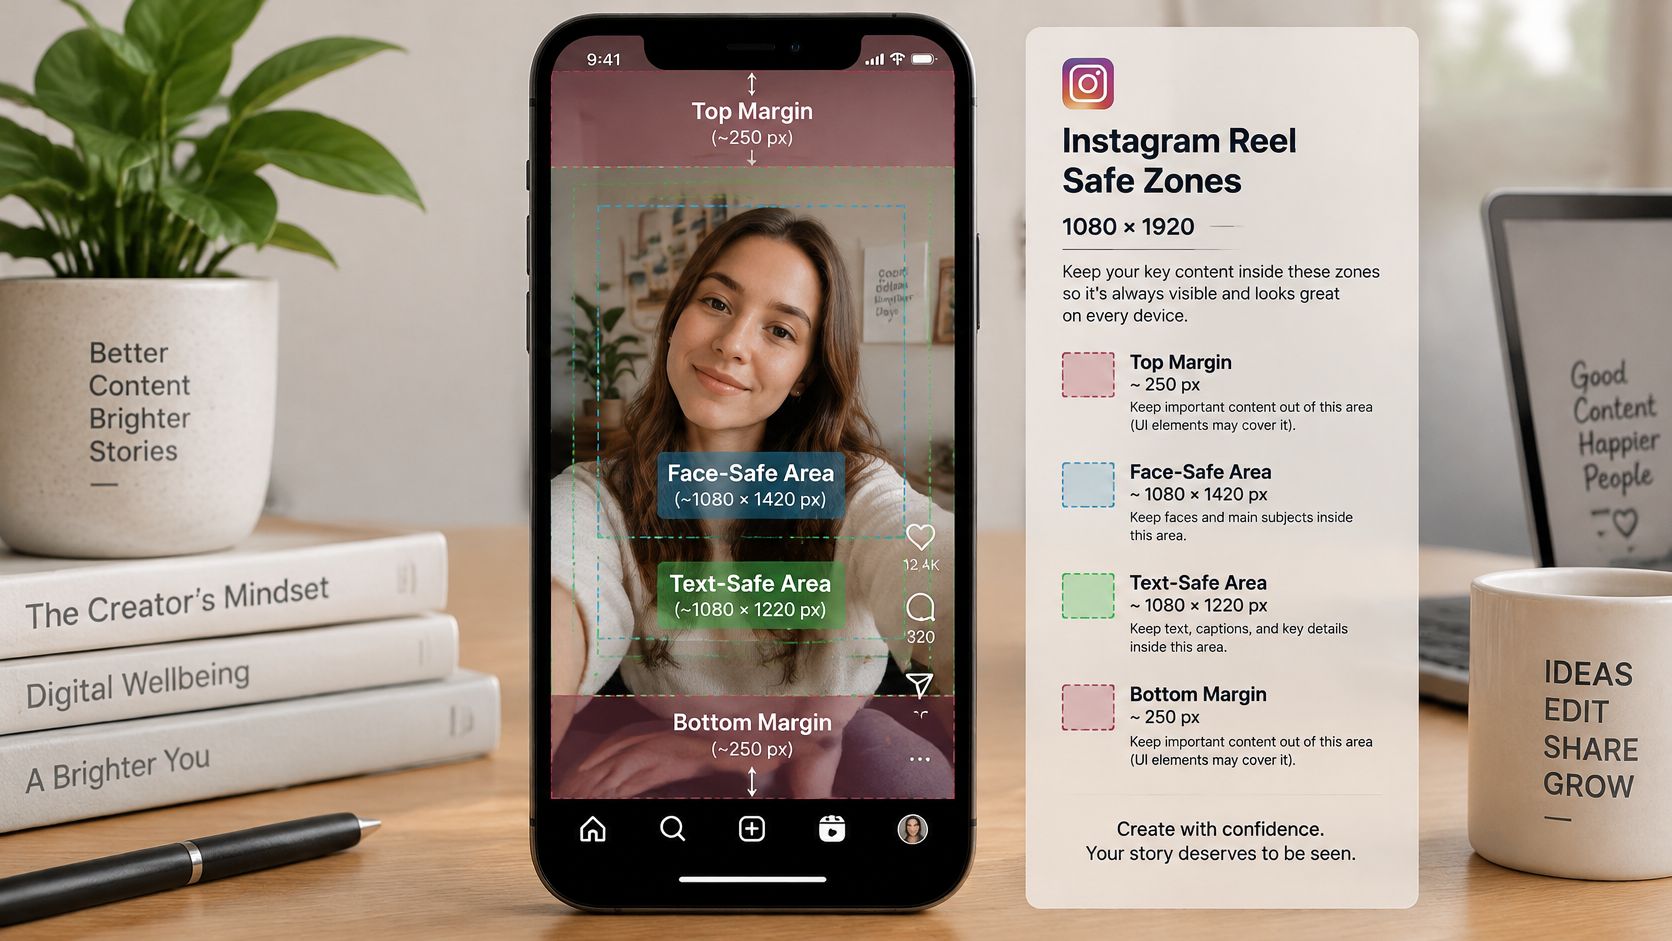
A 1080 × 1920 frame gives you the full canvas, but Instagram places its own interface over parts of that canvas. If your face, product, or key sentence sits under those controls, viewers can't see it clearly even though your editor showed a clean frame.
Instagram doesn't publish an official pixel safe box for this purpose. Use practical production margins instead, and measure them on your timeline. They're working guardrails, not a platform guarantee.
<a id="margins-you-can-measure"></a>
Margins you can measure
Leave about 250 pixels clear at the top. Leave about 420 pixels clear at the bottom. Keep about 80 pixels clear on each side.
Those margins leave a central working area of roughly 920 × 1250 pixels. Put the face, the product, and the one line that must be read inside that area. Background detail can extend to the edges. Essential information shouldn't.
- Top band: The username, audio label, and stickers can occupy this space.
- Bottom band: The caption, audio credit, and like, comment, and share controls sit here, and a long caption reaches higher.
- Side margins: A small inset protects logos and text from controls and slight reframing.
The bottom deserves the most caution because it changes with the caption. A short caption may leave your lower text visible. Expand the caption, and the same line can disappear behind interface text. Design for the expanded state if the words matter.
<a id="where-captions-go-wrong"></a>
Where captions go wrong
Take a caption that's 48 pixels tall and sits 200 pixels from the bottom edge. In your editor, it looks neat and close to the speaker. In the Reel player, the caption bar and controls cover it.
Move that line so its base sits at least 450 pixels from the bottom. It may look slightly high on a blank timeline, but it remains readable once Instagram adds its interface. That small move is often the difference between a caption viewers can follow and one they have to guess.
Burn captions into the picture when exact placement matters. A platform subtitle layer can shift with the interface or viewer settings. Rendered captions stay where you placed them, although you still need to check size and contrast after export. If you're deciding how to prepare those captions, a guide to adding subtitles to a video can help you choose a workflow that keeps placement under your control.
Type size matters after compression. Fonts under about 40 pixels, hairline strokes, and thin white lettering over a bright scene often turn muddy. Use a heavier weight, stronger contrast, or a simple backing shape. Don't make viewers decode text that's already fighting the background.
<a id="check-the-frame-on-a-phone"></a>
Check the frame on a phone
Export a test and watch it on your phone with the caption expanded. Pause on the busiest frame. Check the speaker's eyes, the product name, and the main caption line.
If you have to move your thumb or close the caption to read the message, the message is in the wrong zone.
Also check any logo near a side. Keep it inside the 80-pixel inset so a slight crop doesn't clip a letter or edge. A logo that only works at the exact boundary of the canvas isn't placed safely.
<a id="export-settings-for-a-clean-master"></a>
Export Settings for a Clean Master
Exporting is where a good timeline either stays clean or picks up avoidable damage. Work in the same order each time, and render the final file once.
<a id="the-delivery-recipe"></a>
The delivery recipe
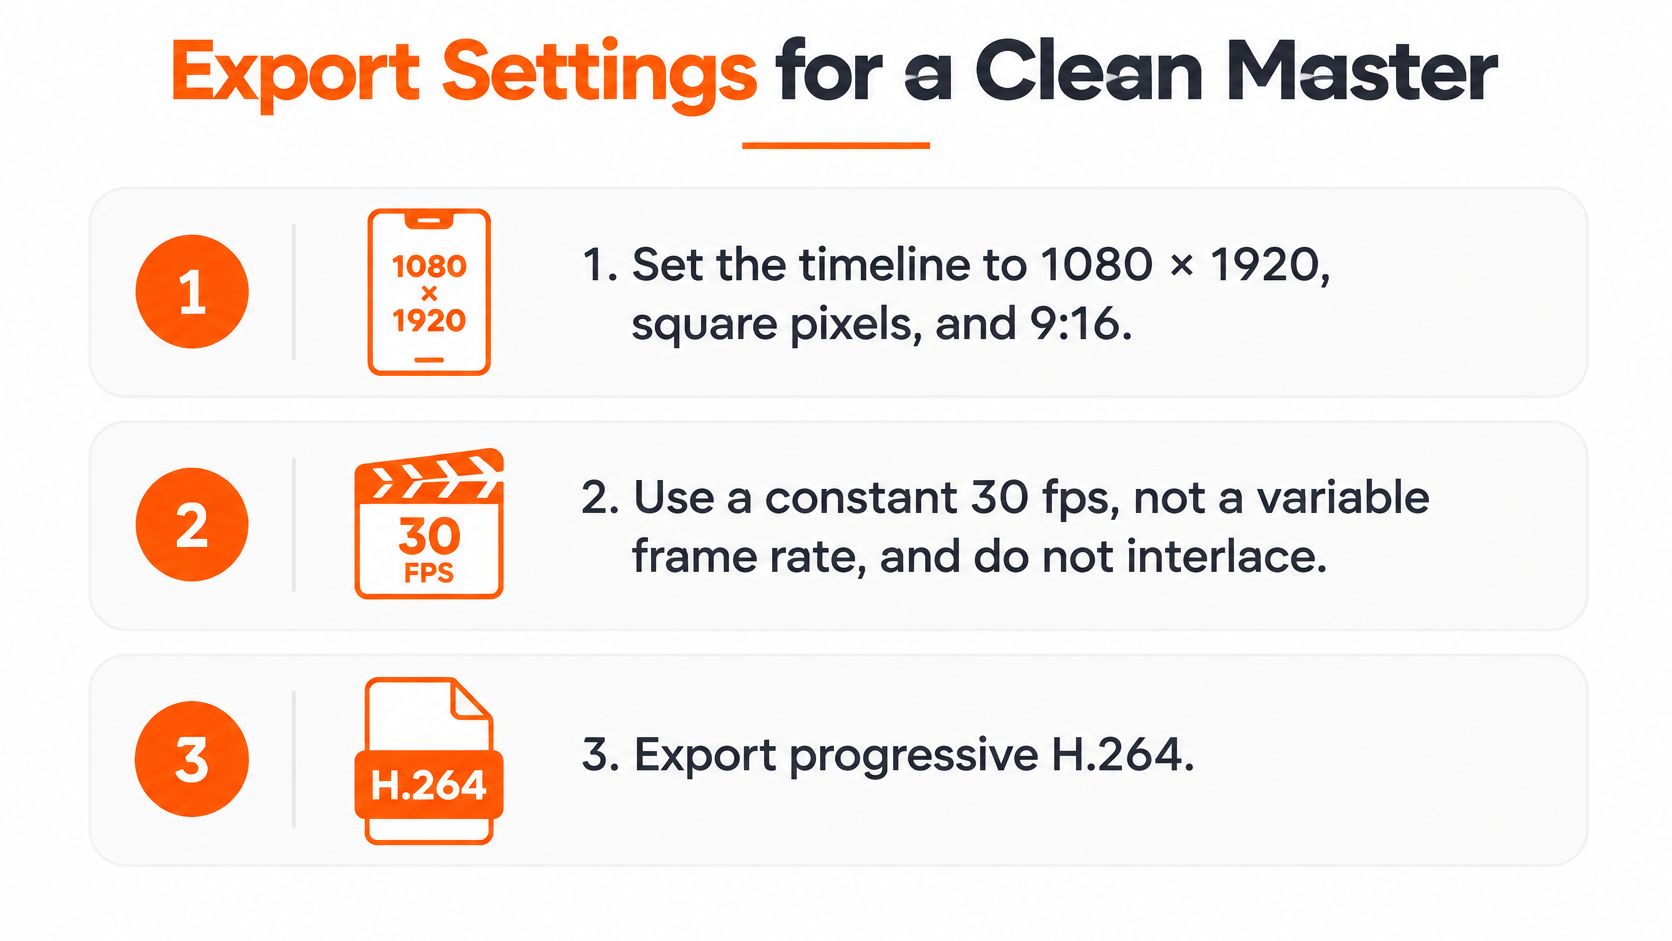
- Set the timeline: Use 1080 × 1920, square pixels, and 9:16 so faces and products keep their true proportions.
- Lock the frame rate: Choose a constant 30 fps, not a variable frame rate, and don't interlace the video.
- Choose the video encode: Export progressive H.264 in an MP4, or use HEVC if your tool requires it, with 4:2:0 chroma and a closed GOP.
- Add the audio: Use AAC at up to 48 kHz, in stereo for a stereo mix or mono for a single voice.
- Render text into the picture: Place captions and titles inside the safe zone before export, so they don't move later.
- Export once: Upload that finished file directly instead of sending it through chat apps or extra converters.
- Check the file size: Compare long exports with the 4 GB Reels ad ceiling before you try to upload.
A guide to the best video format for Instagram describes a dependable delivery file as MP4 or MOV with progressive H.264 or HEVC, fixed frame rate, closed GOP, square pixels, and 4:2:0 chroma subsampling, plus AAC audio up to 48 kHz in mono or stereo. In everyday work, MP4 with H.264, constant 30 FPS, and stereo AAC is the safest compatibility choice.
Each setting solves a visible problem. Progressive scan avoids the combing edges that interlacing can create on moving subjects. Square pixels prevent geometric distortion, so a circle stays round and a face doesn't stretch. A fixed frame rate keeps motion timing predictable for the editor, the uploader, and the player.
<a id="bitrate-and-generation-loss"></a>
Bitrate and generation loss
For an H.264 file at this frame size, use a high-quality variable bitrate in the 8 to 15 Mbps range as an editor's working target. That's not a platform limit. It's a practical range that gives detailed scenes enough data without making every short video unnecessarily large.
Don't chase quality by repeatedly converting the same file. Each transcode decodes and compresses the picture again. Fine detail gets discarded each time, especially around text, hair, patterned clothing, and fast motion. Render the finished video once, keep that master, and upload it.
The same caution applies when you borrow settings from a still-image workflow. If you shoot and edit on a Mac, Instagram export guidance for Mac photographers is a useful companion for the photo side of a campaign, but your Reel still needs its own video timeline, frame rate, codec, and audio checks. A photo preset doesn't answer those questions.
Editors who work across several formats also need to keep presets separate. A video editor for time-lapse work may handle image sequences well, for example, but the final Reel preset should still end at 1080 × 1920, constant 30 fps, and progressive H.264.
<a id="inspect-the-file-you-made"></a>
Inspect the file you made
Open the exported MP4, not just the timeline preview. Look at thin titles at full size. Small, high-contrast details are often the first things compression damages, so a title that looks crisp in the editor may soften in the render.
Check the opening frame, the fastest movement, and any scene with small type. If the master is already soft, fix the source or export again from the timeline. Don't expect Instagram to sharpen it into a better video.
<a id="length-limits-for-reach-and-ads"></a>
Length Limits for Reach and Ads
Length has three ceilings, and they don't mean the same thing. Confusing them leads to a Reel that uploads correctly but fails at the job you gave it.
| Rule | Limit | What it controls |
|---|---|---|
| Recording and editing | Up to 20 minutes | Whether the Reel can be captured and posted |
| Recommendation to non-followers | Longer than 3 minutes is not recommended | Discovery among people who do not follow you |
| Boosted Reel | 90 seconds or shorter, plus 9:16 | Eligibility for paid promotion |
Instagram's Reels feature guidance allows one or multiple clips whose combined duration can reach 20 minutes. It separately notes that Reels longer than 3 minutes will not be recommended to new audiences. The first limit answers whether a long Reel can exist. The second answers whether Instagram will recommend it to people who don't already follow you.
<a id="a-successful-upload-can-have-a-weak-goal"></a>
A successful upload can have a weak goal
Say you've made a four-minute story. It posts without trouble, and your followers can watch it. That doesn't make the same cut a strong discovery asset, because it sits beyond the 3-minute recommendation threshold.
Plan the cuts before export. Keep the four-minute version for followers if the story needs that length. Make a discovery version at 3 minutes or less. If you plan to promote it, make a separate version at 90 seconds or less in 9:16.
That may feel like extra work, but each cut serves a different audience. The long version can deepen a story. The discovery version needs a faster hook and a complete payoff. The promoted version needs the clearest idea in the shortest time.
<a id="pick-the-length-before-the-final-encode"></a>
Pick the length before the final encode
Story and educational channels often work well with a 30 to 90 second Reel for reach, then reserve a longer cut for an audience that already knows the series. Use that as a planning pattern, not a rule. A dense tutorial may need more time, and a simple visual idea may finish sooner.
Decide the target while the timeline is still editable. If you export a heavy master, upload it, and only then trim it for another purpose, you'll usually encode again and lose another generation of quality. It's cleaner to duplicate the timeline, cut each version properly, and render each final file once.
For a broader reference when you're planning a series, Instagram Reels length limits from Gainsty provides additional context on how creators think about duration. Your publishing decision still comes back to the three ceilings above. Does the file need to post, be recommended, or run as a promotion.
The longest file Instagram accepts isn't automatically the best file for finding new viewers.
Write the intended use in the filename, such as followers, discovery, or boost. That small habit prevents the common mistake of uploading the longest master everywhere and wondering why the result doesn't match the goal.
<a id="how-specs-change-by-placement"></a>
How Specs Change by Placement
The same video can be valid in one placement and wrong in another. Resolution alone doesn't settle the question. You also need the right shape and duration for where the file will run.
<a id="standard-reels-and-boosted-reels-arent-interchangeable"></a>
Standard Reels and boosted Reels aren't interchangeable
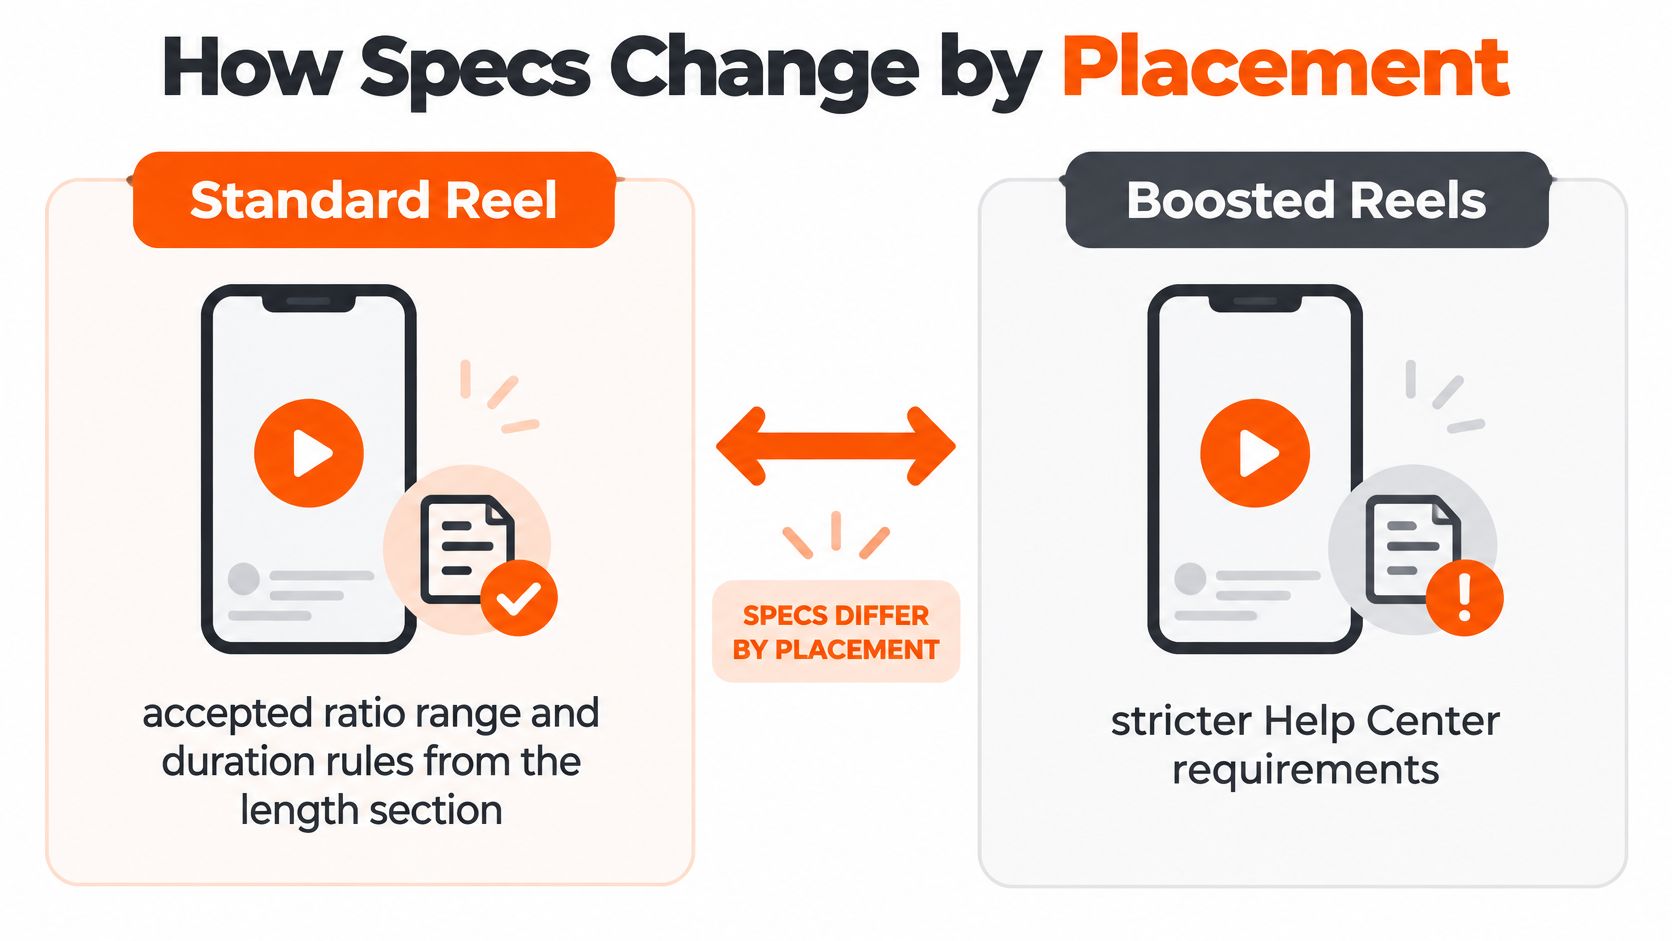
A standard Reel can use the accepted ratio range and the general duration framework. A boosted Reel follows a narrower rule. Instagram's Help Center guidance on boosting Reels says a Reel selected for boosting must be 90 seconds or shorter and must use a full-screen 9:16 vertical format.
That rule is stricter than the general recording and editing allowance of up to 20 minutes. It's also stricter than the 3-minute recommendation threshold for standard discovery. Meeting one limit doesn't mean you've met the others.
Take a two-minute 4:5 video. It may post as a normal Reel. It still fails both boost conditions, because it's longer than 90 seconds and it isn't full-screen 9:16. Preparing a boost after publication then becomes a salvage job.
Make the promoted cut on purpose. Start from the source timeline, cut it to 90 seconds or less, reframe it at 1080 × 1920, and check that the main message arrives without the missing context. Export that version once and label it clearly.
<a id="other-placements-keep-their-own-shapes"></a>
Other placements keep their own shapes
Stories share the 9:16 full-screen shape at 1080 × 1920, but they have their own length behavior. Don't assume a three-minute Reel fits as a Story just because the canvas matches. Shape compatibility doesn't make duration compatibility.
Feed posts are the natural home for 4:5 portrait and 1:1 square versions. Those shapes let viewers see the whole composition in the feed without the video taking over the screen. Horizontal masters stay 16:9 for wide players, where width is an advantage rather than a crop problem.
- Reel: Start with 9:16, then choose the duration for followers or discovery.
- Boosted Reel: Use 9:16 and stay at 90 seconds or less.
- Story: Use the vertical canvas, but plan its timing separately.
- Feed: Use 4:5 or 1:1 when that placement is the goal.
- Wide player: Keep the 16:9 master instead of forcing it into a Reel.
Meta recommends 9:16 creative for Reels ad placements and notes that automated enhancements may change quality. That's another reason to upload the 1080 × 1920 master rather than a file near the minimum. You want the placement system to start with detail you chose, not detail it has to reconstruct.
Use the ratio decision and the length decision together. One tells you the canvas. The other tells you the cut. When both match the placement, you avoid the frustrating result where a polished video posts successfully but can't be promoted or doesn't display as designed.
<a id="fixes-for-soft-cropped-or-jumpy-reels"></a>
Fixes for Soft Cropped or Jumpy Reels
Start with the symptom viewers see, then change the one setting that caused it. Randomly raising every export value wastes time and can create a larger file with the same underlying mistake.
<a id="match-the-symptom-to-the-cause"></a>
Match the symptom to the cause
Soft or blurry picture: The upload may sit near the 720-pixel floor, or it may have been recompressed by a messaging app before Instagram transcoded it again. Go back to the timeline, export the 1080 × 1920 master once, and upload that file directly. If the original clip itself is low resolution, an AI image upscaler workflow may help you improve source assets, but it doesn't replace a clean export.
Black bars at the sides or ends: A 16:9, 1.91:1, or square file is sitting inside a vertical player. Don't stretch it. Reframe the scenes into a true 9:16 cut and accept that some wide compositions need different framing.
Cut-off heads or captions: The subject is likely in the top 250 pixels or bottom 420 pixels of the frame. Move the face or text into the central band. Then test the file with the caption expanded, because that state covers more of the lower picture.
Stutter or uneven motion: A variable frame rate is a common culprit, especially when clips from different sources carry different timing. Consolidate the timeline and render a constant 30 fps. Watch pans, walking shots, and animated text after export, since uneven motion shows there first.
Thin titles that vanish: The type is too small, too light, or too close in brightness to the background. Move the size past about 40 pixels, use a heavier weight, and raise contrast. A simple dark backing can help when the scene changes from bright to dark.
File won't upload as an ad: A long or high-bitrate export may exceed the 4 GB maximum for Reels ads. Lower the bitrate first. Cutting resolution should be the last resort because it removes detail from every frame.
<a id="when-the-picture-looks-fine-but-distribution-doesnt"></a>
When the picture looks fine but distribution doesn't
A Reel that posts but can't be boosted usually breaks one of two conditions. It's longer than 90 seconds, or it isn't 9:16. Fix the timeline and export a separate promoted cut.
A Reel that followers see while new viewers don't may be over 3 minutes. The upload isn't broken. Its length makes it a weak discovery candidate. Save the long version for the audience that chose you, and make a shorter, self-contained cut for people meeting the channel for the first time.
Before you publish, run a five-point phone check.
- Resolution: The file is 1080 × 1920.
- Ratio: The canvas is 9:16.
- Safe zone: Faces and essential text sit in the central band.
- Motion: The frame rate is a constant 30 fps.
- Length: The cut matches followers, discovery, or promotion.
That check takes less time than diagnosing a failed upload after the fact. It also tells you whether the problem belongs in the picture, the encode, or the publishing plan.
<a id="export-the-next-reel-at-1080-by-1920"></a>
Export the Next Reel at 1080 by 1920
Choose 9:16 before you generate or edit the video. Starting with the right frame gives you a true 1080 × 1920 picture instead of a horizontal video that needs a damaging crop later.
Keep the discovery cut at or under 3 minutes. Make a separate boost cut at or under 90 seconds if the Reel will be promoted. Burn captions into the central safe zone, use a constant 30 fps, and upload the finished MP4 once.
ClipNova fits when the job is a finished story video rather than a single generated shot. It produces the script, scenes, voiceover, captions, and background music in one pass. Saved characters keep the same face and outfit across scenes, which helps when one Reel belongs to a continuing series.
Every ClipNova video comes back finished at up to 1080p in 9:16, 16:9, or 1:1, and ClipNova exports MP4 videos in 9:16, 1:1, and 16:9 formats for TikTok, Reels, Shorts, YouTube, LinkedIn, and X. ClipNova also auto-resizes every render for 9:16, 1:1, and 16:9 in one click, so you can prepare placement versions without rebuilding the story each time.
The platform limits still apply. A video past 3 minutes remains a weak discovery candidate on Instagram, even if it's sharp. A boost still needs its own 90-second, 9:16 cut. Good export settings don't override placement rules.
Set the next project to 9:16, keep the essential action in the middle of the frame, and make your first video at the size your viewers will see.
Start your next Reel on a 9:16 canvas and let ClipNova AI return it as a finished story video with script, scenes, voiceover, captions, and music at up to 1080p. Keep the same characters from scene to scene, prepare the 1080 × 1920 version for Reels, and make a separate square or horizontal version only where that placement needs it.
Ready to ship your own?
Start creating viral videos with AI in under twenty minutes, no credit card required.