
You've got family photos scattered across your phone, a few shaky clips, and a birthday or memorial approaching. You want something more meaningful than a slideshow, but choosing what to leave out feels harder than learning the editor.
Making a memory video starts with a small story, not a transition pack. Choose who'll watch it, connect the images with a clear voice, and treat consent, accessibility, and preservation as part of the work.
Table of Contents
- Choose the Format and Length Before You Edit
- How to Make a Memory Video Step by Step
- Pacing, Music and Narration That Hold Attention
- Consent and Privacy Before You Publish
- Export Settings and Archive Copies
- Fixing the Problems Viewers Notice Most
- Make Your First Memory Video
<a id="choose-the-format-and-length-before-you-edit"></a>
Choose the Format and Length Before You Edit
Where will people watch the video? Answer that before placing a photograph. A portrait frame suits a phone, while a wide frame gives a group photograph room on a television.
YouTube's aspect-ratio guidance identifies 16:9 as the standard on computer displays, explains that its player adapts to other shapes, and recommends uploading in the native ratio rather than adding bars. Choose the canvas before rendering, not by cropping a finished export.
Format and length by where the video will be watched
These are suggested editing targets, not platform limits.
| Destination | Aspect ratio | Length | Why it fits |
|---|---|---|---|
| YouTube long-form | 16:9 | 2 to 5 minutes | Desktop and TV viewing, the default for family archives |
| YouTube Shorts | 9:16 | 30 to 60 seconds | Full-screen mobile feed |
| TikTok | 9:16 | 30 to 60 seconds | Mobile feed, keep captions clear of the bottom edge |
| Instagram Reels | 9:16 | 30 to 60 seconds | Mobile feed, design for sound-on viewing |
| Memorial gathering or TV screen | 16:9 | 3 to 5 minutes | Readable from across a room |
| Square feed post | 1:1 | 30 to 90 seconds | Balanced frame for feeds that mix orientations |
Length should follow the story's scope. A single recollection needs less space than an anniversary spanning several generations. Don't extend a short memory just because you have more photographs.
If you're still finding the thread, use visual journal inspiration from Life Calendar to identify recurring places, routines, and objects. A familiar kitchen can connect a family story more naturally than a collection of unrelated milestones.
Practical rule: Build the landscape family master first when television viewing matters. Make the vertical version as its own project so you choose which faces remain visible.
<a id="how-to-make-a-memory-video-step-by-step"></a>
How to Make a Memory Video Step by Step
An editor can arrange files, but you have to decide what they mean. Start with the person or experience you want viewers to remember, then select material that supports it.
The process below keeps collection, storytelling, and finishing connected.
<a id="gather-the-material-and-find-the-thread"></a>
Gather the Material and Find the Thread
-
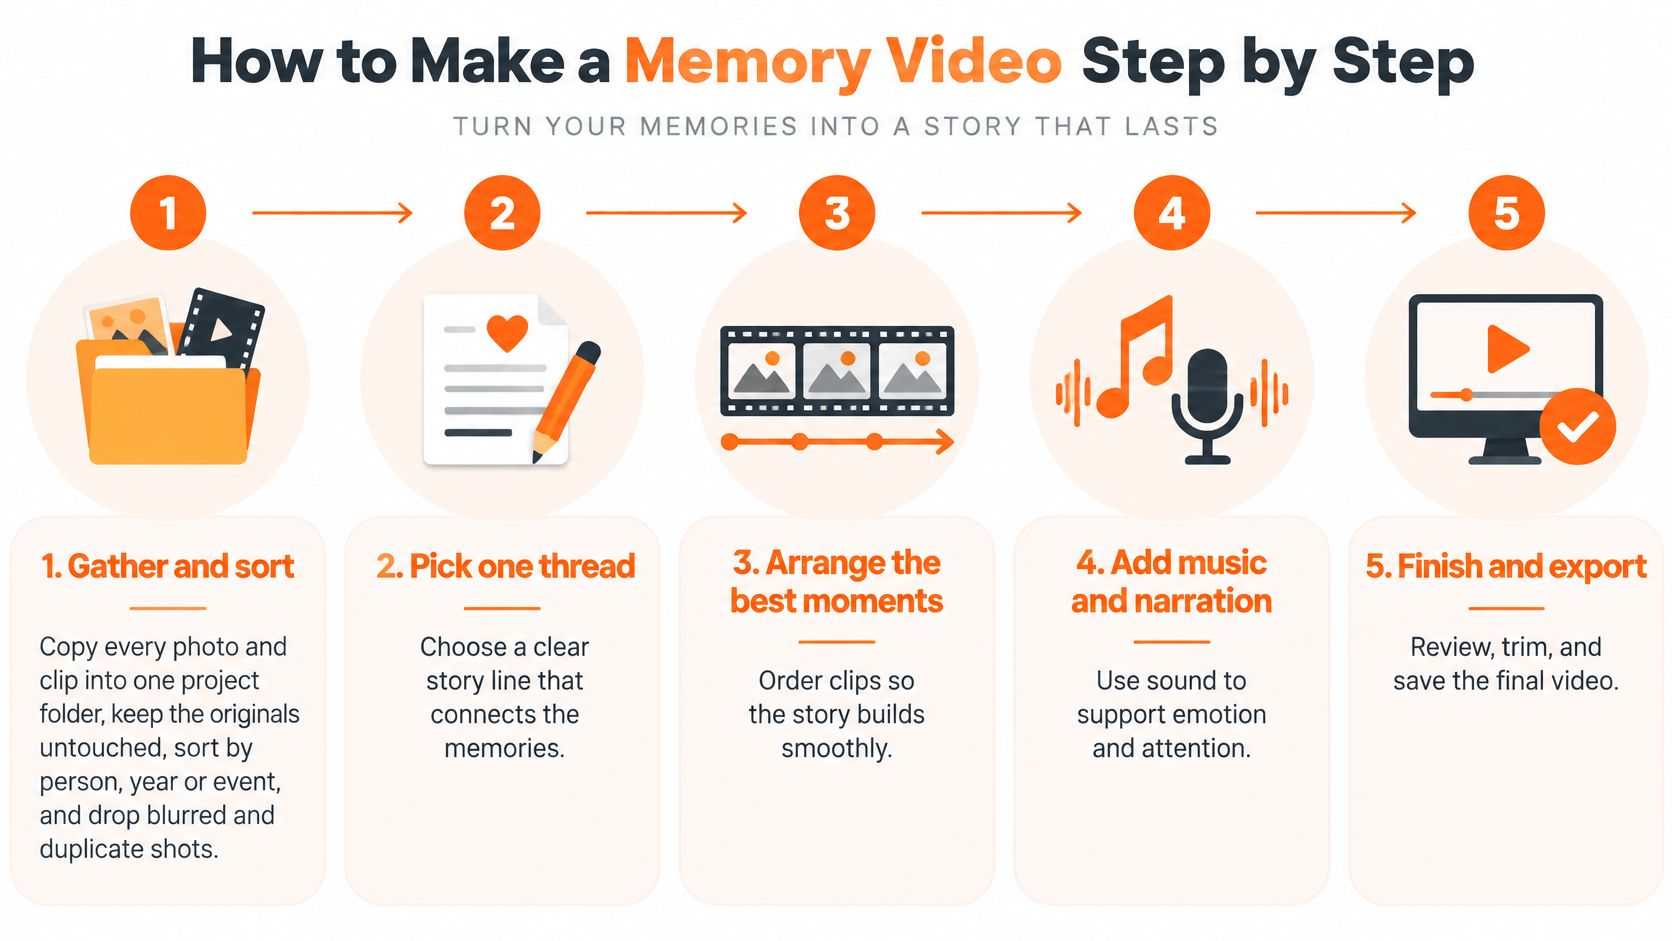
Gather and sort. Copy photographs and clips into a project folder, leaving originals untouched. Separate working material by person, year, or event, and move duplicates and blurred shots out of the selection rather than deleting family records.
-
Pick one thread. Choose a person, trip, year, or milestone, then finish this sentence: viewers should remember this person for what? A story about your grandmother welcoming everyone into her kitchen is easier to shape than a complete account of everything she ever did.
-
Write the narration first. Describe specific actions and details instead of stacking compliments. For a hypothetical minute-long birthday cut, draft roughly 130 words, then read them aloud with natural pauses and shorten the script if it feels rushed.
If you're recording a relative, prepare prompts around photographs rather than asking for an entire life story at once. The Sunnylands Family Story Project guide recommends planning questions, controlling recording conditions, and replaying a 20–30-second test before the interview.
Record in a quiet, furnished room with an external microphone when available. Listen through headphones: an emotionally valuable answer won't become clearer because you add music underneath it.
<a id="assemble-around-the-voice"></a>
Assemble Around the Voice
-
Build the scene order. Open with a strong, recognizable image, establish the setting, show the memorable action, and end with what it meant. Give each scene a clear purpose instead of displaying every photograph in date order.
-
Lock images to the narration. Show the kitchen when the speaker mentions the kitchen, not during the next sentence about a wedding. If you're considering generated movement, the picture-to-video guide offers a separate workflow; don't treat invented motion as documentary evidence.
-
Add music and captions. Choose music or a restrained track whose vocals don't compete with speech. Caption every spoken line, then check names manually rather than trusting automatic transcription.
For example, a grandmother's 80th-birthday tribute could use 12 scenes of about 5 seconds for a 60-second cut. In that hypothetical edit, scene three might show her kitchen with yellow chairs exactly when the narration names them.
Read the ending against the final image. Once nothing needs moving, lock the cut and save the project before beginning export checks.
<a id="pacing-music-and-narration-that-hold-attention"></a>
Pacing, Music and Narration That Hold Attention
Use this table as a starting edit plan, not a requirement to fill a scene quota. Choose counts and holds that fit your running time.
Scene count and music handling by video length
| Video length | Scenes | Seconds per scene | Music handling |
|---|---|---|---|
| 30 to 60 seconds | 6 to 15 | 4 to 5 | Start with music about 15 to 20 dB under narration, lifted at the open and close |
| 2 to 3 minutes | 20 to 45 | 4 to 6 | Same mix, with one change of track at the midpoint |
| 5 minutes | 50 to 60 | 5 to 6 | Consider a track change every 60 to 90 seconds to mark chapters |
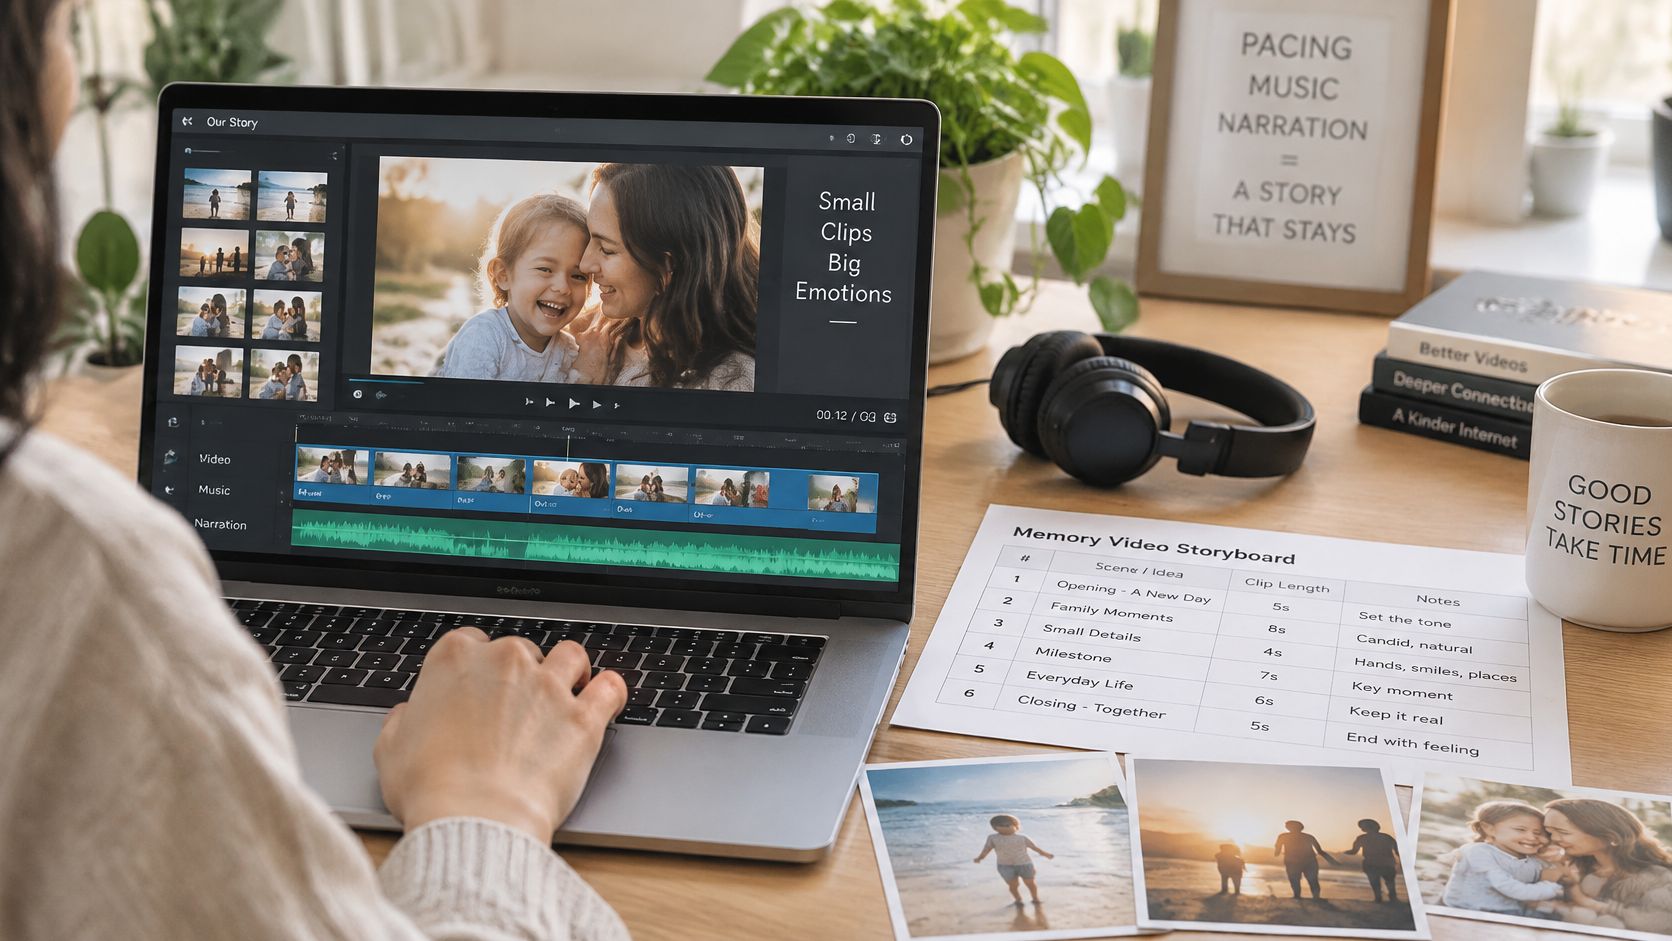
Keep the storyboard beside the timeline so you can judge each scene against its purpose.
<a id="let-the-voice-set-the-pace"></a>
Let the Voice Set the Pace
A still image doesn't automatically need movement. Hold a meaningful face when viewers need time to recognize it; use a gentle pan when it reveals something useful, not just to keep the frame busy.
Read warmly, without a presenter's urgency. Pause after unfamiliar names and dates, and describe important visual details so someone who can't see the photograph clearly still understands the memory.
Music levels need listening, not just meter readings. Duck the track during speech and lift it between thoughts, avoiding abrupt changes that make a quiet tribute feel like a trailer. The guide to making video with music can help you choose an assembly workflow.
Use this video as an additional reference while reviewing your edit.
<iframe width="100%" style="aspect-ratio: 16 / 9;" src="https://www.youtube.com/embed/J0ydlAqg6_8" frameborder="0" allow="autoplay; encrypted-media" allowfullscreen></iframe><a id="make-the-story-accessible"></a>
Make the Story Accessible
Research on digital memorial practices identifies accessibility and usability barriers for older participants. Don't assume every relative can read small captions, hear quiet speech, or use a social app.
Use large, high-contrast captions, keep text away from interface controls, and review translated narration with someone who speaks the language. Listen at reduced volume on ordinary speakers: if you strain to understand the voice, simplify the mix.
Accessibility isn't a separate version of the story. It's whether your intended viewers can experience it.
<a id="consent-and-privacy-before-you-publish"></a>
Consent and Privacy Before You Publish
Publishing a tribute and asking permission afterward puts relatives in an unfair position. They have to object publicly to something presented as a loving gesture.
Start with a private family review. Research on TikTok grief narratives identifies consent, privacy, respectful representation, and potential exploitation of the deceased as central ethical concerns. A polished video can still misrepresent someone through selective images or invented speech.
<a id="choose-the-audience-deliberately"></a>
Choose the Audience Deliberately
- Private: Keep the video in controlled family storage and show it directly, without a shareable viewing link.
- Family-shared: Send an unlisted link to named relatives, explaining that it shouldn't be forwarded. Unlisted doesn't mean confidential.
- Public: Publish only after the people involved have reviewed the intended version and understand where it will appear.
Get written permission from identifiable living people before public publication. A clear text-message approval creates a useful record, but it isn't a substitute for any formal release your particular use requires.
For someone who has died, discuss public use of photographs and voice with the family. Recreating their face or voice calls for explicit family approval and clear labeling, not an assumption that a tribute makes reconstruction acceptable.
<a id="review-what-the-video-reveals"></a>
Review What the Video Reveals
Check backgrounds, captions, documents, and spoken details for addresses, phone numbers, medical information, financial matters, and traumatic circumstances. Ask whether each detail serves the memory or merely exposes someone.
Label synthetic narration and reconstructed scenes in the video and description so viewers can distinguish interpretation from original footage. Don't put invented words into someone's mouth as though they said them.
If relatives disagree, retain the private family cut and pause public publication. Keep the untouched archive separate from the version approved for sharing.
<a id="export-settings-and-archive-copies"></a>
Export Settings and Archive Copies
A video that plays well at a family gathering still needs a copy that can be reopened and edited later. Export the finished viewing file from the editable project. Re-encoding an already compressed video can reduce picture and audio quality without restoring information that has been lost.
1080p Full HD is 1920 × 1080 pixels. Match the canvas to your chosen orientation. A larger export cannot restore detail missing from a small photograph.
<a id="export-in-a-reliable-order"></a>
Export in a Reliable Order
- Check the locked timeline. Confirm spelling, captions, image framing, audio transitions, and the final frame.
- Create the viewing file. Use a widely supported format such as MP4 with H.264 video and AAC audio. Keep the project's frame rate unless there is a specific reason to change it.
- Test playback on the intended screen. Open the file on another device and, if possible, on the television or display planned for the gathering.
Keep the project's linked media with the project file. A project document without its photos and audio may reopen with missing-file warnings instead of an editable timeline.
<a id="preserve-more-than-the-finished-video"></a>
Preserve More Than the Finished Video
Use a common backup rule: keep three copies, on two types of storage, with one copy off-site. Set up the copies while collecting material, rather than waiting until the video is ready to share.
Separate camera originals, audio masters, the editable project, and viewing exports into clearly named folders. Include the subject, date, and topic in filenames. Mark uncertain dates as approximate rather than guessing.
Archive check: Someone else should be able to identify the people, locate the permissions, and understand the folder without asking you.
Save a transcript, photo list, credits, and technical notes alongside the project. Store drives in a cool, dry place, check that files still open, and move the archive to current storage before its hardware or file formats become difficult to use.
<a id="fixing-the-problems-viewers-notice-most"></a>
Fixing the Problems Viewers Notice Most
A dragging middle is a selection problem before it's an effects problem. If several images make the same point, keep the strongest one instead of adding narration to justify the others.
Common memory video problems, causes and fixes
The numerical settings below are practical troubleshooting starting points, not guarantees.
| Symptom | Likely cause | Fix |
|---|---|---|
| Story drags after the second minute | Several similar photos in a row | Keep the strongest image per idea and cut the rest |
| Music drowns out the narrator | Music bed set close to narration level | Try lowering music 15 to 20 dB under the voice and duck it during speech |
| Old photo looks stretched | Forced crop to the wrong aspect ratio | Use fit with a blurred background instead of stretching |
| Photos look soft at 1080p | Small source image zoomed past its native size | Replace with the original file or limit the zoom to a gentle move |
| Captions unreadable on a phone | Lines too long or text too small | Try two short lines and check them at phone size |
| Export looks worse than the preview | Exported from a previous export | Export once from the project file at full quality |
<a id="separate-source-problems-from-editing-problems"></a>
Separate Source Problems From Editing Problems
Open a suspect photograph outside the editor. If it's already soft, look for the original scan or camera file rather than a copy downloaded from a messaging conversation.
Sharpening can emphasize edges, but it can't reliably restore missing facial detail. Use an irreplaceable low-resolution image as a restrained cutaway instead of enlarging it to fill the screen.
For distorted faces, reset scale and aspect controls before changing the crop. Stretching changes people's proportions; fitting preserves the image, even when you need a background behind it.
<a id="review-before-rendering-again"></a>
Review Before Rendering Again
Watch once for story and once for technical distractions. Mark fixes in the timeline, make them together, and render after the review rather than exporting after every adjustment.
With generated talking scenes, inspect mouth timing and facial continuity separately. LatentSync's lip-synchronization paper explains why synchronization also requires identity preservation and temporal consistency, not merely an attached voice track.
When you're unsure whether to add or remove, remove the redundant scene first. A shorter, clearer tribute is better than a longer cut that explains the same feeling repeatedly.
<a id="make-your-first-memory-video"></a>
Make Your First Memory Video
Start with a folder, a person, and a memory you can describe aloud without notes. Check names and dates with a relative, then choose whether you're preserving original material or creating a clearly labeled interpretation.
For generated storytelling, ClipNova makes finished long AI videos with consistent characters, including script, original scenes, voiceover, captions, and background music in one pass. Videos run up to 5 minutes at up to 1080p, with 9:16, 16:9, or 1:1 output and narration in 18 languages; use the AI voiceover tools guide to evaluate narration choices.
<a id="choose-the-workflow-that-fits"></a>
Choose the Workflow That Fits
Clip generators such as Runway, Kling, Veo, and Hailuo make shots; ClipNova assembles the whole story. InVideo and Pictory use stock-based templates, Revid, StoryShort, and Zebracat focus on shorts, and HeyGen and Synthesia center on presenters.
Saved characters retain the same face and outfit across scenes; Series supports up to 8 recurring characters with story memory, and characters can speak with lip sync. Review every likeness and spoken line, and fix or regenerate individual scenes in Studio rather than treating generation as verification.
Our workflow is find your idea, write the script, and generate the video, taking an idea to a finished short-form video in under 5 minutes. That doesn't include family approval or archival checks. Plans start at $19/month with commercial rights, which don't replace permission to use someone's likeness or music.
Make your first video with a small, approved story.
ClipNova AI turns an idea or script into a finished story video with original scenes, narration, captions, and music. Bring a family-approved memory, review every generated scene, and create a version your relatives can understand, share appropriately, and keep.
Ready to ship your own?
Start creating viral videos with AI in under twenty minutes, no credit card required.