

You type a scene prompt, watch the opening frame appear, and for a moment it looks like the anime short you had in mind. Then the character blinks, the hairstyle shifts, the background warps, and the eye colour changes before the camera finishes its move. The failure isn't your imagination or your prompt. It reflects how current AI video systems handle continuity.
Learning how to make anime videos with AI means adopting a producer's workflow. You aren't rendering a finished episode with one command. You're creating reference images, generating short shots, checking every transition, approving dialogue, and assembling the reliable pieces into a coherent film.
Table of Contents
- Why a Single Prompt Will Not Get You an Anime Episode
- Choosing the Right AI Models and Tools for Anime
- Building a Character Bible That Survives Multiple Shots
- Writing Prompts and Configuring Anime Styles
- Adding Voice, Animation, and Lip-Sync That Actually Holds Up
- Assembling, Upscaling, and Exporting for Social Platforms
- Troubleshooting, Workflow Habits, and Where AI Anime Is Heading
<a id="why-a-single-prompt-will-not-get-you-an-anime-episode"></a>
Why a Single Prompt Will Not Get You an Anime Episode
The first beautiful frame creates the wrong expectation. It suggests that the model understands your protagonist, the scene geography, the acting intention, and the next few seconds of motion. In practice, it may understand only a visual approximation of the prompt at a particular moment.
AI video generation grew from image-generation research into temporal synthesis. A 2025 bibliometric review of 422 peer-reviewed publications describes 2022 as a major milestone because the Video Diffusion Model extended diffusion-based generation into high-fidelity moving sequences. The same review notes that NUWA-XL generated videos up to 11 minutes through a “Diffusion over Diffusion” architecture, but research progress doesn't remove the production problems creators meet in ordinary shots. The review of AI-based video generation research identifies temporal consistency, identity preservation, camera control, and coherent motion as continuing challenges.
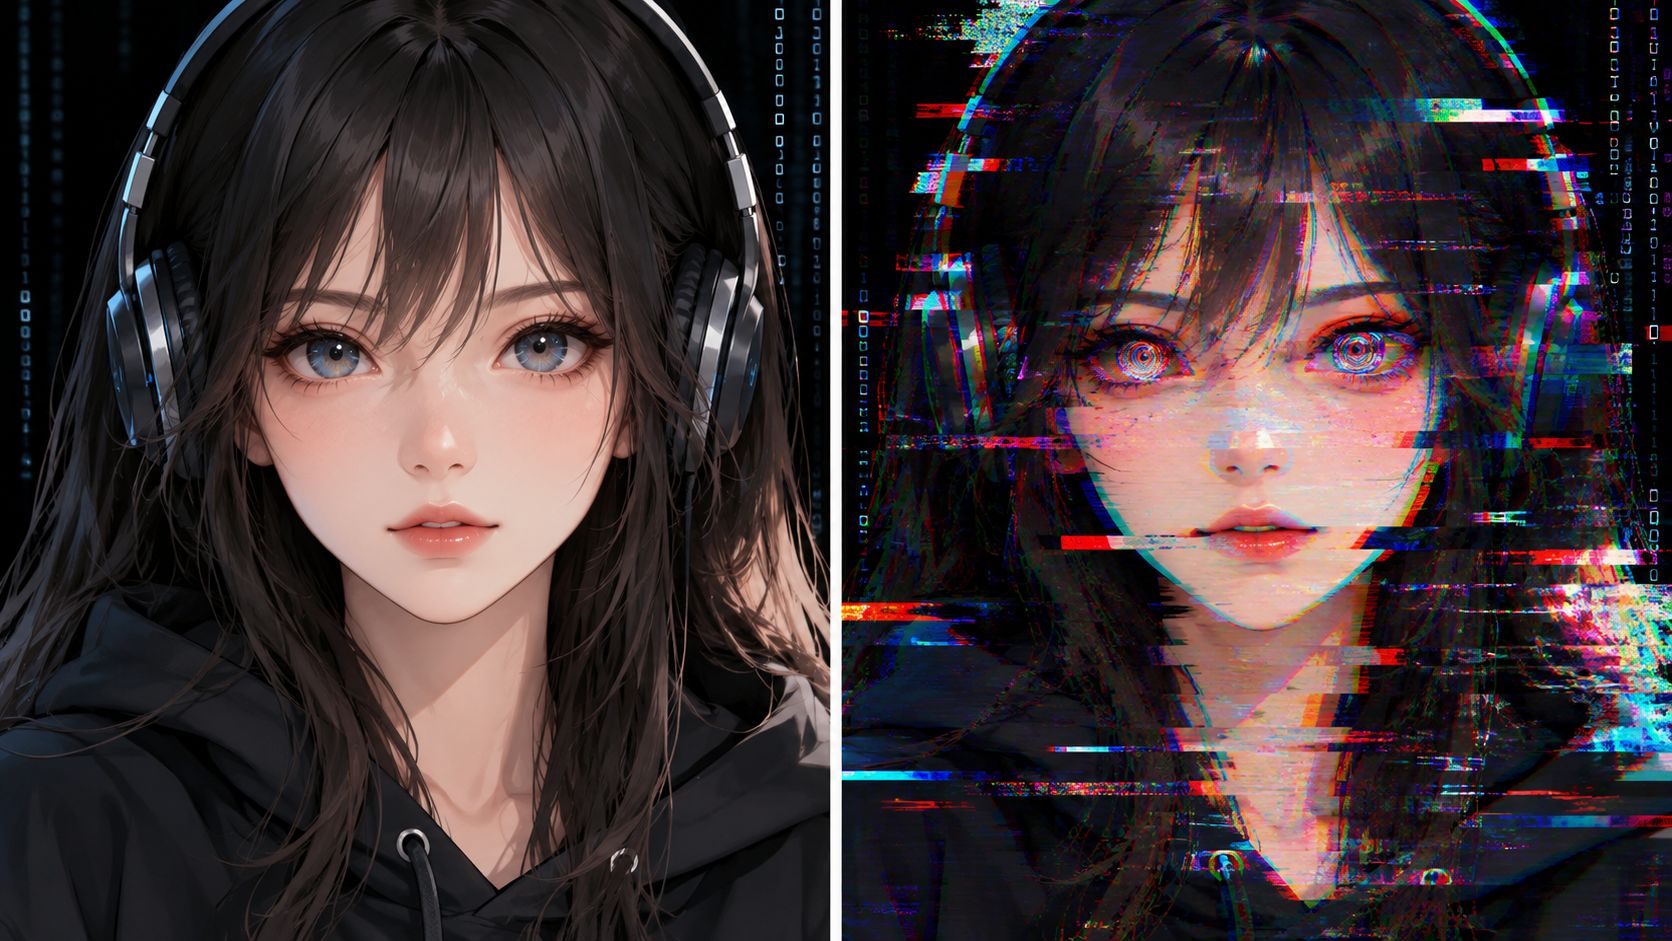
Diffusion models are useful because they iteratively refine noisy representations into detailed images and video. That makes them effective for line art, colour palettes, character designs, and cinematic backgrounds, but refinement isn't the same as memory. The model can produce a convincing face in one frame while failing to preserve the same face through a turn, expression change, or lighting transition.
<a id="the-shot-is-the-unit-of-production"></a>
The shot is the unit of production
A practical workflow treats AI as a shot-generation engine, not an autonomous animator. Write a shot list, create a strong visual reference, generate a short clip, inspect it as moving footage, and decide whether to approve, edit, extend, or regenerate it.
This approach costs more attention than a single-click render, but it gives you control over failure. If a four-second shot breaks, you replace that shot. If you ask for an entire episode and the protagonist drifts halfway through, you may lose the whole sequence.
Production rule: Protect continuity before adding spectacle. A simple shot with a recognisable character is more useful than a spectacular shot that can't connect to the next one.
The 2024 ACM study on synthetic-video detection tested a method on 2,924 TikTok video samples from four video-generation models and used spatio-temporal attention to examine both individual frames and changes over time. The ACM study on detecting and attributing generated video reinforces a point producers already learn during review: a still image can look excellent while the sequence reveals flicker, accessory changes, unstable anatomy, or timing problems.
Your workflow should therefore include temporal review. Watch adjacent frames for changing eye shapes, moving costume details, warped hands, background shimmer, and motion that doesn't match the camera. The goal isn't to eliminate every imperfect frame. It's to ensure that defects don't interrupt the story.
<a id="choosing-the-right-ai-models-and-tools-for-anime"></a>
Choosing the Right AI Models and Tools for Anime
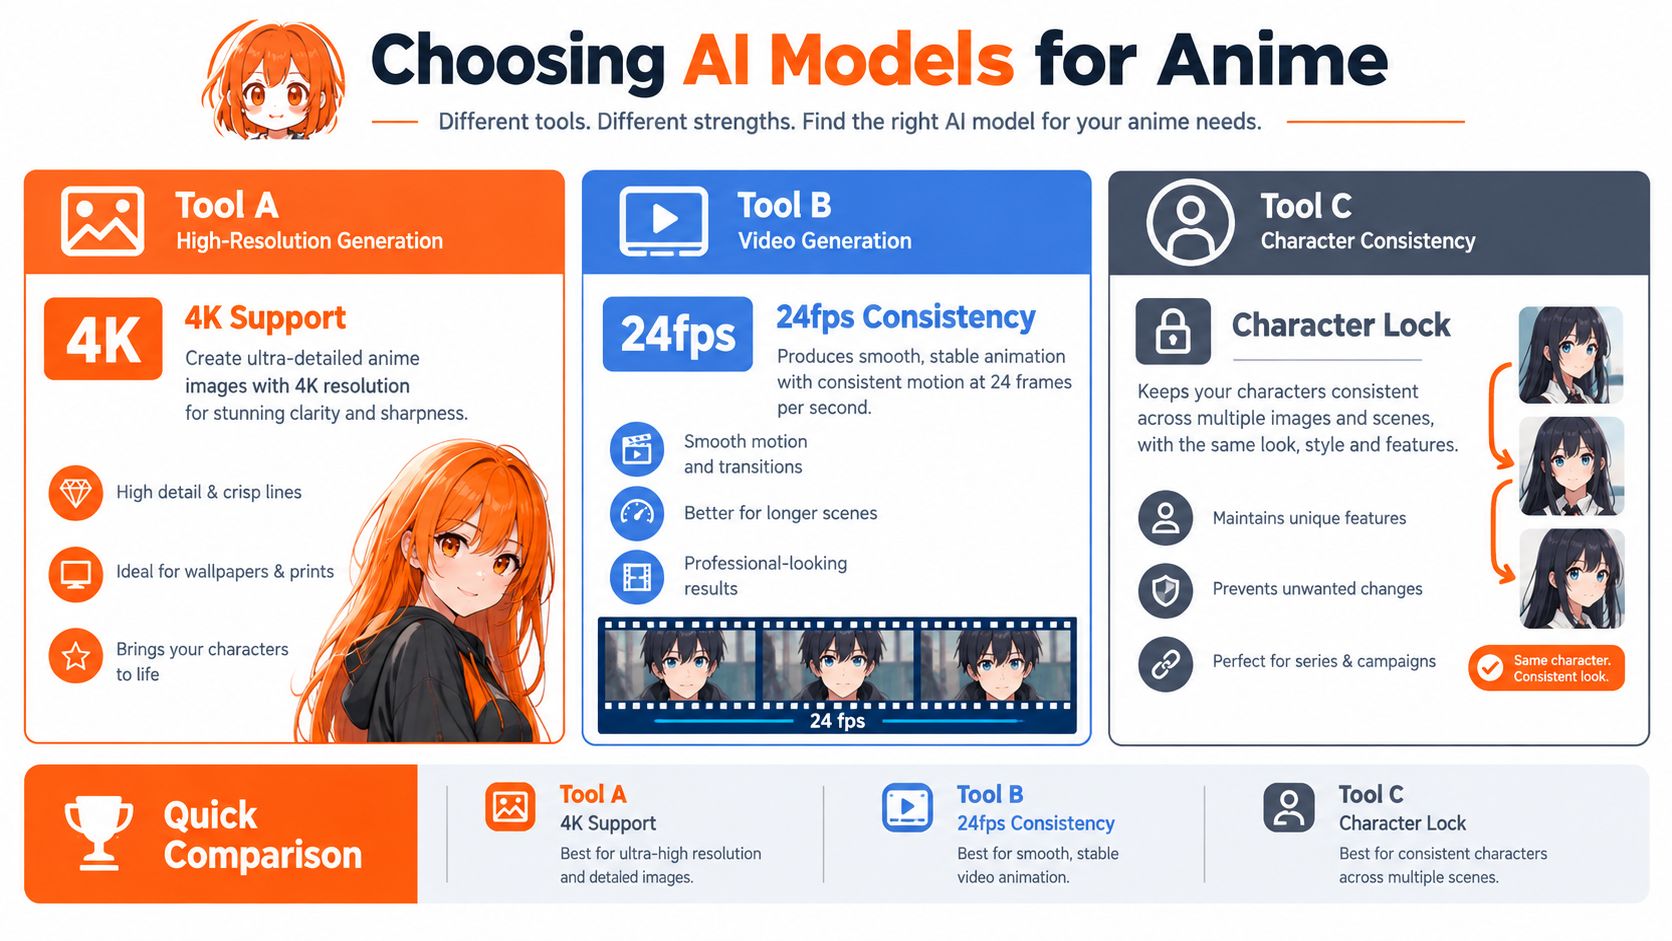
Tool selection starts with the project you can finish, not the model with the most impressive demo. A multi-tool stack might combine an anime-tuned image generator, an image-to-video model, a voice platform, a lip-sync system, and a video editor. An integrated studio reduces handoffs by putting scripting, visuals, narration, captions, music, and exports in one workspace.
Both approaches have trade-offs. Separate tools can give you finer control over references, seeds, motion, and editing. They also create more opportunities for style drift, inconsistent colour management, lost metadata, and licensing confusion. An integrated platform can make assembly faster, but you should verify which models it exposes and how much control it gives you over character references and shot regeneration.
<a id="choose-by-control-rights-and-handoffs"></a>
Choose by control, rights, and handoffs
Before generating anything, check these criteria:
- Anime control: Look for stylised generators or checkpoints that handle clean linework, cel shading, expressive faces, and simplified anatomy without forcing photorealistic textures.
- Reference handling: Confirm whether you can provide a character image, preserve a seed, extend an approved clip, or lock a subject across different shots.
- Motion options: Image-to-video is useful for controlled performances from a still. Text-to-video is faster for exploration but usually gives you less precise staging.
- Commercial terms: Read the plan's rules for commercial use, watermarks, output ownership, voice rights, and model restrictions before producing client work.
- Export policy: Check whether the service provides the resolution, aspect ratios, audio controls, and clean exports your publishing channels require.
- Project records: Save prompts, reference files, seeds, model names, voice settings, and approved renders in a project folder.
A solo creator often benefits from an integrated workspace while learning, then adds a specialist image or motion tool when a specific shot needs more control. A marketing team should prioritise repeatable templates, commercial rights, shared assets, and fast variations. An agency needs clear client ownership, reproducible settings, separated project spaces, and a review process that doesn't depend on one operator's memory.
For a broader look at combining script, visual generation, voice, and editing in one production flow, see this guide to an AI movie maker. ClipNova can generate stylised short-form videos and images from prompts, topics, or links, with anime video generation, curated voiceover, captions, music, and multi-aspect exports available within its studio. Treat it as one possible stack, not a substitute for reviewing character continuity shot by shot.
Don't choose tools based only on raw resolution. A high-resolution still that can't preserve a costume detail is less valuable than a lower-resolution reference that remains stable across the scene.
<a id="building-a-character-bible-that-survives-multiple-shots"></a>
Building a Character Bible That Survives Multiple Shots
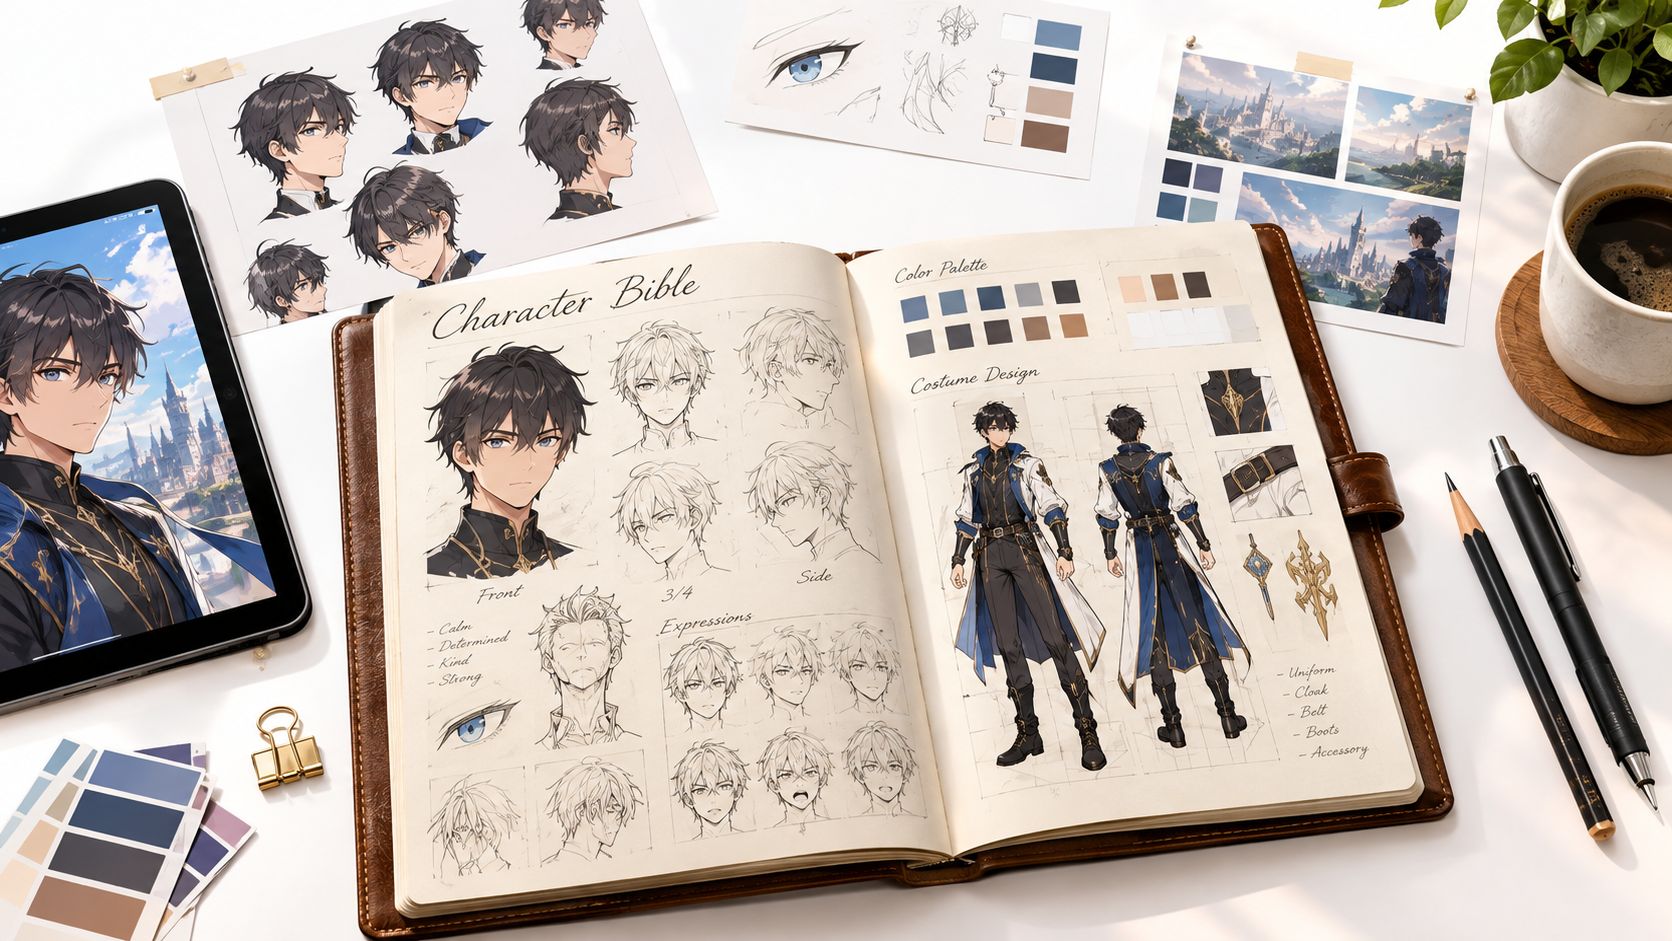
Your character bible is the production document that prevents every new prompt from unintentionally redesigning the cast. Create it before animation begins, and make it specific enough that another person could use it without guessing.
Start with one clean source image per character. A crowded screenshot containing multiple faces can confuse identity references and merge people into one design. Crop the source so the model sees a single subject, then create a small reference set that covers the character's face, silhouette, costume, recurring accessories, and important expressions.
<a id="record-identity-separately-from-style"></a>
Record identity separately from style
A style reference defines the visual language, such as cel shading, line weight, colour contrast, background treatment, and texture. An identity reference defines the person, including facial proportions, hairstyle, eye shape, body proportions, costume, and permanent props. Mixing the two can make troubleshooting difficult because you won't know whether a bad result changed the character or the aesthetic.
Use a character-bible template like this:
- Identity: Name, age range as an artistic description, face shape, eye colour, eye shape, nose and mouth proportions, hairstyle, and distinctive marks.
- Silhouette: Height impression, build, posture, coat shape, sleeve length, and the outline that should remain recognisable at a distance.
- Costume: Garments, materials, fasteners, colour blocks, footwear, and items that never change between scenes.
- Palette: Main colours, accent colours, shadow colour, skin treatment, and the lighting conditions that may alter them.
- Props: Weapons, glasses, bags, jewellery, cybernetic parts, or other story objects. Mark permanent equipment as permanent.
- Performance: Neutral expression, anger, fear, fatigue, joy, and the physical habits that define the character.
- Camera references: Front, three-quarter, profile, close-up, medium shot, and full-body views.
Generate a storyboard before writing motion prompts. Decide who appears in each shot, where they stand, which direction they face, what prop they hold, and how the camera moves. This prevents a model from inventing a new relationship between characters just because the prompt didn't specify screen direction.
<a id="generate-short-shots-and-review-the-joins"></a>
Generate short shots and review the joins
Use short clips rather than asking for a complete scene in one render. Short generation makes it easier to compare the final frame of one shot with the opening frame of the next, and it limits the amount of material you discard when identity or motion breaks.
A strong reference-to-shot pipeline looks like this:
- Create or select the cleanest approved character image.
- Describe the location and action without rewriting the character's identity in contradictory language.
- Specify framing, camera movement, lighting, and screen direction.
- Generate a short preview.
- Review it while moving, not only as screenshots.
- Regenerate defective shots from the original reference instead of recycling a degraded output.
- Extend an approved clip when the next beat shares its camera, lighting, and motion.
When a clip needs a new environment, a saved character tag can help insert the subject into that setting. When the performance depends on a particular pose or expression, a direct reference image may work better than a tag. The right choice depends on whether you need reliable character insertion or precise acting.
The production teams described in this practical account of style drift in AI anime videos found the same trade-off. Early, clean references were more dependable than repeatedly recycling generated images, while clip extension helped preserve continuity between connected beats.
<iframe width="100%" style="aspect-ratio: 16 / 9;" src="https://www.youtube.com/embed/MbQv8zoNEfY" frameborder="0" allow="autoplay; encrypted-media" allowfullscreen></iframe>A character bible doesn't make the model perfect. It gives you a stable baseline for judging whether a new shot is acceptable.
<a id="writing-prompts-and-configuring-anime-styles"></a>
Writing Prompts and Configuring Anime Styles
A useful anime prompt describes a shot as a director would, not as a pile of attractive adjectives. Separate the prompt into subject, action, framing, lens, lighting, palette, and style so you can identify which variable caused a change.
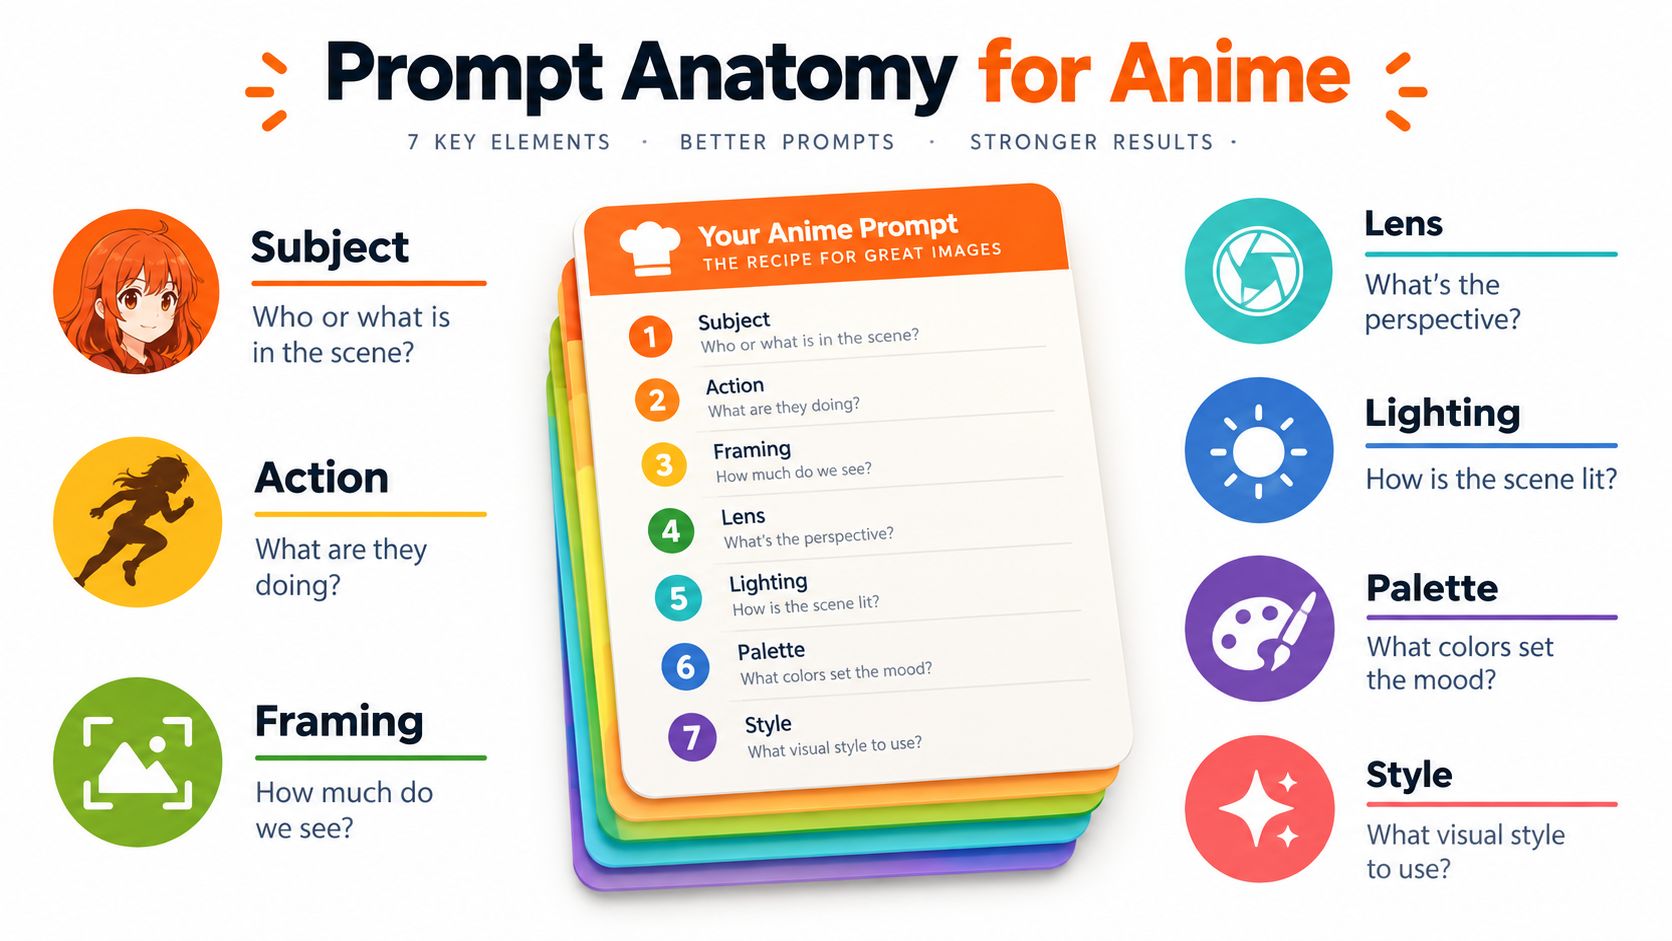
A loose prompt might say:
“A cool anime hero walking through a city at night, cinematic and dramatic.”
It gives the model a mood but leaves the production decisions open. A structured version might say:
“The approved silver-haired courier walks slowly from left to right through a rain-soaked shopping street, medium tracking shot, three-quarter rear view, restrained camera movement, cool blue shadows with warm shop-window accents, clean 90s cel-shaded linework, readable face, stable coat silhouette, cinematic night lighting.”
The second prompt doesn't guarantee a good clip. It reduces ambiguity. You can then change one element at a time rather than rewriting the entire request after every failure. For a deeper breakdown of prompt construction, use this guide to text-to-video prompts.
<a id="decide-what-to-lock"></a>
Decide what to lock
Strict style locking protects a series from visual drift. It works well when the project depends on a recognisable house style, a recurring cast, or continuity between social posts. The trade-off is reduced variation. If every shot uses identical framing, lighting, and line treatment, the result can feel mechanical.
Looser style settings help during exploration. They can reveal a better background treatment or a more expressive pose, but they also make it harder to match an approved reference. Explore broadly with disposable tests, then tighten the style and character controls before final rendering.
Negative prompts can suppress recurring defects. Use terms such as extra fingers, malformed hands, duplicate limbs, warped face, flicker, unstable background, photorealistic skin texture, inconsistent costume, changing eye colour, and text artifacts when the model responds to them. Don't treat a negative prompt as a repair tool. If the composition is wrong or the character identity has already collapsed, regenerate from a better reference.
<a id="keep-a-usable-generation-log"></a>
Keep a usable generation log
Record the prompt, negative prompt, model, reference image, seed, aspect ratio, motion setting, and date for each approved shot. A seed can help you explore nearby variations while retaining some visual relationship to the original, but it isn't a guarantee of identity. Keep it when the variation is useful. Abandon it when it traps you in a broken pose or repeats the same defect.
Your log turns accidental success into a repeatable process. It also lets you compare the approved shot with the earliest clean reference when style drift appears after multiple image-to-image passes.
<a id="adding-voice-animation-and-lip-sync-that-actually-holds-up"></a>
Adding Voice, Animation, and Lip-Sync That Actually Holds Up
Dialogue should be approved before facial animation begins. If you animate first and rewrite the line later, you create unnecessary work because the mouth timing, pauses, expression, and head movement all depend on the final audio.
Record or synthesise clean speech, remove long silences, and normalise the loudness. Then segment the transcript into phrases and map the audio to phonemes or a compact set of visemes. The mouth layer should follow the voice, while head movement, blinking, brows, and emotional expression remain on separate control layers.
<a id="use-the-audio-as-the-timing-authority"></a>
Use the audio as the timing authority
A dependable dialogue pipeline looks like this:
- Voice track: Approve the performance, pronunciation, pacing, breaths, and emotional emphasis.
- Transcript: Mark pauses, emphasis, interruptions, and words that need clear articulation.
- Phoneme or viseme timing: Map sounds to mouth shapes rather than relying on a generic open-and-close cycle.
- Facial animation: Drive mouth shapes from the timing data while controlling expressions independently.
- Manual correction: Fix plosives, fricatives, pauses, and moments where emotion changes faster than the default animation.
- Review: Watch the complete cut at normal speed and then at reduced speed.
Lip-sync failures are easy to spot in close-ups. A mouth can continue moving during silence, use the same shape for different consonants, or smile while the voice conveys fear. Research on lip-sync animation defines the core task as matching mouth movement to phonemes, while anime-generation evaluation treats subject consistency, motion smoothness, image quality, and background consistency as distinct concerns. The research on lip-sync animation and anime-generation evaluation supports separating these checks instead of treating a visually attractive frame as proof that the shot works.
Audio rule: Don't ask the face to invent timing that already exists in the voice track.
Use clean mono speech and consistent sampling settings across the project. Add explicit pause markers to the transcript. In a close-up, inspect every dialogue cut at full speed and reduced speed, looking for visible one-to-three-frame offsets. Reject a shot with a clear offset, identity change, or facial jitter rather than hiding the defect with captions.
Voice quality also depends on acting direction. A polished voice library with controlled pacing, breath, and emphasis can give an anime character more usable performance than raw text-to-speech, but no voice system can rescue an unclear line reading. Choose the voice before animation, then judge the image and audio as one performance.
<a id="assembling-upscaling-and-exporting-for-social-platforms"></a>
Assembling, Upscaling, and Exporting for Social Platforms
Approved shots become a finished video in the edit. Generation only supplies usable pieces. Place each clip against the script, voice track, or music, then cut on movement when it supports the action. Preserve screen direction so the audience can track where characters stand relative to one another. Add captions after timing and shot order settle, because even a small dialogue change can require a new caption pass.
Choose the master frame before generating replacement shots. 9:16 fits vertical short-form feeds, 1:1 protects a square composition where cropping is aggressive, and 16:9 keeps wider cinematic framing intact. Keep faces, subtitles, and story-critical props within a central safe area. A strong reference-to-shot workflow accounts for the final crop before animation begins, rather than trying to rescue missing information during export.
<a id="export-choices-for-common-anime-video-platforms"></a>
Export choices for common anime video platforms
| Platform | Aspect Ratio | Resolution | Caption Style | Audio Target |
|---|---|---|---|---|
| TikTok | 9:16 | Platform-compatible vertical master | Large burned-in captions with high contrast | Clear dialogue over music |
| Instagram Reels | 9:16 | Platform-compatible vertical master | Short phrase captions, strong emphasis | Dialogue-first mix |
| YouTube Shorts | 9:16 | Platform-compatible vertical master | Readable captions with restrained animation | Voice and effects separated |
| Instagram feed | 1:1 | Square master with protected edges | Compact captions below the face | Balanced voice and music |
| YouTube horizontal | 16:9 | Horizontal master | Subtitle-safe lower third | Cinematic dialogue mix |
Render at the platform's preferred delivery size. A larger file does not automatically survive compression better. Upscaling can restore detail in approved artwork, but it cannot correct a drifting eye, warped hand, broken silhouette, or mistimed mouth. Use an AI image upscaler for still references and assets that need more detail, then compare the result with the original character and style references before feeding it into motion generation.
<a id="build-a-publishing-checklist"></a>
Build a publishing checklist
- Master edit: Confirm every approved shot is in the intended order, and check that transitions do not reveal continuity breaks.
- Captions: Review spelling, line breaks, timing, contrast, and safe-area placement on the actual target frame.
- Music: Make sure the track supports dialogue and that you have permission to publish it.
- Voice versions: Create translated or re-voiced cuts only after the original timing is approved, so new lines do not conceal edit problems.
- Clean exports: Confirm watermark-free delivery and the commercial rights attached to your plan.
- Compression review: Watch the uploaded version, not only the local master. Fine lines, dark backgrounds, and small facial details can lose clarity after platform processing.
- Archive: Store the final edit, source clips, references, audio, captions, and generation log together.
If a shot fails after assembly, replace the shot or rebuild the affected pass. Repeatedly upscaling or recompressing a damaged render usually makes artifacts more visible. For source-video review outside the editor, use documented legal MP4 download methods instead of unofficial browser extensions or copied files. Traceable media handling matters when a project includes client-owned references or licensed audio.
<a id="troubleshooting-workflow-habits-and-where-ai-anime-is-heading"></a>
Troubleshooting, Workflow Habits, and Where AI Anime Is Heading
The fastest fix for a bad anime shot is usually regeneration, not a cleverer prompt. Prompt editing helps when the model misunderstood a clear instruction. It wastes time when the underlying reference is weak, the pose is impossible, or the clip has already accumulated identity drift.
Use a simple triage:
- Flicker: Shorten the shot, reduce unnecessary background detail, and compare adjacent frames before approving.
- Identity drift: Return to the earliest clean character reference instead of recycling the damaged output.
- Warped anatomy: Simplify the action, change the framing, or regenerate from a clearer pose.
- Mouth offset: Rebuild the facial pass from the approved audio timing and inspect the cut at reduced speed.
- Unstable background: Use a stronger location reference, limit camera movement, or separate the foreground subject from the environment.
- Style drift: Compare the render with the original style reference and stop feeding progressively altered images back into the pipeline.
<a id="habits-that-compound"></a>
Habits that compound
Keep approved character bibles, location references, prompt templates, voice settings, and successful shot configurations in a searchable library. Record not only what worked, but also which references caused recurring failures. Over time, you'll spend less effort rediscovering a stable costume description or a reliable close-up setup.
Review the workflow itself when projects stall. A resource such as find workflow bottlenecks can help you examine handoffs, waiting points, duplicate approvals, and unclear ownership. In AI video, the bottleneck often isn't generation speed. It's deciding which render is acceptable and preserving the information needed to reproduce it.
Research and production practice point toward longer coherent sequences, native audio generation, recurring-character voice systems, and more integrated ideation. Those capabilities may reduce manual work, but they won't remove the need for storyboards, reference control, temporal review, and editorial judgement. The strongest near-term workflow remains assisted production: let AI explore and render, then let a human approve the performance.
Start with one character, one location, and a short sequence. Create the bible, generate the cleanest reference still you can, produce short shots, approve the audio before lip-sync, and edit only the clips that survive temporal review. Ignore the promise of an autonomous full episode until the tools can preserve identity and acting intent without supervision.
ClipNova brings scripting, anime-style generation, voiceover, captions, music, and multi-aspect export into one AI video studio for short-form production. Use it to turn a scene concept into editable visual and audio assets, then apply the continuity checks in this guide before publishing. Visit ClipNova to test the workflow with your next anime short.
Ready to ship your own?
Start creating viral videos with AI in under twenty minutes, no credit card required.