
Most advice on how to make a product video starts with the wrong deliverable: one polished “hero” video. That approach looks efficient in a production plan, but it often produces a single asset that tries to serve cold social traffic, retargeting, product pages, email, and customer support at once. The result is usually a video that's too slow for discovery, too shallow for evaluation, and too sales-heavy for post-purchase education.
A product video works better as a system of funnel-stage variants. Product pages with embedded video convert at 4.8% on average, compared with 2.9% without video, a 65% lift, according to e-commerce video marketing research. That doesn't mean every video will produce the same outcome. It means the asset has to answer the viewer's current question quickly, whether that question is “What is this?”, “Does it work?”, or “Why should I buy now?”
Table of Contents
- Why Your Product Video Should Be a System, Not a Single Cut
- Planning the Right Cut Before You Touch a Single Tool
- Script and Voiceover That Earn the First 3 Seconds
- Visuals, Captions, and Music That Carry the Watch-Through
- Aspect Ratios and Export Specs Without the Guesswork
- A/B Testing the Creative Elements That Actually Move Numbers
- Your 14-Day Product Video Launch Checklist
<a id="why-your-product-video-should-be-a-system-not-a-single-cut"></a>
Why Your Product Video Should Be a System, Not a Single Cut
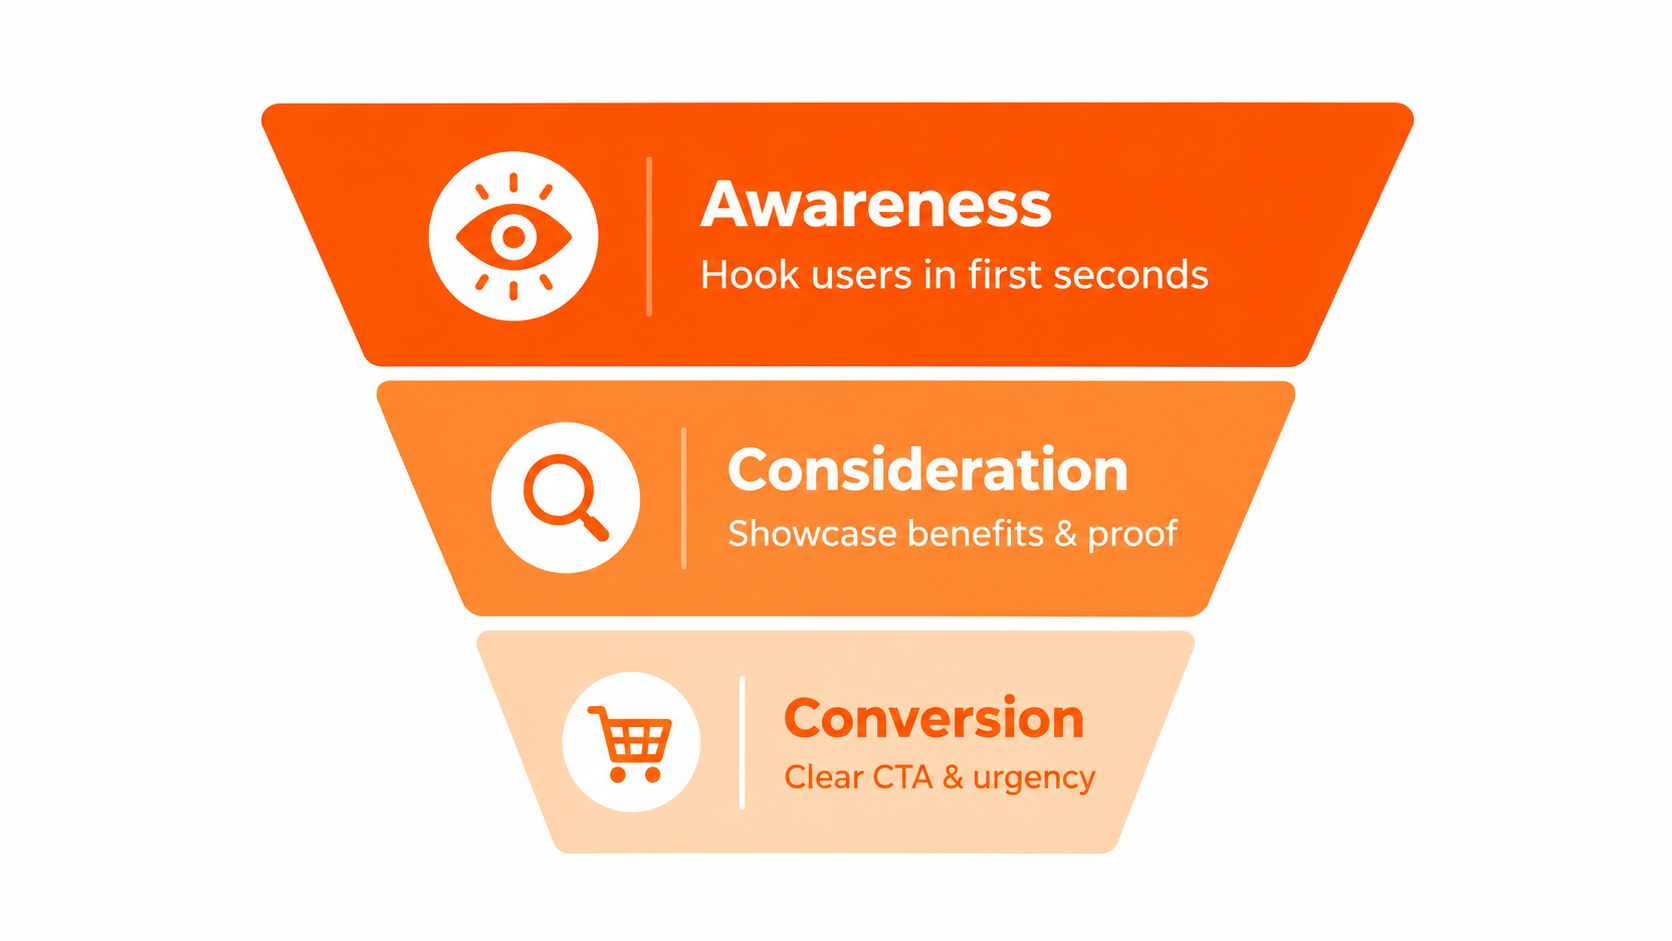
One polished video rarely performs well across every audience. A cold viewer needs a fast interruption, a warm viewer needs proof, and a shopper comparing options needs a reason to choose your product. Each job calls for a deliberate variant, not a longer master cut.
A practical product-video system includes:
- Discovery cut: A brief visual hook that makes the problem recognizable before the viewer scrolls.
- Consideration cut: A compact demonstration showing the product in use, with close-ups that answer practical questions.
- Conversion cut: A clear offer, objection handling, trust signal, and direct call to action.
- Support cut: A tutorial or setup walkthrough that reduces confusion after purchase.
Shoppers often need to see function rather than read another feature list. Research cited by Webtonic reports that 75% of consumers prefer video when learning about a product, while 90% say video helps them decide and 85% say it influenced a purchase. Show the item working, not merely rotating against a polished background.
<a id="build-variants-around-intent"></a>
Build variants around intent
A master cut still has value. It can provide footage, product shots, voiceover, and proof points for shorter versions, but it should not be the only finished asset. Retargeting may need a stronger objection response, while discovery needs faster pacing and less explanation.
Producing those variants can require separate tools for ideation, scripting, voiceover, editing, captions, music, and resizing. A unified workflow such as automated video production in ClipNova keeps those steps in one studio, making an idea-to-export process more practical for a small team.
Connect each cut to the merchandising work around it. A useful companion resource explains how to optimize product listings for DTC, because the video, product page, offer, and supporting copy should reinforce the same buying argument.
<a id="planning-the-right-cut-before-you-touch-a-single-tool"></a>
Planning the Right Cut Before You Touch a Single Tool
The first production decision isn't the camera, template, or AI model. It's the job of the cut.
For each variant, write down five decisions:
- Goal: Are you trying to earn a click, sustain viewing, or move an interested shopper toward purchase?
- Audience: Is the viewer cold, familiar with the problem, or already engaged with the product?
- Hook: Will you lead with the problem, the result, the mechanism, or an objection?
- Funnel stage: Is this awareness, consideration, conversion, or support?
- Format: How much explanation can the placement support without slowing the viewer down?
Consider a $49 ergonomic pillow brand with no existing video library. The team has three retargeting audiences: product-page visitors, cart abandoners, and email subscribers. A vague brief might ask for “a product video.” A useful brief identifies separate jobs, such as demonstrating the pillow's shape to product-page visitors, addressing comfort and return concerns for cart abandoners, and presenting the offer to subscribers.
| Funnel Stage | Audience Temperature | Target Length | Recommended Hook Angle |
|---|---|---|---|
| Awareness | Cold scrollers | Short highlight cut | Problem recognition or visual result |
| Consideration | Product-page visitors | Concise demo | Mechanism, use case, or comparison |
| Conversion | Cart abandoners and subscribers | Direct-response cut | Objection handling, proof, and CTA |
The matrix keeps the team from producing twelve versions when three will answer the immediate questions. It also prevents the opposite mistake, creating one generic edit and forcing every audience to decode it.
<a id="use-the-brief-to-control-production"></a>
Use the brief to control production
ClipNova's ideation prompt and AI assistant can turn a product description into stage-specific angles, scripts, and variant prompts. The useful output isn't a finished video by itself. It's a structured starting point that gives the editor a reason for every scene.
The same discipline helps when you're studying broader marketplace growth. For example, teams working across channels can use practical material on Amazon scaling strategies from Headline to keep product positioning consistent instead of creating disconnected marketplace and social messages.
Planning saves render hours because it exposes conflicts before production begins. If the goal is click-through, the opening and CTA deserve more attention than a decorative transition. If the goal is product understanding, the script needs room for a clear demonstration.
<a id="script-and-voiceover-that-earn-the-first-3-seconds"></a>
Script and Voiceover That Earn the First 3 Seconds
Your script and voiceover should be treated as one creative decision. A strong line can fail when the voice sounds too formal, and a natural read can fail when the captions break at the wrong words.
Open with a number-led promise, mechanism tease, or objection pre-empt. For the fictional $49 pillow, a hook might read:
Bad sleep costs you 11 days a year. This molded foam fixes the cervical angle in 8 minutes, without the $300 chiropractor visit.
Those figures are part of the example brief, not universal product claims. The structure is what matters. The first sentence identifies the pain, the second introduces a mechanism, and the final phrase neutralizes a likely price or alternative objection.
<a id="write-for-the-edit-not-the-page"></a>
Write for the edit, not the page
Put the strongest visual beside the strongest phrase. If the voice says “molded foam,” show the foam profile. If it says “cervical angle,” use a simple side-by-side posture visual or close-up that makes the shape understandable. Don't ask the viewer to absorb a technical claim while watching unrelated lifestyle footage.
On-screen text should carry the central point even when sound is off. Use short phrases, readable contrast, and deliberate pauses. A clever tagline often looks polished in a presentation but does little for comprehension if it doesn't identify the problem or outcome.
A Talking Avatar can provide a presenter-led version without scheduling a shoot, while a curated 32-language voice library supports localized variants without hiring and re-recording a voice artist for every cut. For teams testing several angles, that matters because the voice can change with the audience while the product footage remains reusable. You can also compare different approaches to AI voiceover tools before committing to a final read.
<iframe width="100%" style="aspect-ratio: 16 / 9;" src="https://www.youtube.com/embed/QGTW-70oWEQ" frameborder="0" allow="autoplay; encrypted-media" allowfullscreen></iframe>Test the script and voice together. If the read is too slow, captions may linger awkwardly. If the read is too energetic, a careful demonstration may feel rushed. Record a rough version first, then cut visuals and captions to that rhythm before polishing the final audio.
<a id="visuals-captions-and-music-that-carry-the-watch-through"></a>
Visuals, Captions, and Music That Carry the Watch-Through
The middle of a product video has one responsibility: prove that the opening promise deserves attention. Static product beauty shots rarely do that on their own. They establish appearance, but they don't always explain use, texture, fit, setup, or outcome.
Start with three B-roll archetypes:
- Hero: The complete product in a clean, recognizable composition.
- Proof: The product solving the stated problem in a realistic use case.
- Detail: Close-ups of material, mechanism, controls, packaging, or fit.
Use short B-roll passages, then change the visual perspective before the sequence feels repetitive. Hands-on use, unboxing, close-ups, and outcome shots each restore attention in a different way. The exact rhythm depends on the voiceover, but every cut should either clarify the product or renew interest.
<a id="make-captions-part-of-the-composition"></a>
Make captions part of the composition
Captions aren't a transcript pasted over the finished video. They're a second layer of persuasion for viewers watching without sound.
Keep text away from platform controls and visual clutter. Short chunks are easier to scan than full sentences, especially when the speaker is moving quickly. A practical style uses three-to-four-word caption groups, hard cuts at phrase breaks, strong contrast, and a brief hold on the central punchline.
The caption track should follow the voiceover's phonemes, not merely its sentence endings. That alignment makes the video feel faster without increasing speech speed. ClipNova's auto subtitles and caption styles, including Hormozi-style treatments, can reduce the manual timing work. Guidance on how to add subtitles to a video is also useful when you're building a repeatable caption workflow.
<a id="let-music-support-the-message"></a>
Let music support the message
Music should establish energy without competing with the product explanation. Beat-match transitions to caption changes when the track supports that approach, but don't force every cut onto a beat if it damages comprehension.
ClipNova's Music-to-Video workflow can automate beat matching, which is useful for fast variant production. The editor still needs to check the result. A technically synchronized cut can look artificial if it interrupts a product action halfway through.
<a id="aspect-ratios-and-export-specs-without-the-guesswork"></a>
Aspect Ratios and Export Specs Without the Guesswork
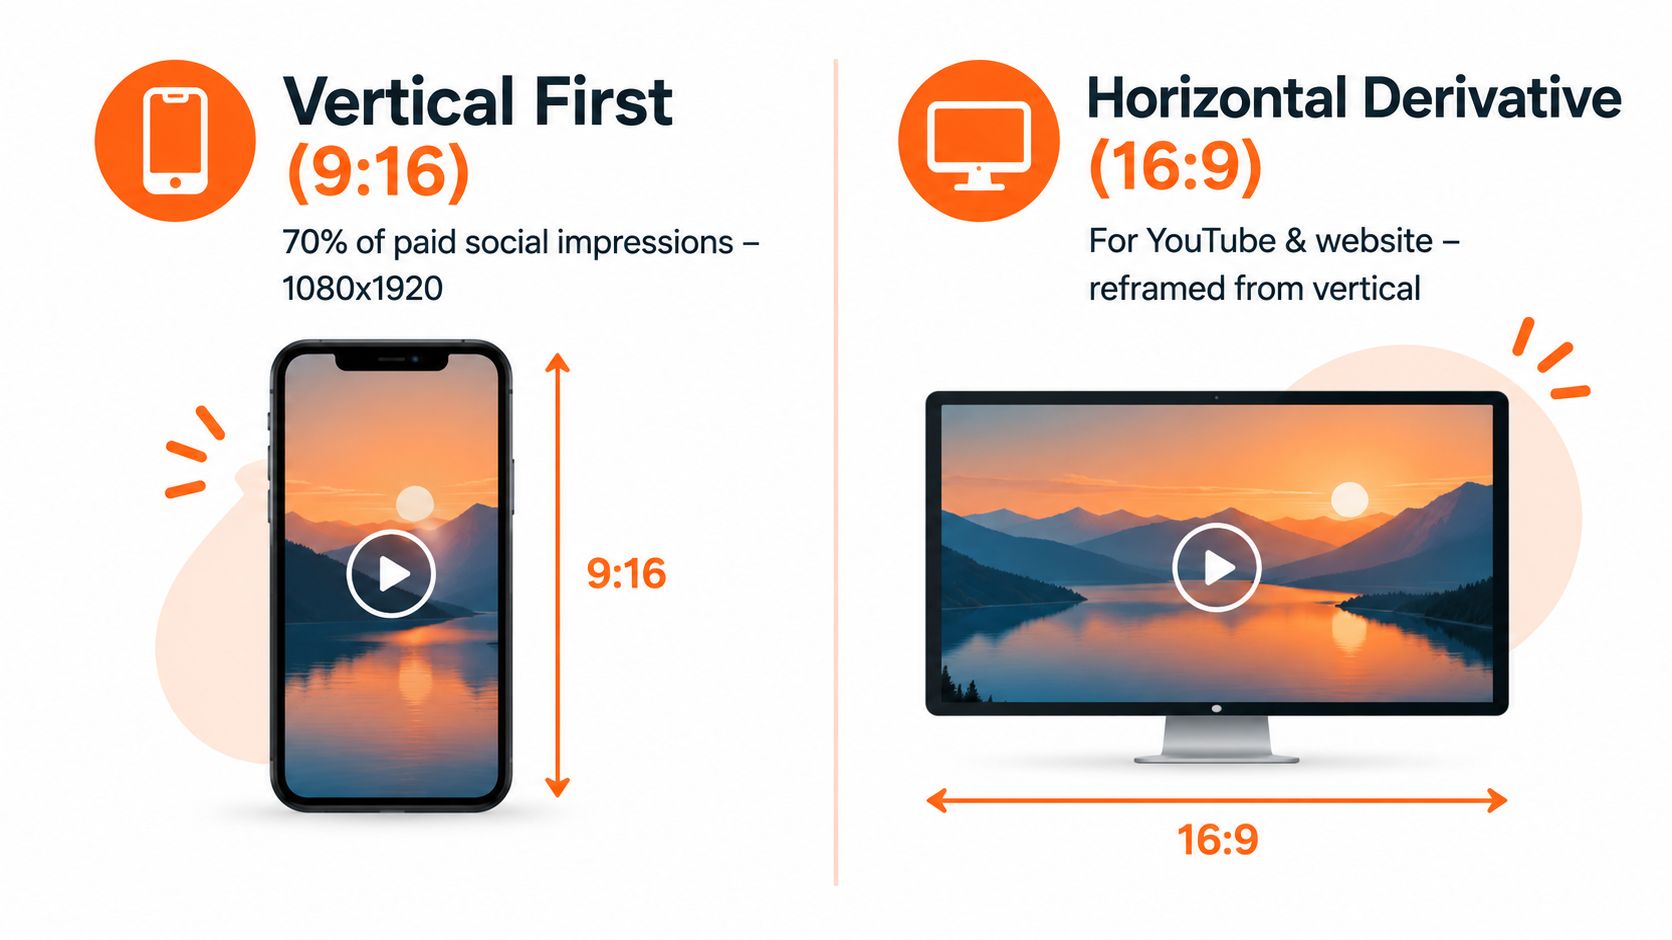
Start with a vertical master, then build funnel-stage variants from it. In the cited dataset, 97% of rendered video ads used the 9:16 format, supporting a vertical-first workflow for commerce and direct response according to this ad creative performance benchmark.
Horizontal placements still matter for desktop inventory, while square can suit other feeds. Derive 16:9 and 1:1 from the vertical composition rather than rebuilding each cut from scratch. Keep the product, hands, text, and CTA within a central safe area. That preserves the selling information when the frame is cropped.
<a id="choose-practical-exports"></a>
Choose practical exports
For short product ads, a clean 1080p export usually covers review and delivery needs. Choose higher resolution when texture, small construction details, or premium materials carry the sales argument. Otherwise, larger files slow review and upload without improving the viewer's decision.
Before publishing, check logo visibility, text overlay, voiceover, and duration. Google Ads surfaces creative-quality checks within 72 hours after launch, creating a quick feedback loop for those components, as noted in the same ad creative benchmark. Use filenames that record the audience, funnel stage, hook, duration, and aspect ratio.
ClipNova's all-in-one studio supports 9:16, 1:1, and 16:9 exports, plus watermark-free 1080p and 4K output on paid plans. Presets turn one approved idea into platform-ready derivatives without rebuilding the timeline.
<a id="ab-testing-the-creative-elements-that-actually-move-numbers"></a>
A/B Testing the Creative Elements That Actually Move Numbers
Creative testing fails when the team changes everything at once and then calls the winning ad “better.” That's a preference test, not a useful experiment.
Start with four variables that affect how the viewer receives the message:
| Variable | Variant A, Control | Variant B, Test | Expected CTR Lift |
|---|---|---|---|
| Logo | Small corner logo | No logo or earlier brand reveal | Qualitative directional test |
| Overlay copy | Benefit statement | Proof or mechanism statement | Qualitative directional test |
| Voiceover | Conversational read | Alternate delivery or voice | Qualitative directional test |
| Duration | Longer explanatory cut | Shorter focused cut | Qualitative directional test |
The final column should remain a hypothesis. No fixed lift is guaranteed because performance depends on audience, offer, placement, and auction conditions.
<a id="keep-the-test-interpretable"></a>
Keep the test interpretable
Hold the offer, audience, and budget constant while testing one creative variable. A sequential process is easier to interpret than a large launch where the hook, voice, music, caption style, and duration all change together.
Use platform feedback quickly. The cited creative benchmark reports that ads under 30 seconds produced higher Brand Awareness, Favourability, Search Intent, and Consideration Intent than longer ads, with lifts of 5 points, 7 points, 20 points, and 19 points respectively in the Digital Doughnut summary. That supports testing a tight cut against a longer explanation, but it doesn't tell you which version will win for your product.
Messaging placement matters too. The same source reports that text occupying 40% to 60% of the frame produced 39% higher CTR than messaging under 20% of the frame. Keep text readable, but don't let captions cover the product or become a wall of copy.
For more context on experimental discipline, this guide to how A/B testing boosts growth is a useful reference. In practice, generate variants in the same session. Clone the timeline, change one element, export, and log the result. The workflow only becomes a growth advantage when testing happens regularly.
<a id="your-14-day-product-video-launch-checklist"></a>
Your 14-Day Product Video Launch Checklist
A two-week launch plan works when each day produces a decision, not just activity. Keep the first version intentionally modular so the same footage can support discovery, consideration, conversion, and support cuts.
<a id="days-1-through-4"></a>
Days 1 through 4
Day 1: Lock the product, funnel stage, objective, and primary KPI for each cut. Define three hook directions before writing the full script.
Day 2: Map the audience's main question and objection. Separate what a cold viewer needs from what a cart abandoner already knows.
Day 3: Write the longer master scripts and shorter derivatives in parallel. Use Talking Avatar previews to judge voice energy before finalizing the narration.
Day 4: Approve the message hierarchy. If the script still lists features without showing the buyer's outcome, revise it before generating visuals.
Outsourcing can help. A specialist copywriter or creator can improve the angle when the team lacks customer insight. Automation is more useful once the decisions are clear and repeatable.
<a id="days-5-through-10"></a>
Days 5 through 10
Day 5: Generate the hero, proof, and detail B-roll set. Label clips by funnel stage so the editor doesn't reuse a discovery shot for an objection-handling sequence.
Day 6: Burn in captions and run a music beat-matching pass. Check every caption on a mobile-sized preview.
Day 7: Render the 9:16 master first. Derive 1:1 and 16:9 from the same timeline, then inspect the safe areas rather than trusting automatic reframing.
Days 8 and 9: Produce four controlled variants, such as logo treatment, CTA overlay, voice style, and duration. Change one variable at a time where possible.
Day 10: Export the required resolutions without watermarks. Create a naming system that includes product, audience, stage, hook, duration, and format.
<a id="days-11-through-14"></a>
Days 11 through 14
Days 11 to 13: Launch the variants with a controlled traffic split. Read CTR and hold-rate at the first review point, remove weak ads according to your predefined rule, and duplicate the strongest creative into the next test.
Day 14: Record what the audience responded to, including the hook, proof style, voice, caption treatment, and objection. Turn those findings into a reusable brief so the next production cycle starts with evidence rather than a blank document.
Don't automate customer insight, claims approval, or final brand judgment. Automate repetitive assembly, voiceover variants, captions, beat matching, resizing, and exports. That division keeps the workflow fast without turning every product video into the same template.
Use ClipNova to turn one product brief into funnel-stage scripts, voiceovers, visuals, captions, music, and platform-ready variants in a single studio. Start with your product page or a clear product image, create the discovery and conversion cuts first, then export the formats your campaigns need and put them into a controlled test.
Ready to ship your own?
Start creating viral videos with AI in under twenty minutes, no credit card required.