
You've got a good script, your camera is charged, and you already know you'll hate the third take. So you upload one decent selfie, generate an avatar, and get a single impressive still that falls apart the moment it speaks, turns, or gets cropped for a phone. That's the usual trap.
If you're learning how to create an avatar of yourself, treat it as a reusable production asset, not a portrait. Judge it across aspect ratios, scripts and voices. One realistic frame proves very little. A usable avatar holds its identity when it smiles, pronounces awkward names, and appears vertical on Tuesday and horizontal on Friday.
Table of Contents
- What Reference Material Your Avatar Needs
- Choose How You Are Represented
- How to Build Your Avatar Step by Step
- Write the Script and Choose a Voice
- Fixing Uncanny Faces, Lip Sync and Voice Problems
- Privacy, Consent and Disclosure Before You Publish
- Export Settings and Publish Readiness
<a id="what-reference-material-your-avatar-needs"></a>
What Reference Material Your Avatar Needs
| Reference | What to Capture | What to Avoid |
|---|---|---|
| Front-facing photo | One high-resolution neutral portrait in even light | Autofocus blur, glasses glare, heavy makeup, hair covering the face |
| Head-turn and nod clip | Left and right turns, nods and slow blinks for 20 to 30 seconds | Fast movement and extreme angles |
| Expression clip | Smiling and speaking frames in the same setup | A single selfie as the only reference |
| Speaking clip | Natural talking to camera with varied sounds, 1 to 2 minutes | Background noise, music, cut-off sentences |
| Voice sample | Clean, quiet speech read aloud for 1 to 3 minutes | Echo, room reverb, phone calls, heavy compression |
Start with that front-facing portrait in diffuse, even light. A window softened with a thin sheet or a softbox at roughly face height works well. Keep the camera at eye level, at a fixed distance, and lock focus before recording so autofocus doesn't hunt across your face.
<a id="shoot-movement-in-a-deliberate-order"></a>
Shoot Movement in a Deliberate Order
Record the head turns, nods and blinks slowly, then a relaxed smile, then a minute or two of talking to camera. Deliberately include sounds like "ee," "oo" and "th," because lip shapes vary more than expected. Wear the same outfit and keep the same lighting throughout, or the model may learn what looks like two different people.
That coverage matters because a single expression can't validate a riggable face. The PMC review of facial reconstruction methods notes that FaceScape contains 16,940 textured 3D faces from 847 subjects with 20 expressions per subject. You don't need that scale, but the principle scales down. More controlled expression beats one flattering selfie.
Remove glasses if they glare, pull hair away from your face and ears, and skip extreme expressions. Record your voice in a quiet room with no fan, music or echo. Decide now whether you'll clone your voice or use a library voice, because a clone depends on this sample.
Practical rule: Re-shoot a weak reference before you upload. Twenty extra minutes now costs less than retraining later.
Check every file against the table before moving on. If you later want motion from a still, our guide to turning a picture into video with AI covers that route, but it doesn't rescue a thin reference set. Your avatar is only as stable as what you feed it.
<a id="choose-how-you-are-represented"></a>
Choose How You Are Represented
Before you lock a look, list the visible traits you may want to show, soften or omit. A mobility aid, a scar, alopecia, a prosthesis, or facial expressions that don't follow a typical pattern all belong on that list. Treat each choice as reversible: a production decision for this project, not a permanent statement about who you are.
Work trait by trait:
- Keep it: Leave the trait visible in your references if it's part of how you want to be recognized.
- Soften it: Reduce prominence through framing, clothing or styling, without pretending it doesn't exist.
- Leave it out: Shoot a separate reference set only when you want that version.
- Save versions: Store each option as its own preset, such as full appearance and default look.
If a trait appears clearly in your reference photos, the model will carry it into the render. That is why this decision belongs before training. It also helps to separate two questions that often get merged: does this avatar look like me, and does it communicate like me? The answers don't have to be identical.
Representation control matters for accessibility as much as for style. An avatar you plan to reuse across scripts, voices and aspect ratios should start from the version of you that shows up on camera most days. Set your everyday appearance as the default preset, then hide or soften traits only when a specific project calls for it.
Keep at least two presets so the choice stays open at render time. For professional contexts where a conventional headshot sets the reference point, you can also create polished LinkedIn portraits and compare that version with a more personal one. Don't let a template push you into a stereotyped portrayal. I judge a preset by whether it still reads as you after a format swap; a sharp single frame proves very little on its own.
<a id="how-to-build-your-avatar-step-by-step"></a>
How to Build Your Avatar Step by Step
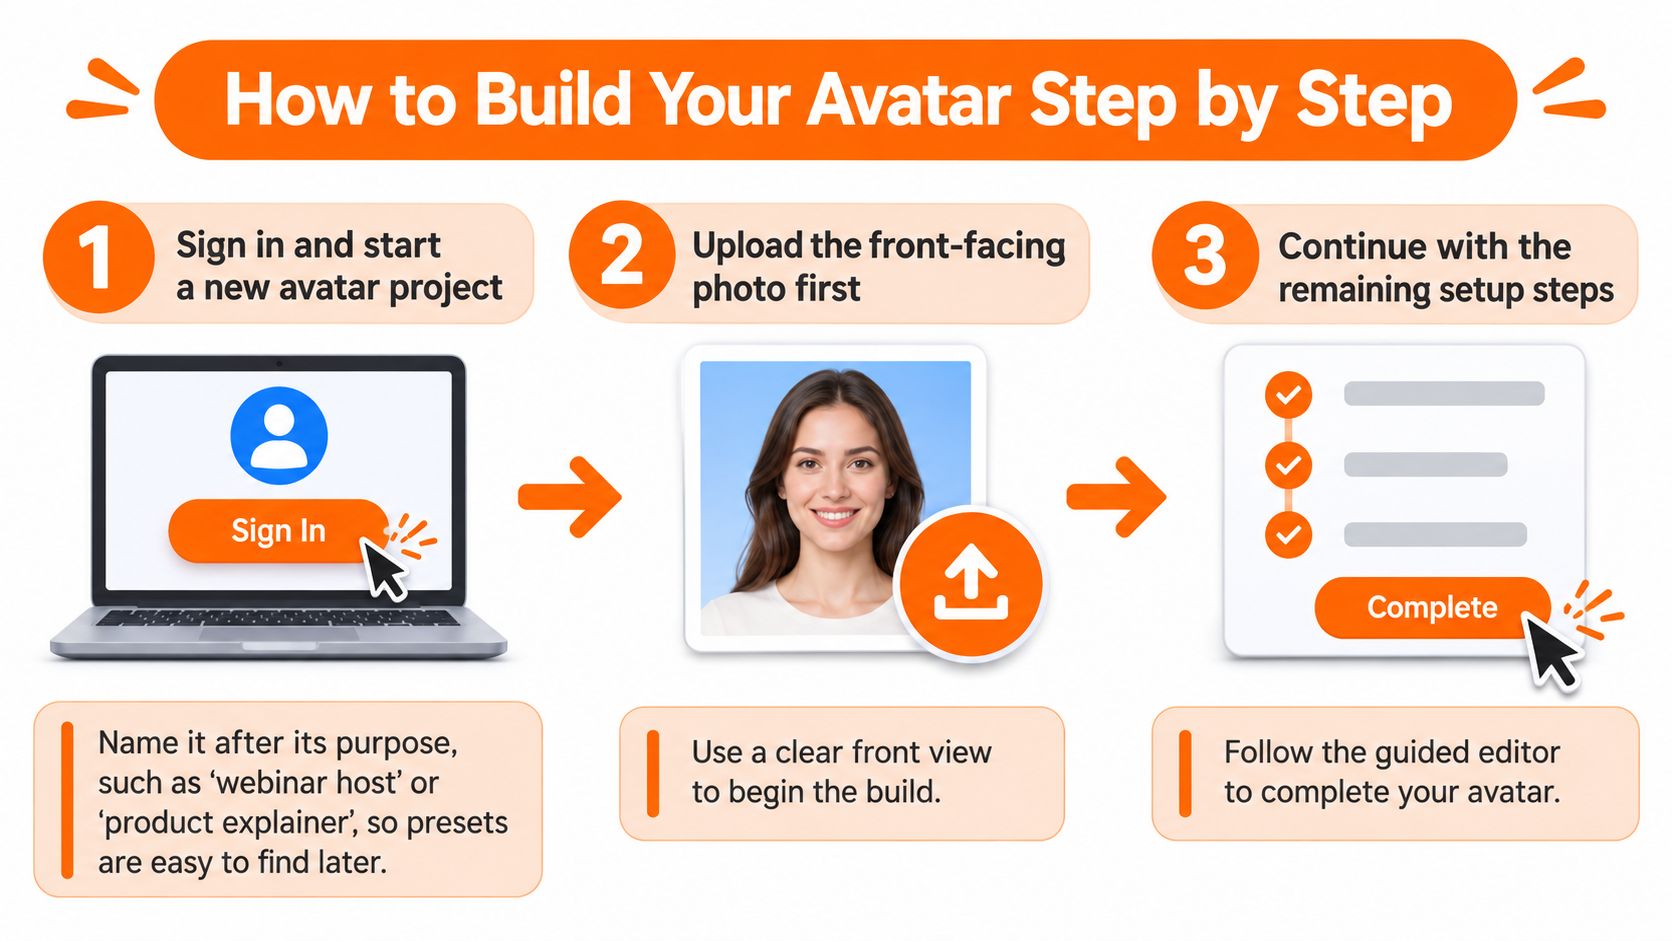
- Start a named project. Sign in and name the avatar after its job, such as webinar host or product explainer. Purpose-based names make presets easy to find when you've built several versions.
- Upload the front-facing photo first. Check the preview and crop so your face fills roughly half the frame. A tiny face gives the model too little detail around the eyes, teeth and hairline.
- Add expression clips separately. Upload head turns, nods and the smile clip as distinct inputs where the tool allows it. The model needs variety, not three copies of the same neutral mood.
- Add speech and voice. Upload the speaking clip and voice sample, then confirm the tool detects only your face and voice. A second person drifting through a clip can contaminate training in ways that are hard to undo.
- Train and wait for a complete status. This can take minutes or longer depending on how much material you supplied. Don't judge a half-processed preview.
- Review three test frames. Render neutral, smiling and speaking versions and flag any problem with eye alignment, lip closure or hairline. A healthy result keeps the eyes steady and your face recognizable across all three.
- Lock the look as a preset. Save face, hair and outfit together so future videos match. Log the date and the exact reference files used, so you can roll back if a later recording changes the result.
If one expression fails, add a clip for that expression rather than re-running everything. That discipline saves time and tells you what fixed it.
<a id="where-fashion-work-shows-the-same-principle"></a>
Where Fashion Work Shows the Same Principle
Consistency is the whole game once a character appears repeatedly. Tools offering AI virtual models for fashion face the same challenge at full-body scale, where outfit and pose have to stay coherent across a set. Your talking avatar is narrower, but the standard is similar.
Don't approve the avatar on one heroic front frame. Approve it on the worst of your three test frames.
That's the version your audience will eventually see at an unflattering pause point. If it still reads as you there, you've got an asset worth scripting for.
<a id="write-the-script-and-choose-a-voice"></a>
Write the Script and Choose a Voice
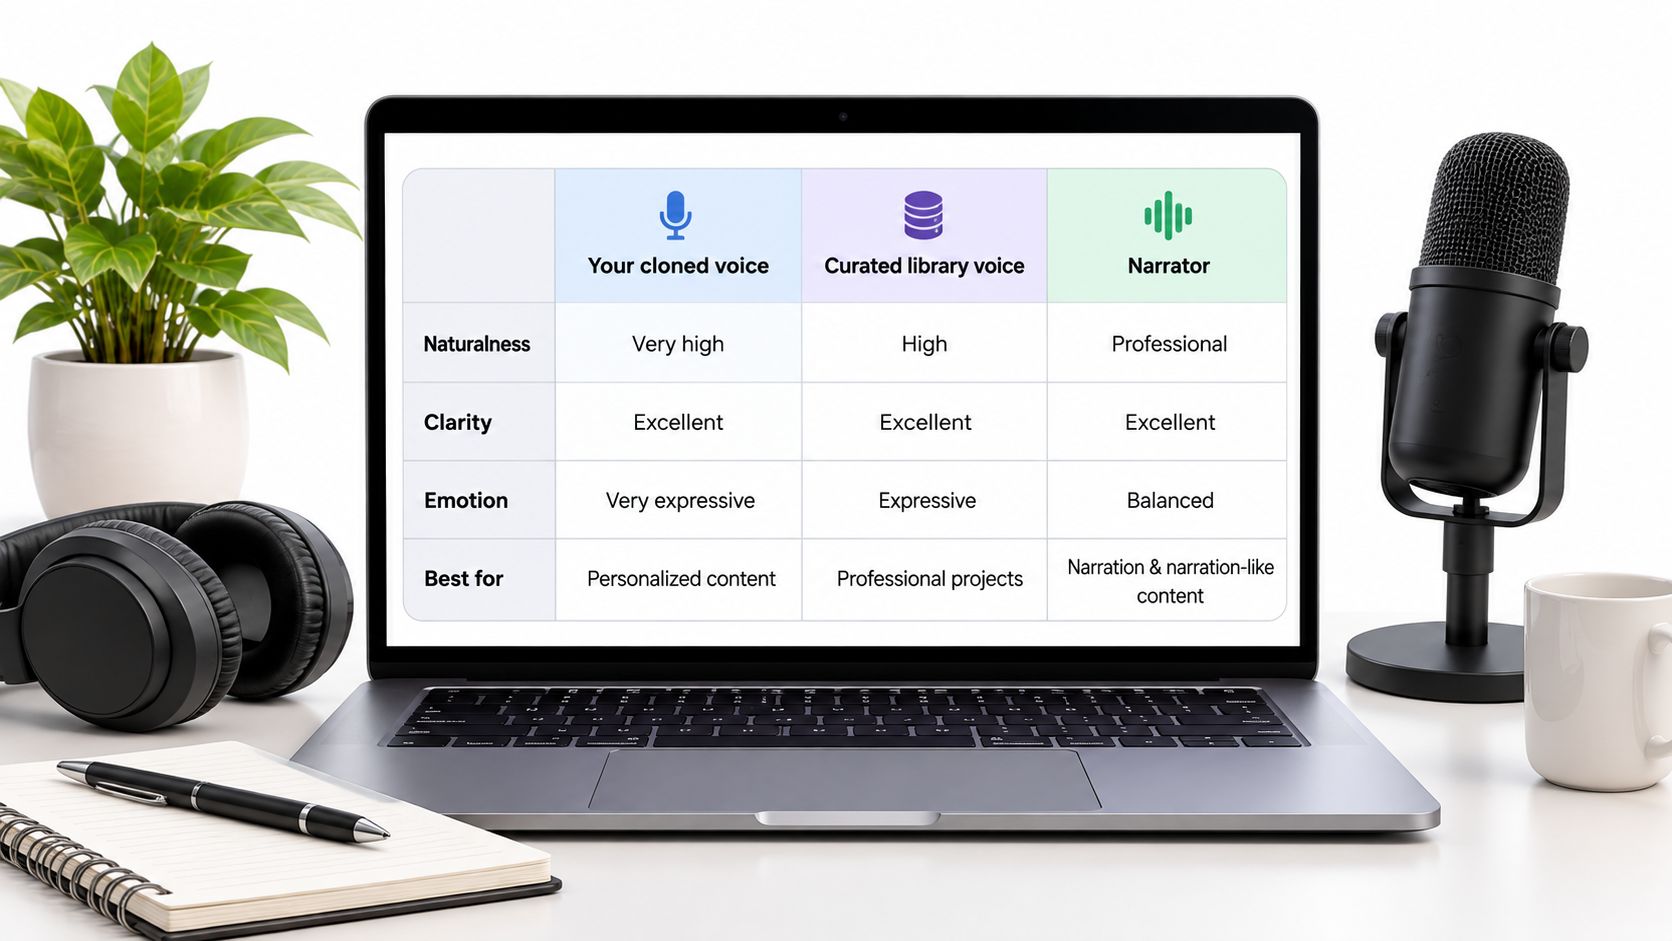
| Voice Option | Best For | What You Provide | Watch For |
|---|---|---|---|
| Your cloned voice | Personal brand and creator channels | Clean voice sample of 1 to 3 minutes | Pronunciation drift on names and technical terms |
| Curated library voice | Quick drafts and testing | Script only | Less personal; match tone to the avatar's look |
| Narrator voice | Explainers and voiceover without a talking face | Script and language choice | Does not speak as you |
| Localized voice | Same avatar in several languages | Separate script per language | Check accent and pacing in each language |
A cloned voice suits personal content, but only if the sample is clean and the pronunciation sounds like you. A library voice is faster for drafts and language tests, as our roundup of AI voiceover tools for short video explains. A narrator fits when the avatar doesn't need to speak in first person at all.
Whichever route you pick, write for the mouth. Keep most sentences between 8 and 15 words, because long clauses produce unnatural breath and visible lip-sync drift. Write numbers and abbreviations the way they should be spoken, so "two hundred" rather than "200" when that's what you want to hear.
<a id="script-habits-that-save-renders"></a>
Script Habits That Save Renders
- Punctuate for breath: Use commas and full stops to control pauses and emphasis.
- Respell stubborn names: Put a phonetic version in the script and test it in isolation.
- Pace explainers moderately: Aim for conversational speed, and slow down for instructional or emotional lines.
- Test before committing: Render a 10 to 15 second line first and listen for emphasis, pacing and mispronounced words.
If the accent or tone is wrong, switch voices instead of endlessly tweaking punctuation. Punctuation can fix rhythm. It can't turn the wrong voice into the right casting choice.
<a id="fixing-uncanny-faces-lip-sync-and-voice-problems"></a>
Fixing Uncanny Faces, Lip Sync and Voice Problems
| Symptom | Likely Cause | Fix |
|---|---|---|
| Lips drift out of sync | Long sentences or fast speech | Shorten sentences, slow voice speed slightly and regenerate that scene |
| Face looks waxy or uncanny | Harsh light or extreme expression in the source | Re-record references in diffuse light with a neutral expression |
| Voice sounds like another person | Noisy or compressed voice sample | Record a clean sample and retrain the voice |
| Identity drifts between scenes | Too few reference angles | Add turns, nods and a saved look preset |
| Teeth or jaw artifacts | Low resolution or motion blur | Use a sharper, higher-resolution source and steady camera |
| Names mispronounced | Unusual spelling | Respell phonetically in the script and test a short line |
| Hair edges flicker | Flyaway or covering hair | Pull hair back in the reference and add even lighting |
Start with the most common failure, lip-sync drift in long sentences. Shorten the line, slow the voice slightly, and regenerate only that scene. If you want the underlying production logic, you can explore lip sync production steps and you'll see why timing problems are usually script and audio problems before they're animation problems.
A waxy face usually points back to harsh light or an extreme expression in your source footage. Don't try to polish that at render stage. Re-record the reference. The same applies when the voice sounds like a stranger, which almost always means the sample was noisy, compressed or recorded too far from the microphone.
<a id="fix-in-order-of-cost"></a>
Fix in Order of Cost
Quick fixes include script edits, voice speed changes and regenerating one scene. Slow fixes include re-recording references and retraining. Work through one change at a time, or you won't know which change helped.
Production habit: Change one variable, regenerate one scene, and compare. Batch fixes hide the cause.
Finally, inspect teeth, ears and hairline in the vertical crop on an actual phone. Small artifacts that look harmless on a desktop monitor become obvious at phone size, close to the face. That's where your viewers will judge the result.
<a id="privacy-consent-and-disclosure-before-you-publish"></a>
Privacy, Consent and Disclosure Before You Publish
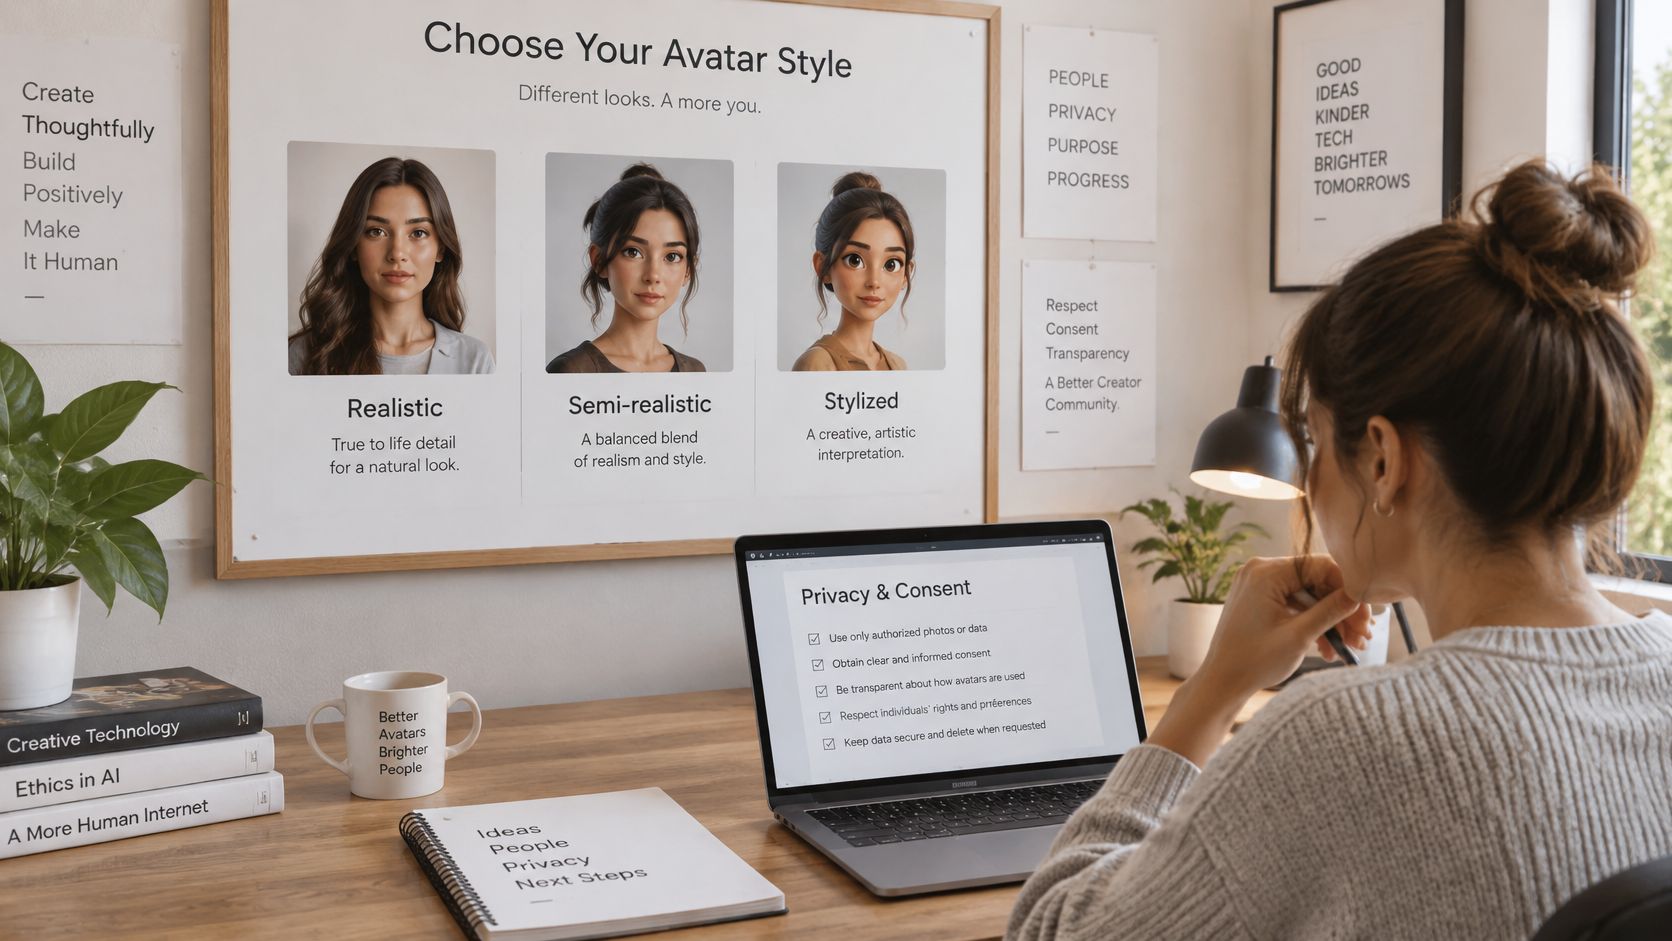
Treat the avatar as a reusable production asset: consent, labels and tone have to survive every crop, script and voice you attach it to. Realism is only the first decision. A realistic avatar can fit a personal channel where viewers already know you. A semi-realistic version often suits training and explainers, and a stylized one is safer for entertainment or any setting where nobody should mistake it for live footage.
A 2025 systematic review of avatar-design research found that human-like avatars can seem more trustworthy, while stylized avatars may generate more positive emotional responses and reduce cognitive load. It also concluded that users generally trust real humans more and prefer avatars in supportive rather than social roles. That matters in sales, health, education, hiring and politics, where a convincing face can win attention and still set the wrong expectation. Accessibility-focused design favors letting people represent their everyday appearance, including mobility aids, scars, hair and assistive devices, rather than smoothing those details away.
Match the design to the stakes, then keep written consent for every reference photo and voice recording. Define where the avatar may appear, for how long, and who may approve changes. Never upload footage of another person without permission. Limit team access, require approval before publishing, and delete source files you no longer need. If consent is withdrawn, retire the preset and the exports built from it.
Add a visible on-screen label saying the speech is AI-generated, and keep it on every export, including vertical crops, translated versions and paid ads. Do not let the avatar make medical, financial or legal claims for you. Keep separate presets for entertainment, marketing, internal training and customer-facing messages so a casual read does not drift into a sensitive announcement. When you share the finished file, the guide to turning a video into a link explains distribution; disclosure still has to travel inside the video.
<a id="export-settings-and-publish-readiness"></a>
Export Settings and Publish Readiness
| Aspect Ratio | Typical Placement | Framing Note |
|---|---|---|
| 9:16 vertical | Short-form video, Reels and TikTok | Head in upper two-thirds, bottom fifth clear for captions |
| 1:1 square | Feed posts and carousels | Face centered and wide enough for captions |
| 16:9 horizontal | YouTube, websites and presentations | Eyes near the upper third line |
| 1080p | Most social platform uploads | Default export for everyday publishing |
| 4K | Large screens and reuse in future edits | Render only when the source supports it |
Framing decides whether your face survives the crop. Converting a horizontal render to vertical often slices through the head, so reposition the avatar in the scene or re-render from a vertical framing. Keep one master file at the highest resolution your source supports, then export platform versions from it.
In our AI Character studio, a host can be created once by describing them in a few words, giving them a name and locking the look, and the same face, hair and outfit then return in every scene and episode. You can also upload a reference photo or drawing to lock a character's look. We don't post videos for you, so you download the MP4 file and post it yourself.
Check audio on a phone before you export everything. Levels that sound comfortable in an editor can clip or feel buried on small speakers.
<a id="the-go-or-no-go-check"></a>
The Go or No-Go Check
- References pass: Every file meets the capture standards you set at the start.
- Three crops pass: Test renders at 9:16, 1:1 and 16:9 hold up around eyes, lips, teeth, hairline and ears.
- Voice passes: A short test sounds right on pacing, names and emphasis.
- Trust passes: The AI label is visible and consent is recorded for every person whose media you used.
- Preset saved: The approved look is locked for reuse.
If anything fails, fix references first, then voice, then export settings. Your first action today is simple. Make one short test video from your own references, review it against this list, and only then build a series around it.
Build that first test in ClipNova, where you can turn a script and a reference look into a talking avatar video with voiceover, captions and music in one workspace. Lock the version that passes your checks, export it in the ratios you publish, and start with one honest test before you commit to a full series.
Ready to ship your own?
Start creating viral videos with AI in under twenty minutes, no credit card required.