
You've finished a polished PowerPoint deck, but your audience won't be in the room when you present it. They'll watch it on a phone, share it through a learning platform, or open it in a browser that handles media differently from your desktop. The challenge isn't only learning how to convert a PowerPoint to video. It's producing a file with dependable playback, natural pacing, readable visuals, accurate captions, and the right format for every channel.
PowerPoint can handle the baseline export well, but only when the deck is prepared for video rather than live presentation. For social content, multilingual campaigns, and repeated production, an AI workflow can take the same source material further by generating narration, captions, alternate aspect ratios, and localized versions.
Table of Contents
- Exporting Your Deck Using Native PowerPoint Tools
- Troubleshooting Export Failures and Quality Drops
- Mastering Slide Timings and Narration Sync
- Automating Short-Form Video Creation with AI
- Adding Accessibility and Multilingual Reach
- Choosing the Right Workflow for Your Project
<a id="exporting-your-deck-using-native-powerpoint-tools"></a>
Exporting Your Deck Using Native PowerPoint Tools
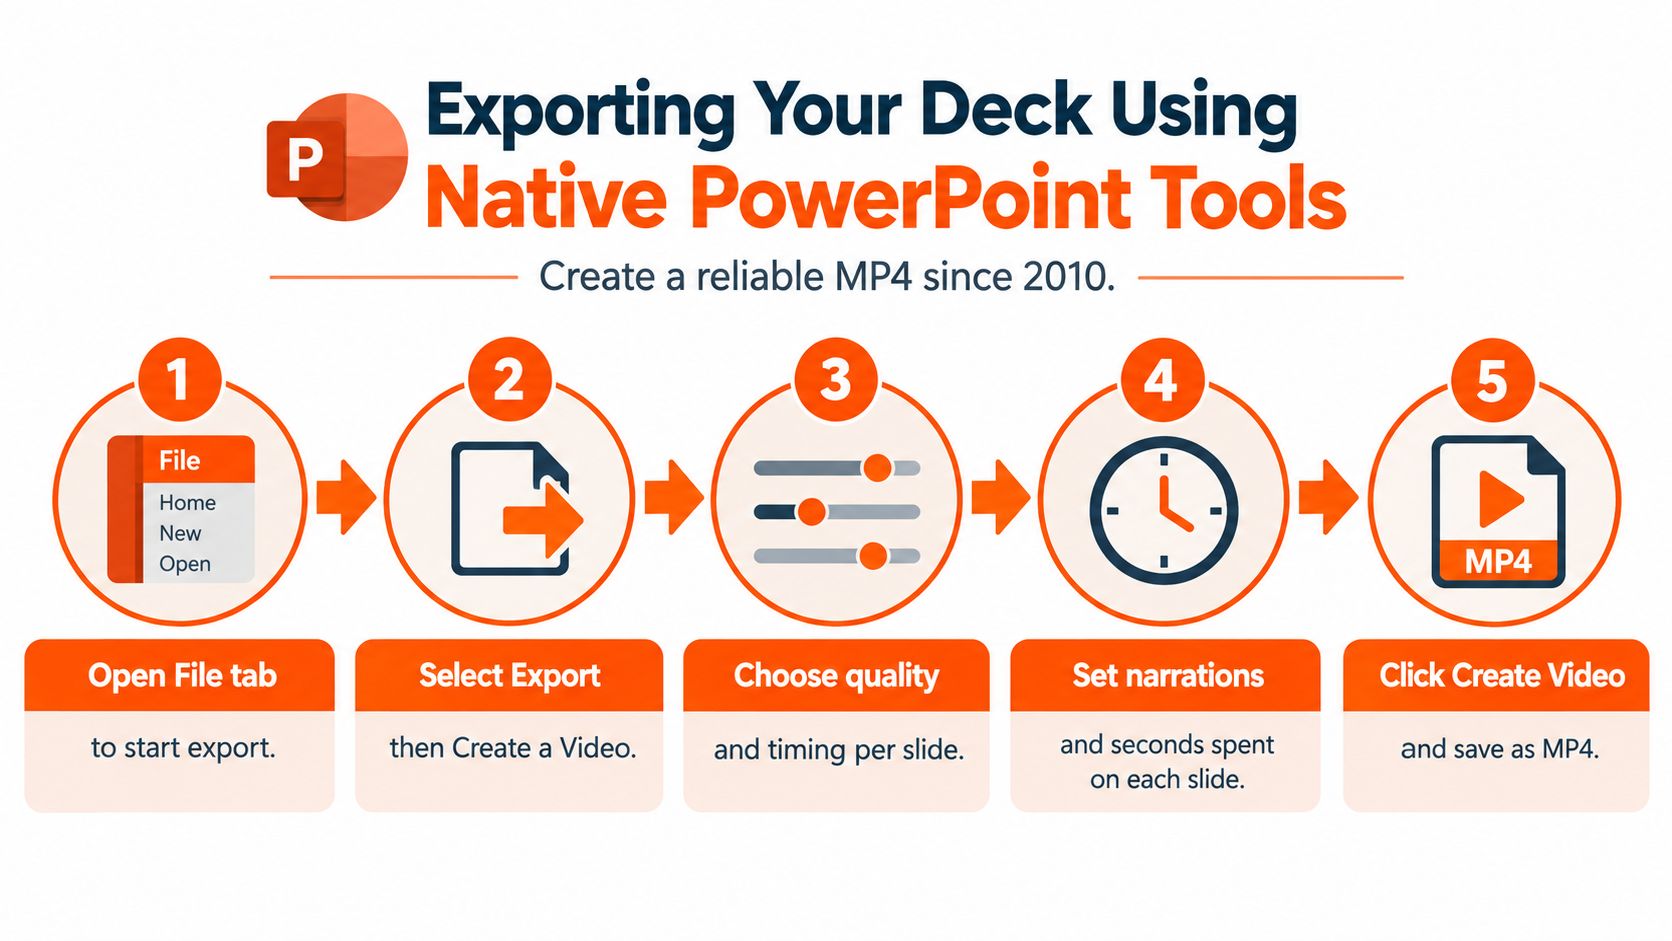
For a straightforward presentation video, desktop PowerPoint remains the most predictable starting point. Microsoft's official workflow sends the deck through File > Export > Create a Video, where you choose the output quality and create an MP4 or WMV file. Microsoft also notes that PowerPoint introduced a dedicated Create a Video workflow in PowerPoint 2010, so this isn't a new or experimental feature. It's a native part of the desktop application. Microsoft's PowerPoint export instructions document the current click path.
<a id="use-the-compatible-format-first"></a>
Use the compatible format first
Open the finished presentation in the desktop version of PowerPoint, then follow these steps:
- Select File.
- Choose Export.
- Select Create a Video.
- Choose the output quality.
- Decide whether to use recorded timings and narrations or assign a fixed duration to each slide.
- Select Create Video.
- Save the file as MP4 when possible.
MP4 is the practical default because Microsoft identifies H.264 video with AAC audio as the most compatible format for PowerPoint video playback and recommends it for inserted or played video content. That combination is also a sensible baseline when the file will move between desktop players, browsers, mobile devices, and publishing platforms. Microsoft's media compatibility guidance explains why this standard matters.
PowerPoint for the web still doesn't support converting presentations into video, so you'll need desktop PowerPoint for native export. If the deck contains narration, recorded timings, or embedded media, keep those elements in the presentation before exporting and review the resulting MP4 from beginning to end.
For another practical walkthrough of the full conversion process, the VideoLearningAI complete conversion guide is useful when you want a second reference for the native workflow.
<a id="troubleshooting-export-failures-and-quality-drops"></a>
Troubleshooting Export Failures and Quality Drops
A PowerPoint export can fail even when the slides look correct in edit mode. The usual causes are heavy embedded media, incompatible audio or video, add-ins, or conflicts with GPU rendering. The result may be a frozen render, a corrupted MP4, or a video with missing media. Microsoft's export troubleshooting discussion describes these recurring blockers and points to desktop PowerPoint, compatible media, compressed assets, and controlled add-in testing.
Work from a duplicate of the deck. Remove or replace one suspected asset at a time, then export the copy again. This makes the result useful as a diagnostic instead of turning several simultaneous changes into another source of uncertainty.
Check the areas that usually create trouble:
- Embedded video and audio: Replace questionable files with MP4 video using H.264 and AAC where appropriate. You can also remove one media item temporarily to identify whether it causes the failure.
- Large presentation assets: Run PowerPoint's Compress Media command before exporting. Microsoft lists quality choices such as 1080p, 720p, and 480p, which trade visual clarity for a smaller file.
- Add-ins: Disable nonessential add-ins and repeat the export. If the problem disappears, re-enable them individually to locate the conflict.
- GPU rendering: Slides that freeze, flicker, or render inconsistently may improve when hardware graphics acceleration is disabled in PowerPoint's advanced settings. Compare the new file with the original test.
Quality loss requires a separate check. A low-resolution source image or video cannot regain detail through a higher export setting. If the source is sharp but the MP4 looks soft, review media compression and confirm that the selected export quality is not unnecessarily low.
Practical rule: Change one variable per test. A clean copy and a short export check reveal more than changing media, add-ins, and resolution together.
Before publishing, watch the exported file from start to finish, then confirm its format, audio, and slide rendering. For YouTube projects, this PowerPoint-to-YouTube upload guide covers the handoff from the exported MP4 to the publishing workflow.
<a id="mastering-slide-timings-and-narration-sync"></a>
Mastering Slide Timings and Narration Sync
A technically correct export can still produce an uncomfortable viewing experience. Live presenters pause while viewers read a chart, explain a transition, or consider a question. The exported video needs those pauses built into its timings, either through recorded delivery or deliberate slide durations.
PowerPoint supports recorded timings and narrations, as well as a fixed duration for each slide. Recorded timings suit presentations with spoken explanations because slide changes follow the actual delivery. Fixed durations are practical for silent announcements, simple decks, or slides with a predictable amount of text.
<a id="match-timing-to-the-viewers-task"></a>
Match timing to the viewer's task
Record the narration and slide advances with PowerPoint's recording tools, then listen through the result before rendering. Dense charts, small labels, and multi-step explanations usually need more time than title slides. A slide should remain visible long enough for viewers to orient themselves without making the narration feel slow.
Embedded media creates another timing risk. Set a slide with audio or video to remain onscreen slightly longer than the media duration. Otherwise, the export can cut off final words, music, or footage. Microsoft's Mac movie export guidance also notes that larger or more complex presentations may take several minutes to render. Give a demanding export time to complete before treating it as frozen.
Use this review pass before creating the final MP4:
- Play the deck in slideshow mode and mark slides that need additional reading time.
- Record narration and timings in one uninterrupted pass when possible.
- Recheck any slide where the narration ends close to the transition.
- Add a small buffer after embedded audio or video.
- Export a test MP4 and inspect internal transitions, not only the opening and closing slides.
Timing should follow meaning, not a template. A short title slide and a data-heavy explanation rarely deserve the same duration. After the test export, adjust the few slides that feel rushed or leave unnecessary dead air, then render the publishable version.
<a id="automating-short-form-video-creation-with-ai"></a>
Automating Short-Form Video Creation with AI
A 16:9 presentation can export perfectly and still fail as a short-form video. On a phone, small labels become unreadable, the opening may take too long, and a detailed slide can force viewers to pause before they understand the point. Short-form production requires editorial decisions beyond PowerPoint's export settings, including a new script, tighter sequencing, reframed visuals, and versions for different audiences.
Start by extracting one claim from the deck. A product presentation might become a 30-second explanation of one feature. A training deck might become a three-part series, with each video covering one procedure. Keeping every slide usually produces a compressed lecture rather than a watchable short.
AI can reduce the repetitive production work after that editorial decision. A practical workflow is:
- Give the system the source deck, script, or presentation summary.
- Specify the audience, single takeaway, tone, duration, and target format.
- Ask for a short script with a direct opening and one clear action.
- Review the proposed sequence before generating the final video.
- Check the rendered version for legibility, pronunciation, factual accuracy, and pacing.
Manual editing remains the better choice when the design includes precise charts, branded motion, complex demonstrations, or legal wording that must remain unchanged. It gives an editor control over every crop, transition, voice cue, and screen change. The trade-off is production time. Each additional aspect ratio, language, or audience requires another review and often another edit.
An AI video studio is more useful for repeatable variations. It can assemble narration, captions, music, visual treatment, and framing from a defined brief, then produce alternate versions without rebuilding the timeline from scratch. ClipNova's publisher describes support for prompt-based short-form generation, voiceover, automatic subtitles, multiple aspect ratios, and translation workflows in 32 languages. Treat those capabilities as production tools, not a substitute for source review.
For content that starts with a webpage or written brief, auto-generate videos from URLs can support the same repurposing workflow without first creating a slide deck.
<iframe width="100%" style="aspect-ratio: 16 / 9;" src="https://www.youtube.com/embed/dvu3y8vcZy4" frameborder="0" allow="autoplay; encrypted-media" allowfullscreen></iframe>Use a final editorial check on every generated variant. Compare the script with the original presentation, confirm that important qualifications were not removed, and inspect captions against the voice track. Check the first three seconds on a phone, then review the full video with sound and without it. Automation makes versioning faster, while a human review protects the meaning, accuracy, and visual clarity of the finished asset.
<a id="adding-accessibility-and-multilingual-reach"></a>
Adding Accessibility and Multilingual Reach
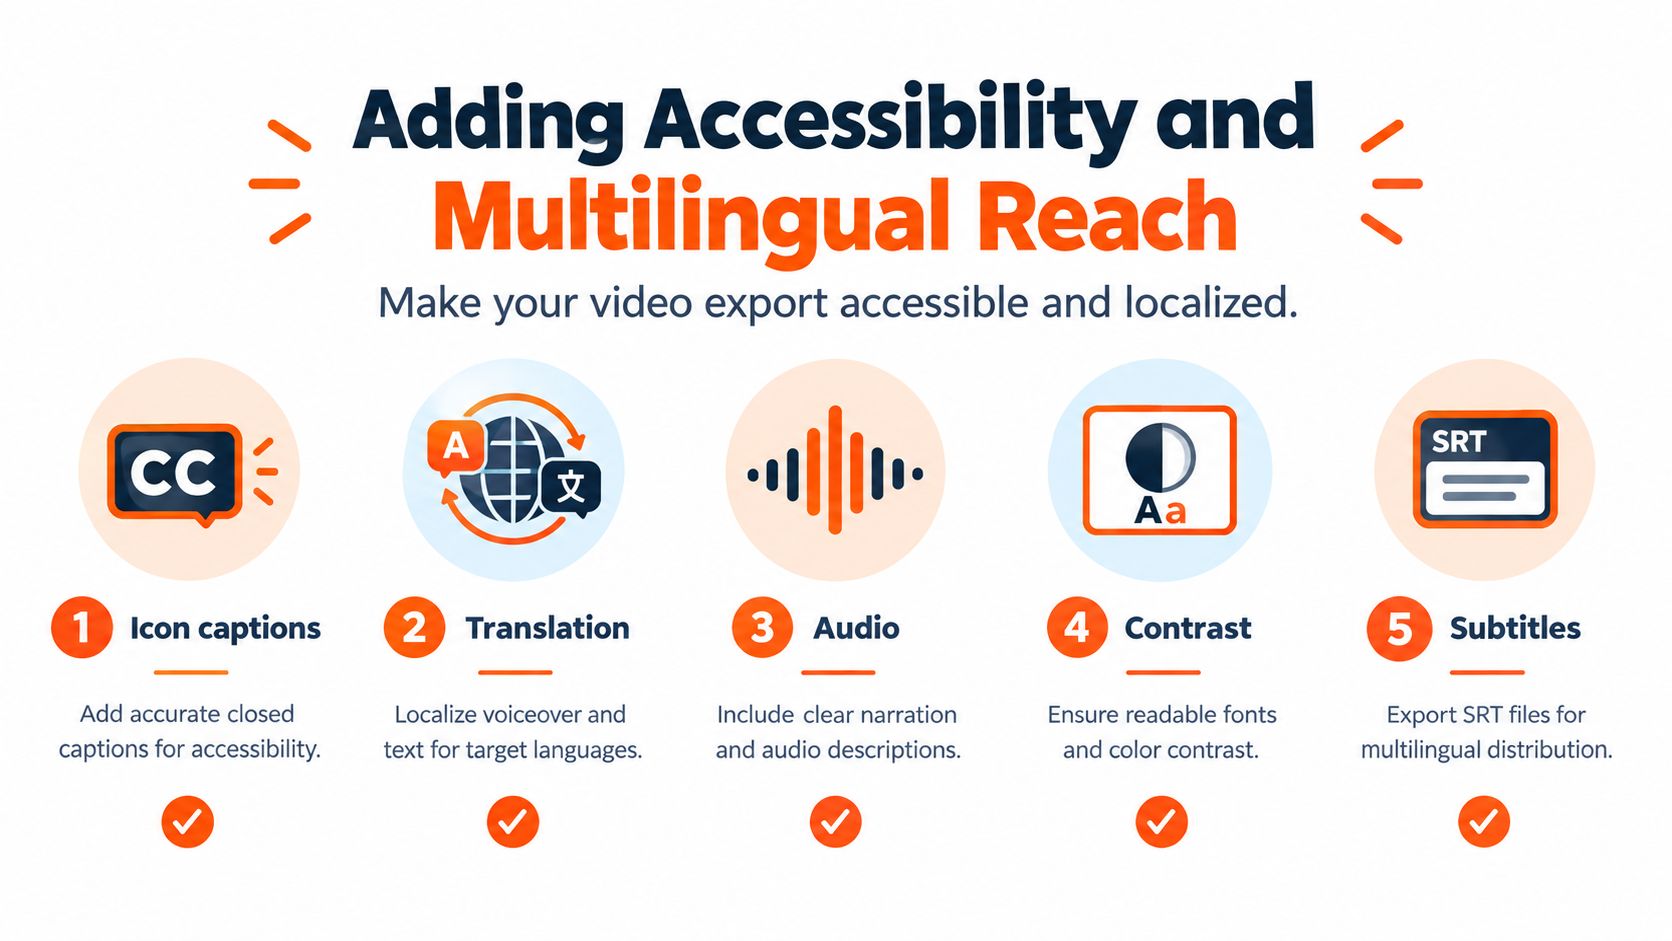
A failed accessibility check can make an otherwise clean MP4 unusable. Viewers may depend on captions, transcripts, audio descriptions, readable contrast, or a translated voice track. Microsoft's guidance covers captions and audio descriptions where needed, and explains that saved media can retain captions and multiple audio tracks in supported formats. Review Microsoft's PowerPoint accessibility guidance before finalizing the export.
Start the review with the mute test. The sequence, main argument, and intended action should remain understandable without narration. If they do not, the deck may rely too heavily on voiceover, use text that blends into its background, or show charts without explaining their meaning.
Captions must follow the spoken track and identify meaningful non-speech audio when it affects understanding. Open captions help when a platform or viewing environment does not reliably expose caption controls. Audio descriptions supply spoken context for visual information that is not available from the slide alone.
Localization creates a separate production risk. Translating narration does not translate words baked into slide images, and longer phrases can break the original layout. Build each language version with separate narration and subtitle tracks, then check names, terminology, reading order, and pronunciation with someone familiar with the target audience.
Use this final pass:
- Captions: Correct names, acronyms, technical terms, timing, and punctuation.
- Audio descriptions: Explain important charts, visual changes, and on-screen actions that narration does not cover.
- Contrast and scale: Check readability after export and every aspect-ratio conversion.
- Language variants: Compare translated voiceovers and subtitles with the intended meaning, not only the literal wording.
- Subtitle files: Retain an editable subtitle file when the publishing platform supports it.
Before distribution, test the rendered video with sound and without it, on the device and platform where viewers will watch. For the subtitle workflow, follow this practical guide on adding subtitles to a video. Human review remains necessary because automated captions and translations can preserve timing while changing meaning.
<a id="choosing-the-right-workflow-for-your-project"></a>
Choosing the Right Workflow for Your Project
The right conversion method depends on what must remain intact. If the deck already has approved animations, recorded delivery, and embedded media, native PowerPoint export is the safer choice because it preserves the original presentation playback. If the deck is mainly a source of ideas for social clips, an AI studio can reduce the manual work involved in scripting, reframing, captioning, and creating language variants.
| Project need | More suitable workflow | Main trade-off |
|---|---|---|
| Internal update or narrated briefing | Desktop PowerPoint export | Preserves the deck, but needs manual review |
| Training presentation with recorded delivery | Native export with timings | Reliable playback depends on media and timing checks |
| Vertical social clip from a longer deck | AI-assisted production | Faster adaptation, but requires editorial review |
| Multilingual content series | AI-assisted localization | Speeds variants, while slide text may still need redesign |
| Highly art-directed campaign | Manual editing or hybrid workflow | More control, with more production effort |
Before exporting, remove hidden material that shouldn't appear, simplify overloaded slides, and decide whether the audience needs the whole presentation or only one argument. Then choose the output path:
- Preserve the deck: Use PowerPoint's desktop export and MP4 settings.
- Improve the pacing: Record narration and adjust slide durations.
- Protect playback: Check media, compress oversized assets, and test the file.
- Adapt for distribution: Rebuild the key message for the target aspect ratio.
- Prepare for access: Add captions, descriptions, contrast checks, and language versions.
- Approve the final file: Watch it with and without sound before publishing.
If you're developing the presentation itself, guidance on scripting video presentations effectively can help you write for spoken delivery instead of copying slide text into narration. For a related slide-based workflow, see how to create a video from slides.
ClipNova helps turn presentation ideas and source material into short-form videos with scripted narration, visuals, captions, music, voiceovers, and exports for multiple aspect ratios. Visit ClipNova to create a polished video variant from your next PowerPoint concept, then review the result for timing, accessibility, and platform fit before publishing.
Ready to ship your own?
Start creating viral videos with AI in under twenty minutes, no credit card required.