

You can tell when an ai image background removal job is going to be annoying before you even open the file. The subject is half hair, half haze, the product edge melts into the backdrop, and the first clean-looking preview still leaves you wondering what's going to break at export. That's the actual job, not pressing one button, but getting a cutout that survives the second look, the dark background, and the final upload.
Table of Contents
- What AI Background Removal Does to Your Image
- Running a Clean Removal Session in ClipNova
- Edge Cleanup Habits That Actually Move the Needle
- Hard Cases Worth Treating Differently
- Batch Workflows and When One-Click Stops Being Enough
- Your Repeatable Removal Checklist
<a id="what-ai-background-removal-does-to-your-image"></a>
What AI Background Removal Does to Your Image

Modern ai image background removal is more than finding the object and deleting the rest. A reliable result comes from a small pipeline: identify the subject, build a mask, refine the transition between foreground and background, then inspect the exported transparency. The first pass can be quick. The edge decisions determine whether the PNG is usable.
<a id="segmentation-and-matting-are-not-the-same-thing"></a>
Segmentation and matting are not the same thing
Segmentation assigns each pixel to a discrete category, so a pixel is treated as either subject or background. Matting estimates a continuous alpha value, preserving partial transparency at the boundary. That distinction matters for hair, fur, smoke, translucent materials, motion blur, glass rims, and other details that do not end in a hard line.
The field predates deep learning. Key milestones include the Mumford–Shah model in 1989, normalized cuts in 2000, and the Berkeley Segmentation Dataset in 2001, which helped establish methods for separating visual regions history of segmentation research. The history also explains a common production failure: the model may identify the subject correctly while estimating its boundary poorly.
Practical rule: a correct silhouette with a weak edge points to a matting problem, not a detection problem.
A cutout should therefore be tested as part of the finished asset, not judged only in the preview. Place it over a light and dark background, inspect fine details at working size, and check whether the edge carries a fringe from the original backdrop. The Bulk Image Generation guide to pro editing places background removal within the wider editing workflow, where masking, cleanup, and export affect the same final image.
<a id="what-good-output-is-judged-on"></a>
What good output is judged on
Quality is commonly assessed with SAD, MSE, gradient error, and connectivity error rather than raw pixel accuracy. These measures reward preserved edge structure and partial transparency, so they match production concerns better than a simple count of correctly classified pixels.
On the Composition-1k dataset, which contains 431 foreground objects with ground-truth alpha mattes, Deep Image Matting reported SAD 50.4 and MSE 14 × 10^-3, while IndexNet Matting reported SAD 45.8 and MSE 13 × 10^-3. The comparison shows why a cutout can look acceptable as a thumbnail yet fail in a real layout.
When an output looks wrong, inspect the boundary before rerunning the whole job. The tool may have found the object but lost its partial transparency, and that requires edge refinement rather than a different crop.
<a id="running-a-clean-removal-session-in-clipnova"></a>
Running a Clean Removal Session in ClipNova

A clean session starts before the download button ever appears. Upload the image, wait for the first pass, and treat the preview like a draft, not a verdict. The subject usually pops out quickly, but the first mask is only the coarse shape, not the final asset.
<a id="what-the-first-pass-should-look-like"></a>
What the first pass should look like
The rough cut should get the big body of the subject right. If it misses a shoulder, a sleeve, or a product corner, that's useful information, because it tells you the model needs more boundary help. The important habit is to judge the result by what happens at the edges, not by whether the subject is visible in the center.
That's where teams often stop too early. They accept a mask that looks clean on white, then discover it falls apart on a dark layout or a colored ad background. A useful check is to review the PNG against the actual environment it'll live in, not the checkerboard preview.
If you're processing event assets, a guide to event photo collection is a decent reminder that source quality matters as much as cleanup. Busy scenes, mixed lighting, and crowded compositions create the same kinds of edge ambiguity that make background removal slower later.
<a id="a-session-that-actually-ships"></a>
A session that actually ships
A strong workflow goes like this. First, upload the original file and let the tool isolate the subject. Second, zoom in and inspect any hairline edge, product contour, strap, logo, or rim where the mask could have shaved off detail. Third, test the same cutout over light and dark backgrounds before you export.
Don't trust a transparent preview until it's survived at least two replacement backgrounds.
That habit catches the ugly stuff early. It also keeps you from overcorrecting a result that already works, which is a common way people turn a decent cutout into a worse one. For teams like ClipNova users, the value is in seeing the mask as a stage of production, not the end of it.
You'll get faster just by stopping less often for “good enough” previews. A subject can look isolated and still be wrong at the edge, and the edge is what users notice once the asset leaves the editor.
<a id="edge-cleanup-habits-that-actually-move-the-needle"></a>
Edge Cleanup Habits That Actually Move the Needle
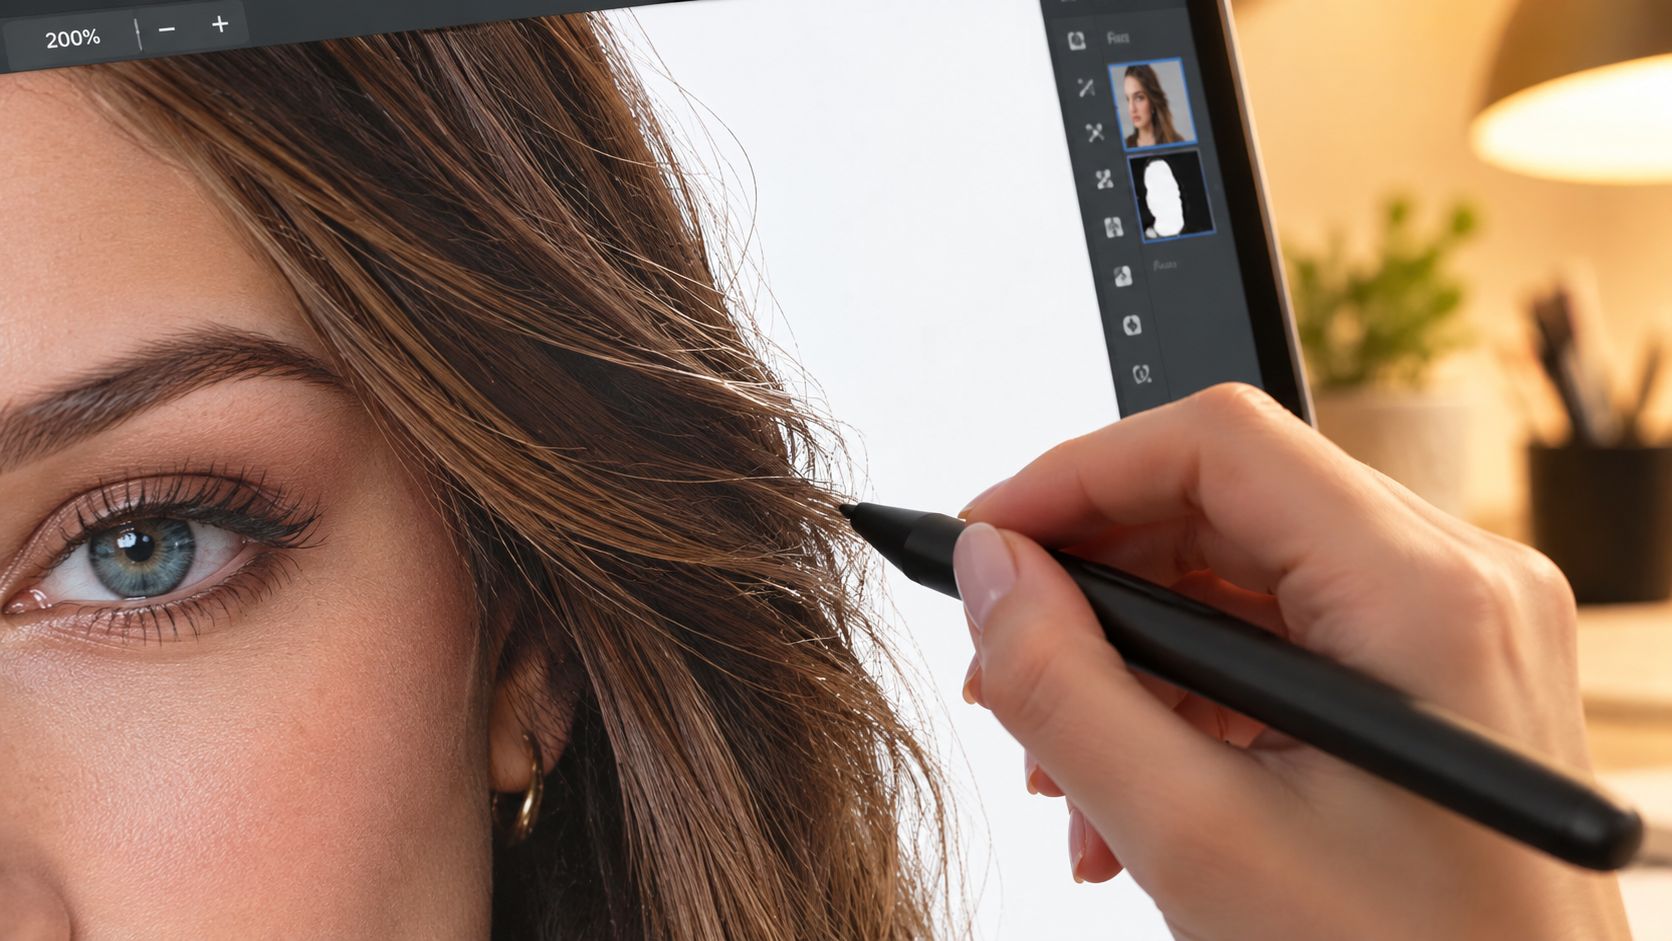
The best cleanup work is boring in the right way. It's not about heavy retouching skill, it's about catching the same small failures before they travel downstream into layout, catalog pages, or ads. Most of the time, the fix is inspection discipline.
<a id="check-the-places-that-fail-first"></a>
Check the places that fail first
Zoom to 200% and look at hair, fur, laces, straps, glasses arms, product seams, and any edge where the subject gets thin. Those are the spots most likely to disappear, break apart, or leave a halo behind. A mask that looks fine at normal size can still have a ragged boundary once you inspect it close.
Use two replacement backgrounds, one light and one dark. That exposes halos that a white preview hides and shows whether the alpha edge is actually clean or just looks clean against one specific backdrop. If the subject is translucent, the same check also reveals whether the software preserved the soft transition or flattened it into a hard outline.
Practical rule: if the edge changes character on a dark background, the job isn't done yet.
<a id="refine-only-where-the-image-needs-it"></a>
Refine only where the image needs it
Don't repaint the whole mask when only one boundary is weak. Re-run the refinement on the problem area, then recheck the result over a saturated background, because color spill tends to show up there first. That's faster than touching the whole file and safer than trusting a preview panel.
When a subject needs a separate cleanup pass, keep the adjustment local. Thin structures and semi-transparent areas usually benefit from a small targeted fix, while solid product blocks often don't need more than a quick edge check. If the image is a high-value hero asset, a second pass is worth it. If it's a simple social crop, you usually don't need to overwork it.
For more advanced image workflows around sharpness and restoration, see the internal AI image upscaler software resource. Background removal and upscaling often sit next to each other in the same production queue, and both punish sloppy edge handling.
The rule of thumb is straightforward. Spend your time where the viewer's eye lands first. That usually means the boundary, not the center of the subject.
<a id="hard-cases-worth-treating-differently"></a>
Hard Cases Worth Treating Differently
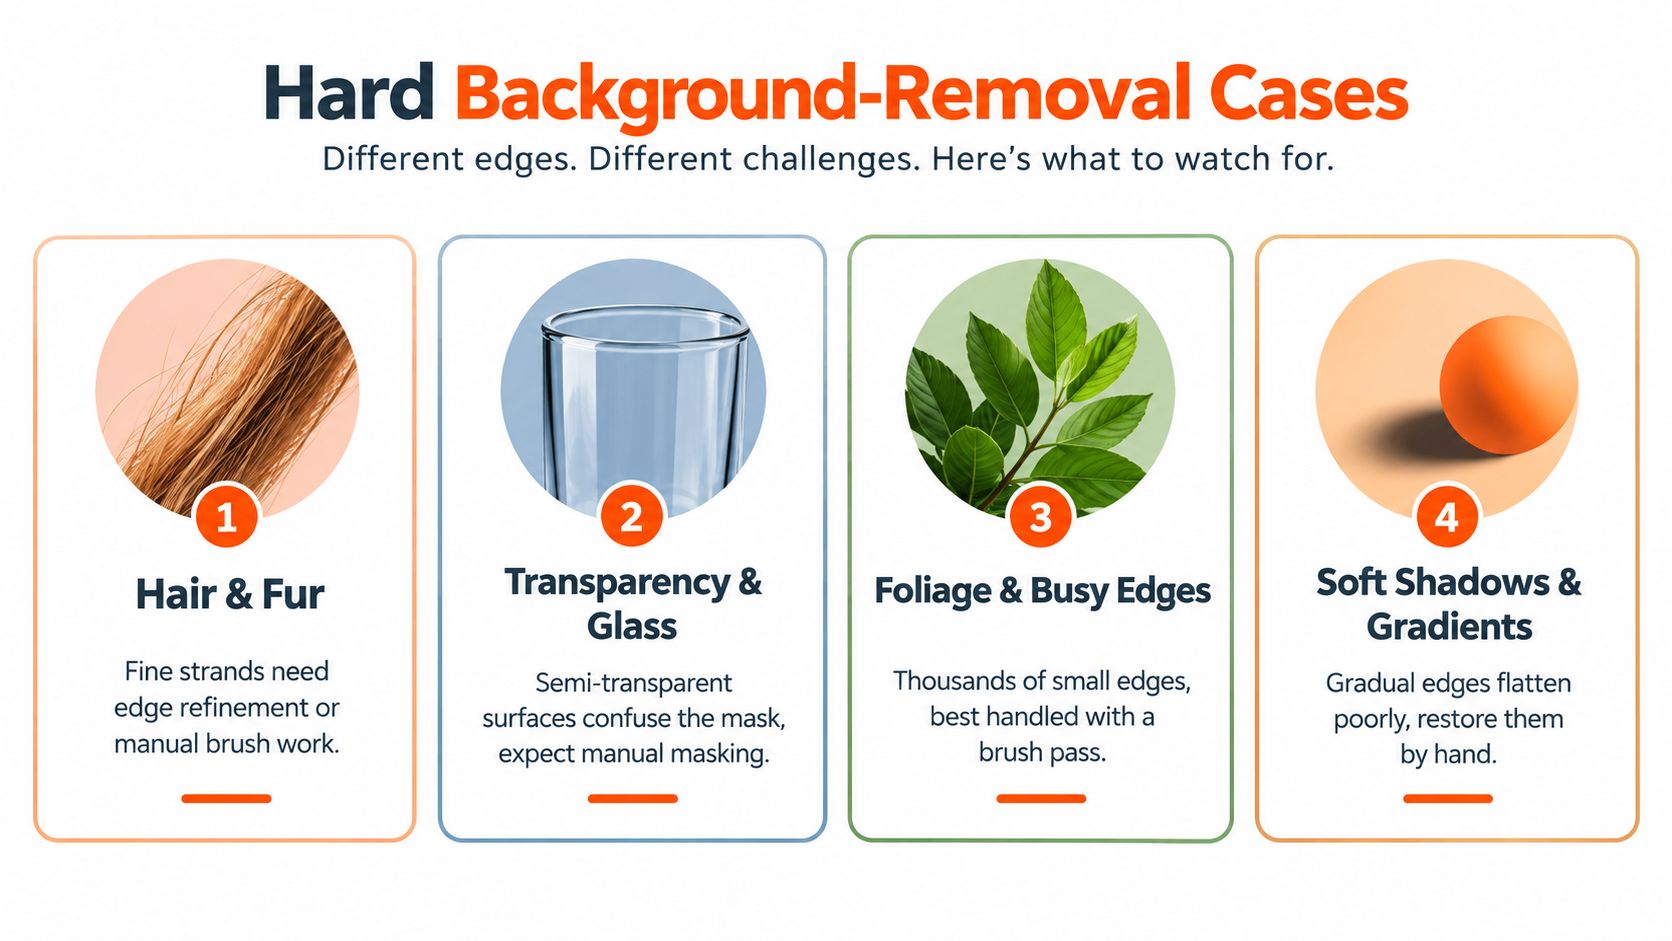
A clean cutout starts with identifying the failure you are likely to see. Hair, glass, a white product on a white table, and a busy product scene each need a different second pass. Classify the subject before refining the mask, and you avoid applying the wrong fix repeatedly.
<a id="hair-fur-and-soft-texture"></a>
Hair, fur, and soft texture
Hair and fur are made of partial strands rather than a single geometric edge. Portrait-focused systems may capture the main silhouette, while fine detail shows clipping, fringing, or excessive smoothing. A mask that works on a straightforward headshot can still fail on a pet or a model with flyaway hair.
Inspect the outer strands against both light and dark backgrounds. If the tips disappear, retain too much background color, or form a plastic-looking band, refine only that region. A local correction usually preserves more texture than repainting the entire mask.
<a id="transparency-and-reflection"></a>
Transparency and reflection
Glass, water, smoke, mesh, reflections, and soft shadows need alpha-aware handling. A binary cutout can remove the very detail that makes these subjects look real. A 2026 comparison of AI background removers on transparent objects scored tools from 5.8 to 8.8 out of 10 on edge fidelity tool comparison. The spread shows why a tidy preview is not enough. Check whether the exported file remains translucent and keeps reflective detail.
For subjects that will sit against a keyed backdrop, see the internal background for green screen video guide. Transparent edges behave differently when the replacement is a flat chroma color.
<a id="low-contrast-and-busy-edges"></a>
Low contrast and busy edges
Similar subject and background tones make the boundary difficult to locate. Clutter adds nearby shapes with matching colors or textures, increasing the chance of holes, halos, and accidental cutouts. Logos, packaging, camouflage, foliage, and textured clothing commonly expose these weaknesses.
Use a second refinement stage on the ambiguous boundary, then inspect the result over a contrasting background. A brush pass may be faster than trying the same automatic removal again.
<a id="when-to-treat-the-subject-as-a-special-case"></a>
When to treat the subject as a special case
Transparent packaging, eyewear, smoke, and reflective cosmetics deserve a manual check every time.
Classify first, then choose the fix. Give hair and fur an edge-detail review, preserve partial transparency in glass, and expect extra mask work around busy scenes. Portrait settings also do not automatically suit e-commerce assets. A bottle, label, and logo can each fail at a different point, even when the final deliverable is the same PNG.
<a id="batch-workflows-and-when-one-click-stops-being-enough"></a>
Batch Workflows and When One-Click Stops Being Enough
For solo jobs, speed feels like the whole story. In batch work, consistency is the story. A tool that handles one image cleanly but makes you redo a quarter of a catalog is not really fast, because the review time comes back later.
<a id="measure-the-batch-not-the-demo"></a>
Measure the batch, not the demo
A better test is a mixed set with easy, medium, and difficult images. A 2026 batch-processing guide recommends measuring the percentage of images that need reruns or manual refinement across that mix, and it warns that WebP or AVIF compression can make a cutout look worse even when the original alpha mask was accurate source. That matters because a good PNG master can still be undermined by a weaker delivery export.
Here's the practical filter I use on batch jobs:
- First-pass acceptance: how many images ship without touch-up.
- Manual minutes per failure: how expensive the misses are.
- Consistency across the set: whether edge thickness stays stable from image to image.
- Export quality: whether the final compressed file still looks clean.
- Subject coverage: how the tool handles hair, fur, shadows, low contrast, and transparency.
<a id="why-the-fastest-option-can-cost-more"></a>
Why the fastest option can cost more
The fastest tool isn't always the cheapest one in real production. If it creates halos on only some files, the team spends time hunting down the bad ones, which is exactly the kind of hidden rework that drains a batch. The problem gets worse when one export format looks fine and another degrades the boundary.
Keep a PNG master, then create compressed derivatives separately if you need them.
That simple split saves trouble later. It also gives you a clean source file to reuse when the same product needs a new background, a new layout, or a different crop. For teams processing many variants, that's usually the difference between a stable pipeline and a messy one.
If you're building a larger editing workflow, the internal automation guide for video editing helps frame how batch thinking applies across formats, not just images. The same logic holds, whether you're shipping product shots or content assets.
<a id="your-repeatable-removal-checklist"></a>
Your Repeatable Removal Checklist
Treat ai image background removal like a pipeline, not a single click. That one habit solves most of the disappointment people feel when a preview looks great and the final asset still needs work. The job is to catch failure modes early, while the file is still easy to fix.
- Run a draft pass first. Use the first result as a rough mask, not a final approval.
- Inspect at 200%. Check hair, fur, straps, thin edges, glass, and any place the subject gets delicate.
- Test light and dark backgrounds. A cutout that only works on white isn't ready.
- Treat hard subjects differently. Transparency, reflection, and busy edges need more attention than a solid object on a plain backdrop.
- Batch-test before you commit. Mixed easy, medium, and hard files tell you more than a single clean example.
- Keep PNG masters. Don't let compression damage a mask you already got right.
- Use the fastest path only when consistency holds. If edges keep shifting, the “quick” tool is creating rework.
That's the standard. A usable PNG isn't the one that looks fine in the preview, it's the one that survives layout, compression, and the second review without getting pulled back into edit.
If you want a workflow that removes backgrounds, refines edges, and keeps your exports ready for production, visit ClipNova. It's built to handle background removal as part of a broader image and video workflow, so you can move from raw asset to usable output without bouncing between tools.
Ready to ship your own?
Start creating viral videos with AI in under twenty minutes, no credit card required.